- JEnv allows you to change your current JDK Version.
- This is helpful for testing or if you have projects requiring different versions of java
- For example you can build a gradle project which requires java8 without changing your environment variables and then switch back to work with java15
- It's written in cmd and powershell so it can change the environment variables and can run on any Windows-10+.
I hope you enjoy it. Please give me a star if you like my work. Thank you!
- Clone this repository
- Add it to the path
- Run
jenv initonce so the script can do the rest - If your using cmd you need to call the batch file. If you use powershell you should call /src/jenv.ps1
- Some reported problems putting JEnv into their C:/Programs folder due to required admin rights
- I hope I could help you. Else open an issue
-
Init
this command will change the PATH after backup
jenv init
Example:jenv init -
Add a new Java environment (requires absolute path)
jenv add<name> <path>
Example:jenv add jdk15 D:\Programme\Java\jdk-15.0.1 -
Change your java version globally
jenv change<name>
Example:jenv change jdk15 -
List all your Java environments
jenv list
Example:jenv list -
Remove an existing JDK from the JEnv list
jenv remove<name>
Example:jenv remove jdk15 -
Uninstall jenv and automatically restore a Java version of your choice
jenv uninstall<name>
Example:jenv uninstall jdk17
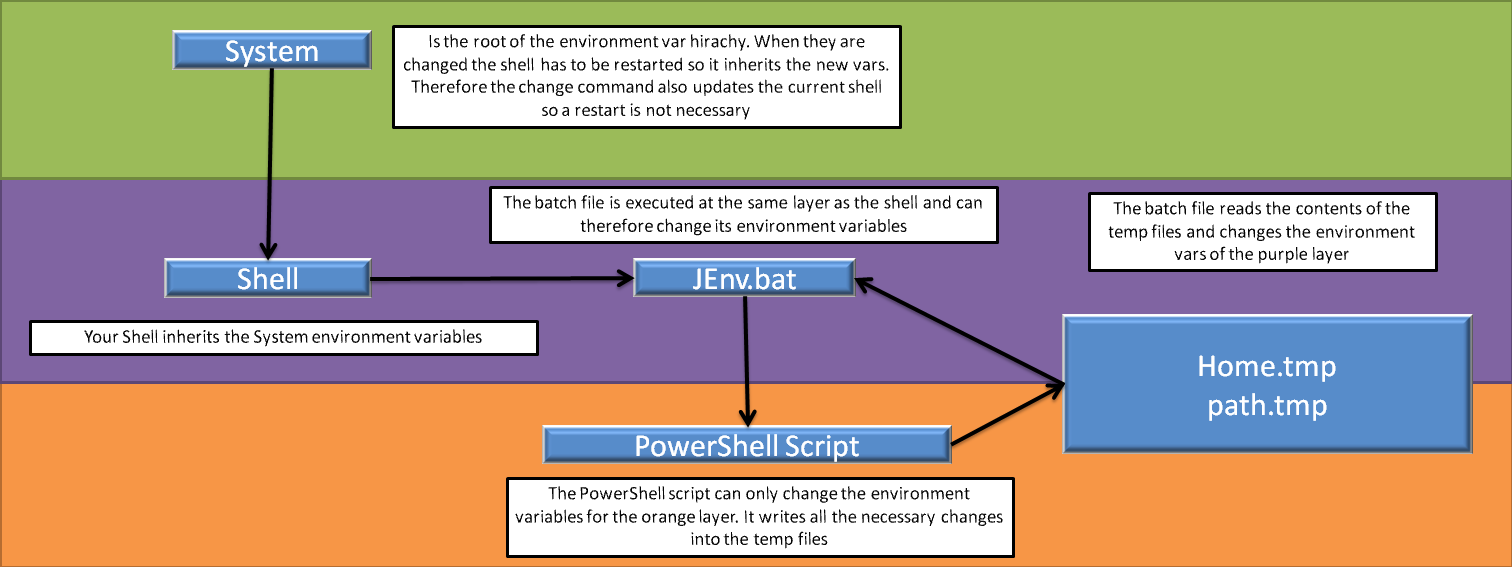
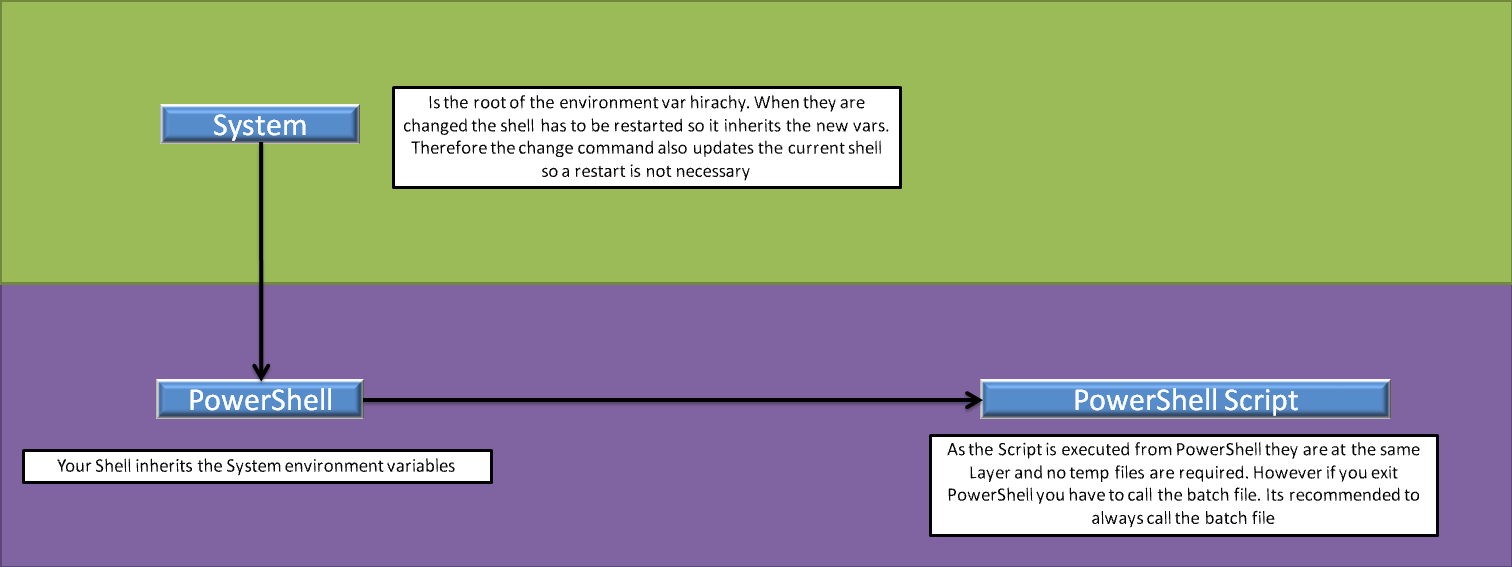
This script creates a java.bat file that calls the java.exe with the correct version When the ps script changes env vars they get exported to tmp files and applied by the batch file An additional parameter to the PowerShell script was added. "--output" alias "-o" will create the tmp files for the batch. See images below
If you want to contribute feel free to do so. This is a great repository for beginners as the amount of code is not huge and you can understand how it works pretty easily.
For running tests I suggest you to use the latest version of powershell (pwsh.exe):
https://docs.microsoft.com/en-us/powershell/scripting/install/installing-powershell-on-windows?view=powershell-7.2
Be careful you have to run it as pwsh and not as powershell
Then you have to install Pester. This is only for tests: Install-Module -Name Pester -Force -SkipPublisherCheck
You could use your already installed powershell as well. However it has an old Pester Module already installed which you can not use and I could not figure out how it can be updated: pester/Pester#1201
Navigate into the test folder and run the test.ps1 file. It will backup your env vars and your jenv config while testing and automatically restore them later. But you should always let the tests finish else your vars and config wont be restored