Using WDT
The WebSphere Development Tools (WDT) for Eclipse can be used to control the server (start/stop/dump/etc.), it also supports incremental publishing with minimal restarts, working with a debugger to step through your applications, etc.
WDT also provides:
- content-assist for server configuration (a nice to have: server configuration is minimal, but the tools can help you find what you need and identify typos, etc.)
- automatic incremental publish of applications so that you can write and test your changes locally without having to go through a build/publish cycle or restart the server (which is not that big a deal given the server restarts in a few seconds, but still!)
Install Liberty Developer Tools via Eclipse Marketplace.
- In Eclipse, click Help->Install WebSphere Software.
- Click Install in the IBM Java EE Batch option then click Finish.
The latest versions of WDT and the Java EE Batch tools are recommended. This sample was tested at versions:
- Eclipse Oxygen 1a
- WebSphere Developer Tools v17.0.0.2 or above
- The level of IBM Java EE Batch Tools for WebSphere Liberty tested is:
- Version: 1.0.251.v20171004_2101
If this is the first time you've ever used Maven from within your Eclipse installation, you may need to install other plugins like m2e (Maven-to-Eclipse). Probably most install methods would include these anyway as dependencies, but just noting since there are a lot of possible routes to install/update a given Eclipse installation with this full set of pluigns.
If the sample git repository hasn't been cloned yet, WDT has git tools integrated into the IDE:
- Open the Git repositories view
- Window -> Show View -> Other
- Type "git" in the filter box, and select Git Repositories
- Copy Git repo url:
- In the Git repositories view, select the hyperlink
Clone a Git repository - The git repo url should already be filled in. Select Next -> Next -> Finish
- Note: the repository does not contain Eclipse project metadata, these are created by Maven import below.
- The "sample.batch.bonuspayout [master]" repo should appear in the view
Although in general, the idea here is that you can switch back and forth between mvn on the command-line and WDT, at this point in time the sample requires you to do a Maven build before you import the Maven projects.
- If you cloned the Git repository through Eclipse/WDT (and don't know the repository root directory used):
- Expand the repository in the Git repositories view to see the "Working Directory" folder
- Right-click on this folder, and select Copy path to Clipboard
- From the repository root, run a
mvn install
$ mvnThis should complete successfully.
Now you can proceed:
-
Select menu File -> Import -> Maven -> Existing Maven Projects
-
In the Root Directory textbox, Paste in the repository directory and click Finish.
-
This will pop-up a dialog from the WDT Maven integration.
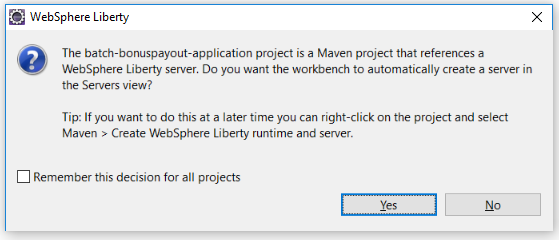
-
Select Yes (and optionally check Remember this decision for all projects).
The import will do a Maven build and will create:
- a Java project for the application
- a batch-bonuspayout-application (Liberty) Runtime environment which contains a BonusPayout Liberty server
- this BonusPayout server will have application batch-bonuspayout-application published to it.
Finally, execute these steps:
- Start the BonusPayout server (you may need to open Servers view via Window->Show View->Servers).
- Right-click the server and select Start.
- Select the
batch-bonuspayout-applicationproject - Find the Job definition (XML) in folder src/main/resources/META-INF/batch-jobs.
- Note: if you use Package Explorer view in the Java perspective you'll have a quicker route to this path than using the Enterprise Explorer in the default Java EE perspective.)
- Right-click on BonusPayoutJob.xml and select Run As->Java EE Batch Job.
- Most of the wizard will be pre-populated, except for the userid and password.
- Supply the values:
 User ID:   bob
 Password:  bobpwd
- You should see a dialog like the following showing that the job was successfully submitted.
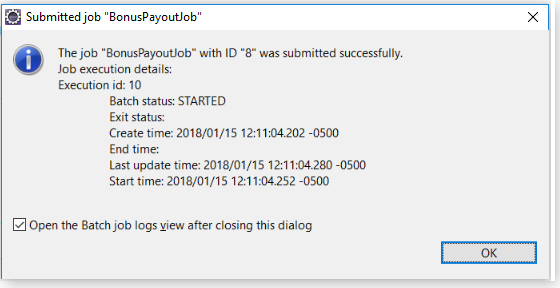
- Typically the response will occur quickly enough relative to the job execution that you will see its Batch Status as STARTED (though it's possible it could end up COMPLETED by then).
- Leave the checkbox selected to go to the Java EE Batch Job Logs view afterwards, refreshing if necessary until the exit status shows as COMPLETED (with default job parameters this will happen quickly). The job has completed successfully !
Now that you have imported the project and run the job successfully, it's time to start experimenting, by modifying the application.
Continue on to Using WDT and Maven together for more details.
- Jump to main page
- On to Using WDT and Maven together
- Back to Maven integration