
ChatPlus is a progressive web app developped with React, NodeJS, Firebase and other services.
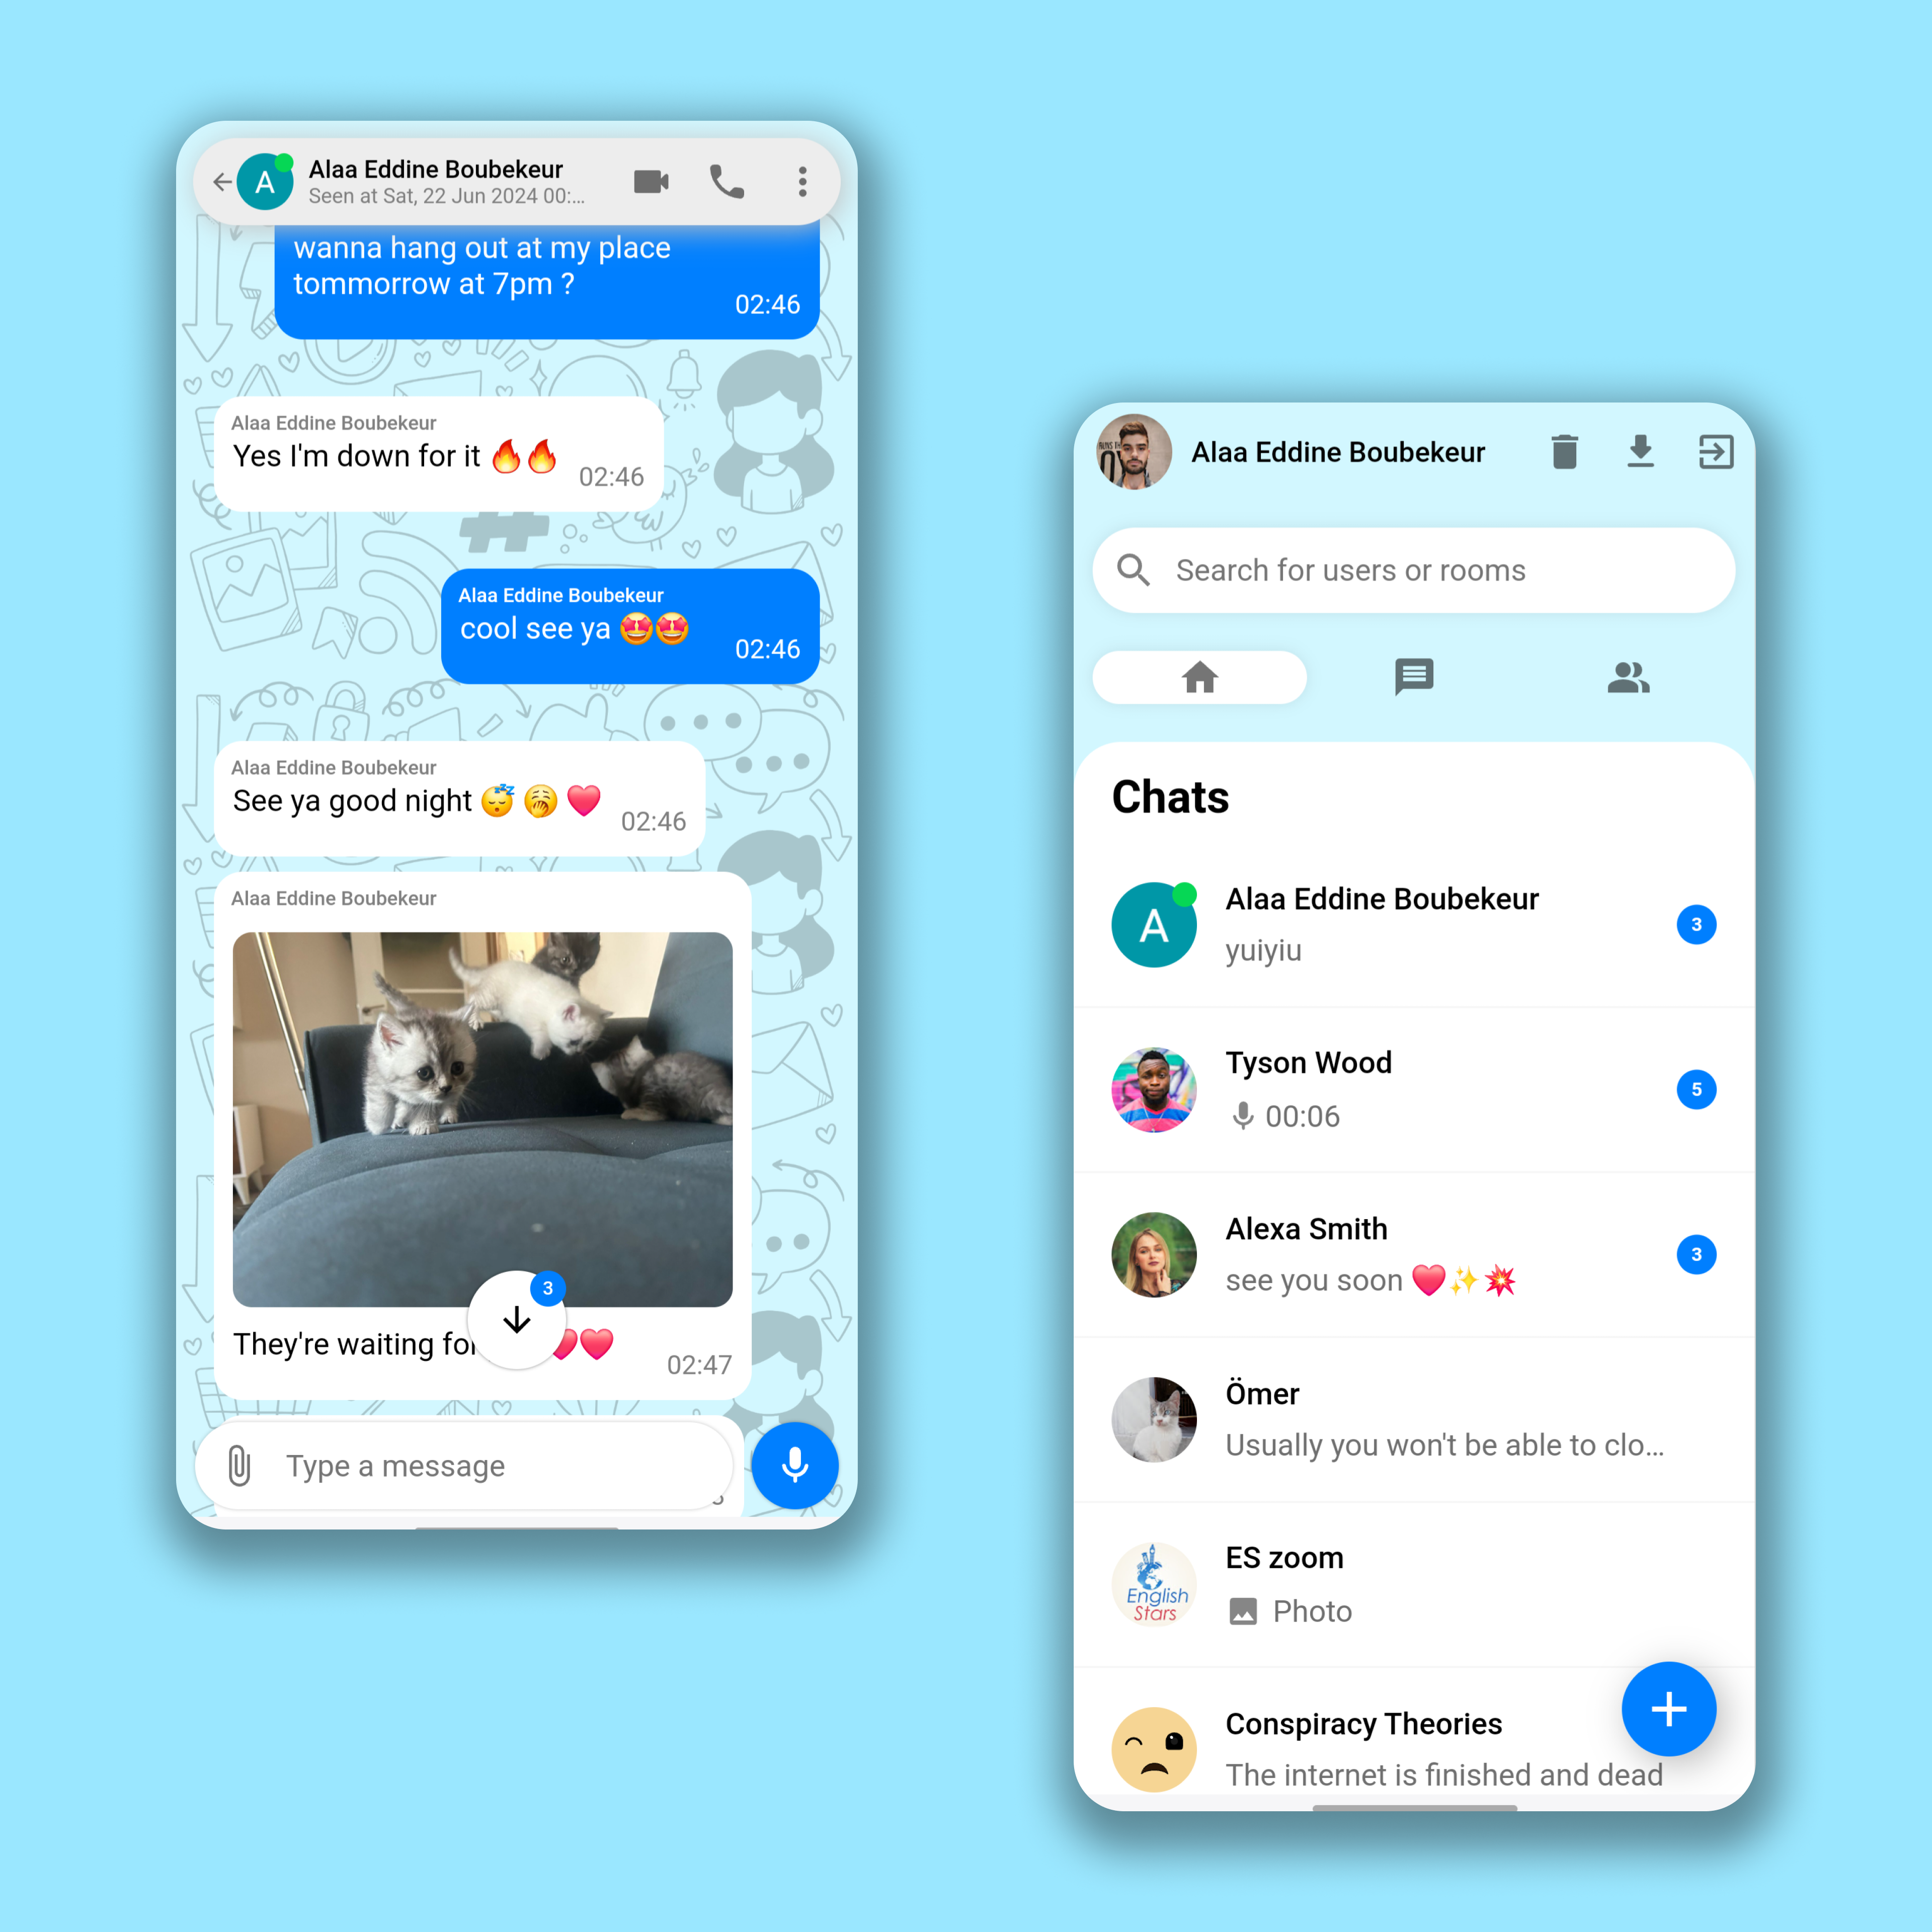
You can Talk with all your friends in real time 🗣️✨🧑🤝🧑❤️
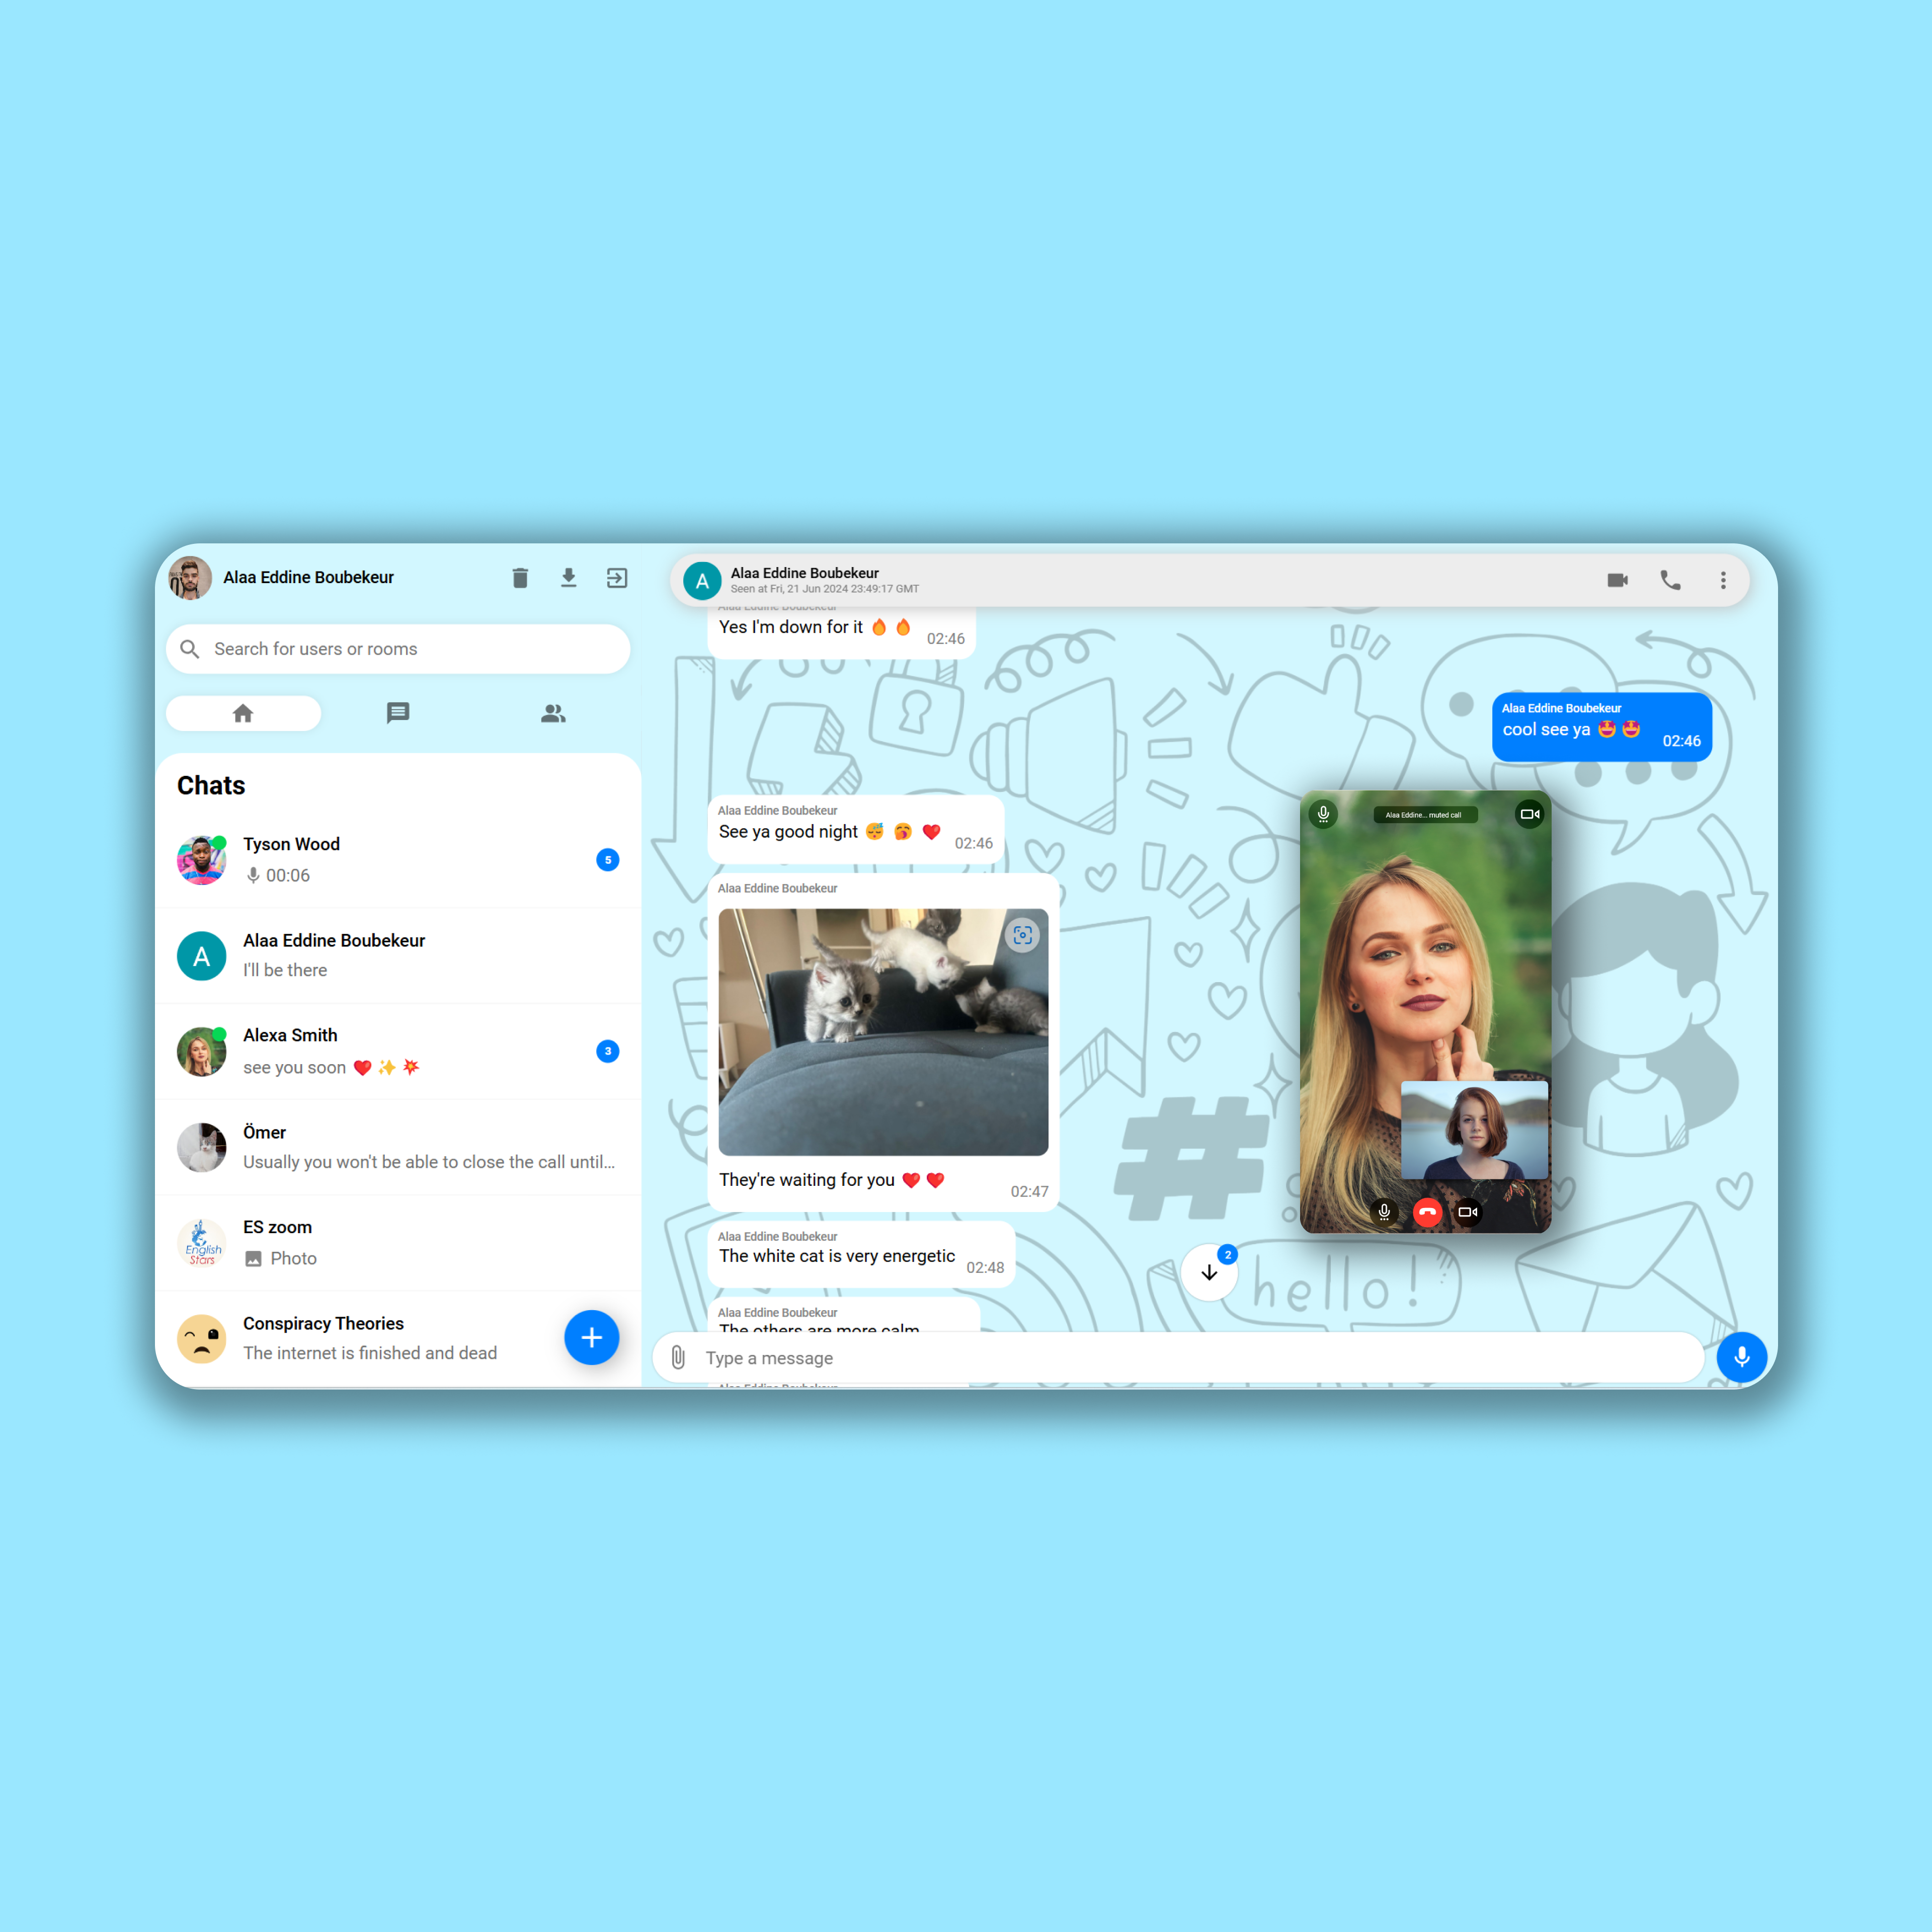
You can call your friends and have video and audio calls with them 🎥🔉🤩
Send images to your friends and also audio messages and you have an AI that converts your speech to text whether you speak french, english or spanish 🤖✨
The web app can be installed on any devices and can receive notifications ⬇️🔔🎉
I would appreciate your support so much, leave us a star and share with your friends ⭐✨
Visit ChatPlus (chatplus-a3d50.firebaseapp.com) and login with your google account, you can install the app by clicking on the arrow down button at the top of the home page, don't forget to accept notifications, and you can search for my name "alaa eddine" and you will find two accounts, it's better to chat with me on the one with my profile picture, also you can call me as well 📹🎦📞🚀.
Share it with your friends and have fun chatting with them🎈🎉😍
After using the app, you can delete your account if you want by clicking on the delete button at the top of the home page, though it would be sad seeing you leaving !!!!.
Note: The web app is very safe, and you can safely access it from the live link, and your data is encrypted by firebase and security rules are set, people won't be able to see your messages or calls with other users, people can only see your name and photo.
If you're intrested in working with me, I would be glad to do that you can contact me here :
- UpWork: https://www.upwork.com/freelancers/~01e15a92091f0f0bc7?mp_source=share
- Email: bounekeur@gmail.com
- WhatsApp & Telegram: +90 534 414 48 71
- ChatPlus: search for my name "Alaa Eddine Boubekeur" in the app and chat with me 😉😉
Clone the code into a folder on your machine then set up the following cloud services:
- Firebase: go to firebase and create a new project and enable Firestore, Database, Messaging, Storage, Authentication (don't forget to allow google authentication) and enable hosting, visit Firebase Documentation (google.com) for detailed informations
- Algolia: go to algolia website and set up a new project and create an app, and create an index, check out Algolia Documentation for detailed informations
- Google Cloud Speech to Text: after you have created your firebase app, you will find it in your google cloud platform, go to your console and add speech to text functionality, check out Speech-to-Text AI: speech recognition and transcription | Google Cloud for detailed informations
- Daily WebRTC: set up a daily api account for call services and create an app, visit Daily | API documentation for more information
after you set up your cloud services, you will be able to access their service account files and API keys from their console, and you want to add them in these files, don't forget to rename them and remove "Sample" or "_sample" from these files names so basically when you add your keys to "configKeysSample.js" you rename it to "configKeys.js":
- "src/configKeysSample.js": in this folder put your firebase configuration object and your algolia app key, public key and index name, and for the callAPI variable, this is the web server endpoint of your call service, which is run by calling the command "node /backend/callServer.js", when run locally, set it to "http://localhost:7000".
- "/public/firebase-messaging-sw-sample.js": this is your service account that sets up notification with firebase messaging, put your firabase configuration object here.
- "/backend/serviceAccountKeySample.json": grab your firebase service account from your console and put it here
- "/backend/audio_transcript_sample.json": grab your google cloud service account from your console and put it over here.
- "/backend/configKeysSample.js": put your daily admin API key, your firebase database URL, your algolia app key admin key and index, your google cloud storage bucket link and your firebase storage bucket (they're the same).
Install all your JS dependencies by running the following command on the root folder and on "/backend" folder, your folder contains your frontend React app, and your backend contains your server side services that interact with your cloud services:
npm installAfter you installed all your dependencies for the frontend and backend, navigate to "/backend" folder and run this command to run your server worker:
node indexThis worker contains all your server side services that interact between your app and your cloud services in real time, it has functionalities like setting the online status of users, deleting users, handling media upload errors and more.
After that run this command to run you app's web call server
node callServerThis web server is an API endpoint that allows your frontend app to send requests to create and delete Call rooms, this server will run locally on "http://localhost:7000" so update your callAPI variable on "src/configKeys.js" accordingly
After setting up your backend, go to your firebase console, navigate to your firestore database, and create a collection "version" and create a document inside it "version" and give it a field called "version" which has a number value (not a string !!) give it any number and each time you update and deploy your frontend app with firebase hosting, increment this number to update the code on the browser of all your clients, you can also run the "updateAppVersion" function on the Test class in the backend "backend/Test".
After that run your frontend code locally for testing and developping by calling this command
npm run startAfter you finished development, build your frontend for production by calling
npm run buildYour production code will be on "/build" folder
In order to make your app available on the internet, you have to deploy the backend and frontend.
For the backend you can use any service you want like Heroku or Railway, just make sure that you're running two servers with the commands I provided for you, one runs the worker service and the other runs the call web service, your call web service is gonna be accessed by an endpoint URL which will be provided by your server hosting service so update your callAPI variable on "src/configKeys.js" accordingly
node indexnode callServerFor the frontend you can setup firebase hosting, make sure that the deploy folder is "public" and rewrite all URLs to "index.html", and don't overwrite "index.html" , and every time you deploy a new version of your frontend, increment the version field on the version document of the version collection that you created, you can do that either manually or by calling "updateAppVersion" function on your Test class on your backend folder, and keep the same configuration that I put on firebase.json
And that's it, you're good to go, let me know what features you added to the app, and if you encounter any problem, just report it on the issues section of this repository and I will be glad to help you.
Don't forget to share this great open source project with everyone and leave us a star ⭐✨😉
There are some documentation files in the "documentation" folder, they provide you with the architecture of the app, logic of the app, UML diagrams and much more.
Take a look at them to get a good understanding of the app.
- Messaging users in real time.
- You can text messages.
- You can send Images.
- You can drag and drop any image to your chat and send it, you can drag pictures from the web, or from your device.
- You can send an audio message.
- You click on an image sent in a chat and it will smoothly animate to the center so you can see it.
- You can see if the user is typing or recording.
- You can record an audio and send it.
- If you record an audio of speech in english, french or spanish it will converted to text
- You can delete the conversation.
- You can search for users.
- You can see the online status of users.
- You can see the unread messages.
- You will have a seen at the bottom if the user saw your message.
- You have an arrow button that allows you to scroll down the chat you also see the unread messages in it.
- You can do a video call to other users.
- You can do an audio call to other users.
- Call elements can be dragged all over the page while you're talking with the other user and you can still send messages and interact with the app while you're in a call.
- You can go full screen during a video call.
- You can mute your audio and stop your camera while on a call.
- You can fetch 30 messages in a chat and if you scroll up you will fetch more messages.
- The audio slider is grey when you send an audio message and is green when you receive one and becomes blue if the receiver plays the audio.
- The audio player allows you to see the full time of the audio and if you play it you will see the current time.
- You can receive notifications if a user sent you a message.
- A sound is played when you send a message or receive one in a conversation.
- Another sound is played if you receive a message from another user..
- you can click on the arrow down button at the home page and the web app is installed in your device.