100 Days Of Code - Dev blog artices
Twitter
CodePen
GitHub
Dev Community Blog
100daysofcode.com • #100DaysOfCode • @ka11away
At the end of this challenge i would love to have learnt the following:
- Gsap Animation
- Object Oriented Programming in JS
- Create more front-end websites
- Learn react js
- Improve in refactoring code and degugging
This are the sections I am going to focus on to improve my front end skills. I hope during or by the end of the challange I will have a job in front end development or freelancing.
Today's Progress: I have always wanted to understand the basic git commands. This made me do more reading about it and make notes on it
Task Accomplished: After going through different documents on the internet, watching videos on Youtube i finally got the git and github basics. Since i have nver created a tech post,I created one on this topic.
Link to work: Git and Github for beginners on dev blog
Tweet: https://twitter.com/TracyCss/status/1274346856387141636

Today's Progress: I always wanted to know how to do pull request and contribute to projects on Github.
Task Accomplished: I went ahead to do my research on youtube and I was able to do my first simple contribution to the Github community.
Results: In the blog I created I made a bonus section on how to do a pull request and a quick guide to open source contribution.
Tweet: https://twitter.com/TracyCss/status/1275057548131856384
Link to my blog:

Today's Progress: I decided to learn about boostrap 5 and it's components.
Task Accomplished: I was able to create different components like navbar forms and the new grid system.
Results: I created a simple website which I also designed it with Balsamiq desktop app.
Tweet: https://twitter.com/TracyCss/status/1275057548131856384
Link to my blog:
Today's Progress: I started going through the Gsap documentation to know how to use it in both logos and images
Task Accomplished: I was able to learn how to use animations in images and create different timing durations.
Results: I started coding an amazing websited designed by Shamima Nasrin. I used Gsap to create the amazing animations
Tweet: https://twitter.com/TracyCss/status/1276560015395094529

Today's Progress: I continued going through the Gsap documentation to know how to use to make stagger animation.
Task Accomplished: I was able to learn how to use rotation animation in images and create different timing durations.
Results: I continued coding the amazing websited designed by Shamima Nasrin. I used Gsap to create the amazing animations
Tweet: https://twitter.com/TracyCss/status/1276560015395094529

Today's Progress: I continued going through the Gsap documentation to know how to use to make stagger animation.
Task Accomplished: I was able to learn how to use rotation and scale animation in images and create different timing durations.
Results: I continued coding the amazing websited designed by Shamima Nasrin. I used Gsap to create the amazing animations
Tweet: https://twitter.com/TracyCss/status/1277547377658933253

Today's Progress: I continued going through the Gsap documentation to know how to use to make stagger animation.
Task Accomplished: I was able to learn how to use scale and position animation(x and y) in images and create different timing durations.
Results: I continued coding the amazing websited designed by Shamima Nasrin. I used Gsap to create the amazing animations
Tweet: https://twitter.com/TracyCss/status/1277873031004684288

Today's Progress: I started learning about regex syntax and how to work with it to validate forms.
Task Accomplished: I was able to understand regex syntax and how it operates in JavaScript. Getting to know about single characters, the greedy characters and the quantifiers.
Results: I was able to create a simple login in form that has validation with the help of regex characters.
Tweet: https://twitter.com/TracyCss/status/1278316219968479232
💻 Github source files
🎥 Live preview
Update: My Git and Github for beginners post got in the top 7 post in Dev community and also got the Git badge. Totally amazing for my first tech blog article to get this far.

Today's Progress: I continued learning about regex syntax and how to work with it in code editors or strings in inputs.
Task Accomplished: I was able to get to know how to a string and group it into individual groups with regex pattern.
Results: I was able to code a fun project where text value from the textarea is converted into span tags that you can hover over and they change their background color.
Tweet: https://twitter.com/TracyCss/status/1278964521613303808
📜 Github source files
🎥 Live Preview

Today's Progress: After learn about regex expression and how it's applied in forms, card validation and other areas.
Task Accomplished: Learn more about regex and write an artcle.
Results: I was able to publish my second tech post about Regex expression in Javascript for beginners. This is a deep drive of regex,, it's aplication and resources to use to learn it.
Tweet: https://twitter.com/TracyCss/status/1279770095225647104
Dev Post: ✍ Regex expression in Javascript for beginners

Today's Progress: Started learning about speech recognition and speech synthesis.
Task Accomplished: I was able to go through Mozilla developer documentation about Web Speech API and build their examples as I learn.
Results: I was able to publish my second tech post about Regex expression in Javascript for beginners. This is a deep drive of regex,, it's aplication and resources to use to learn it. I found a git repo from coding curry and I also used it in my learning process.
Tweet: https://twitter.com/TracyCss/status/1281474098326114305
📜 Github source files
🎥 Live Preview

Today's Progress: Continued learning about speech recognition and speech synthesis.
Task Accomplished: I was able to build a chatbot with JavaScript.
Results: I built a deve assist chatbot which can help code newbies get started with web developement. I named the chatbot Rico. He can get the basic resources such where to learn Javascript or react Js. Also it recommends junior developers on youtube who have documented their journey into the field.
Tweet: https://twitter.com/TracyCss/status/1283366013531234305
Github source files 📜
Live Preview 🎥

Today's Progress: Learned about rest, spread syntax
Task Accomplished: Rest parameter - Helps to put all parameters inside a function in one array.
Spread syntax (arrays) - turns array components into individual values
Symbol is a primitive type - Can be used as keys or property names in objects
Results: I was able to understand how set, rest and spread are used in a array. Also how to use set and it's properties like .add, .size, .has and .delete . Tweet: https://twitter.com/TracyCss/status/1284146667097382912

Today's Progress: Learned about how to use webpack and babel
Task Accomplished: I learnt how important it is to use babel to convert modern ES6 javascript code to code that older websites can run. Also I got to work with webpack and even use the webpack-dev-server to run a local server for distributed coding files. It was important for me to see how to use both production and development modes in a project.
Results: I was able to install babel and webpack packages from scratch and write some digital notes from my lessons. Moving from a simple environment of just html, css and js file to webpack development is new and I will need more practice to be able to run this development smoothly. Tweet: https://twitter.com/TracyCss/status/1284146667097382912

Today's Progress: Learned about about problem solving and how to approach them step by step.
Task Accomplished: Finished watching a few videos about frquency problems and did some quizzes too.
Results: I can now use frequency approach to solve problems. I am not fully confident with this approach but with some practice I will be.
Tweet: https://twitter.com/TracyCss/status/1289094299913793536

Today's Progress: I was able to read some materials on Webpack and babel to fresh my knowledge. I decided to write something about it, in order to help beginners understand it better and have a boilerplate for a project. I went through net ninja crash course about babel.
Task Accomplished: Yeas, I wrote an article and published it to dev.to platform.
Results: My webpack and babel blog post on dev.to platform.
Tweet: https://twitter.com/TracyCss/status/1290319063701499904
Today's Progress: I got started with Node Js as my first JavaScript framework. Went through the introduction section about how to use it and the pros and cons of node. Since I have used Javascript it was the best framwork to chooose instead of another language.
Task Accomplished: I was able to understand the synchronous and asynchronous nature of Node Js and how to know when to use it. Got to learn how to use a server and how to create one.
Results: Created a simple web server in node js and import https and file system modules.
Tweet: https://twitter.com/TracyCss/status/1290683830458777602
Today's Progress: I learnt how to use multiple pointers to solve problems in algorithms question. To be honest, It's better to know different approaches and choose the onw you are most comfortable with.
Tweet: https://twitter.com/TracyCss/status/1290683830458777602

Today's Progress: I did some quizzes on problem solving and wen't through some notes from yestarday.
Task Accomplished: I was able to understand how multiple pointers works in different situations. Also how to use sets in an Array to remove numbers that are repetitive.
Results: Got 3 questions out of 5 that I did.
Tweet: https://twitter.com/TracyCss/status/1290683830458777602

Today's Progress: Finished up the my first node project today! I got to learn a lot about node js. Just the basic on how to set up a server, use API and how to connect your Json data to the client server.
Task Accomplished: Complected the node farm from scratch by watching the node bootcamp course by Jonas.
Results: I was able to connect the frontend to the backend data using a simple API aerver with Node Js.
Tweet: https://twitter.com/TracyCss/status/1292140857236258828

Today's Progress: Today I repeated the questions I didn't get in the problem solving. It is always good to go back and see where you did wrong and how you can improve. It takes time to fully know algorithms.
Tweet: https://twitter.com/TracyCss/status/1293594758246473728

Today's Progress: I went to figma to create some mockups for the Node home chef website. Then I proceeded to make the prototype just to see how the website would function. Then did the actual coding of the project.
Task Accomplished: Used Html, CSS and node Js to make the full website function in the server. I learnt a lot about filling html templates and making simple modules to functions that can be reused across the application.
Tweet: https://twitter.com/TracyCss/status/1294357477794996224

Today's Progress: Created an app on how to build a simple Api by using Jona's course and trying to explain each line of code.
Results: Make a 9 minute read blog on how I created the node home chef application. I also shared why I was learning node Js as a way to learn Javascript.
Blog ✍ : How to make a simple API server with Node Js for Beginners
Tweet: https://twitter.com/TracyCss/status/1292140857236258828

Today's Progress
The user/client types in the url of a webpage in a browser, the request is sent to the server where the website is hosted then the server sends back the response by getting the webpage content to the client. This is called client-server architecture or Resquest reponse model.
-
First when your enter the domain name it is sent back to DNS Domain Name Server where it gets the real IP address of the website. //https://www.google.com/maps to https://216.58.211.206:443. The protocol is http|| https, IP address is 216.58.211.206 and port number is 443 for https || 80 for http.
-
A TCP/IP socket connection is established between the server and the client. TCP is the Transmission Control Protocol and IP is the Internet Protocol, they ddefine how data travels across the web. They set the rules on how data moves across the internet.
-
The Http request is sent to the server. HTTP is Hyper Text Transmission Protocol which is a communication protocol that allows two or more systems to communicate. Http is a protocol that allows the client and server to communicate by sending and receiving messages. Types of HTTP methods: (GET/maps HTTP/1.1)
- GET - for requesting data
- post - for sending data
- patch - for modifying data The HTTP request has the :
- Start line contains: Http method, request target and http version.
- Http request header has contains Host : www.google.com, User-Agent: Mozilla/5.0 and Accepted language - en-us
- Body response only when it's sending data to the server. (POST)
- A HTTP response is sen back from the server. The http response contains:(HTTP/1.1 200 ok)
- Start line with http version, status code and status message.
- Response message
- response body
- The TCP breaks the HTTP request and response into small chunks called packets before they are sent, then it assemble them into their original request and response. The IP protocol sends and routes all the packets through the internet. It makes sure the packets goes back to their respetive IP addresses.
(Amazing summary notes from Jonas course)
Results: I was able to understand how the internet works behind the scenes.

Today's Progress
-
Static websites have ready files that are served to the browser. Like Html, Css, Jvascript and images files. They display the same content for every user.
-
Dynamic website are built on the server each time a new request comes in. It has a database which get the data, with a pre-defined template it builds each page the user requests. From each client based request the page is build with Html, css, images and javascript. This pages are then sent to the browser. This process is also callled server-side rendering. Thus it dynamic beccause the content can change according to the user actions or data in the database. Example is the Twitter website, every time you login you see different tweets.
Web application are dynamic websites with functionality like logging in, signing up or creating profiles.
- API-powered website are websites that have a database that fetches data and its build in two steps: a) Building the Api b) Consuming the Api The Api-powered websites are dynamic websites but the only difference is that Api-powered website send JSON data format to the browser not the entire website. Only the data is sent to the client, no Html,css or js files. When it reaches the browser, it builds the website through the templates created. An API is Aplication Programming Interface which is a software that allows application to talk to each other.
(Amazing summary notes from Jonas course)
Results: I was able to understand how the internet works behind the scenes.

Today's Progress
- I created a blog post where I shared github resources that I have found useful over the time I am coding. It's always good to share with the community and help other code newbies out. To be honest I wish I had found these resources earlier in my journey but that's why I wrote it, to help others.
Results: ✍ Dev.to blog post Learning how to code through GitHub repository

Today's Progress
- I want to start contributing to Open Source projects and be better at my coding skills. It's a good way of to get other developers to review your code plus the feeling you get when your pull request is accepted, it's amazing. I decided to contribute to Protege.dev website. This is a good platform where junior developers can get remote jobs and gain experince through WFH(work from home).
Results: ✍ Became a first contributor to Protoge

Today's Progress
- Earlier in the day, I created another pull request to solve another issue on Dev Protege and It was merged into the main project repository. Yeah, the feel is good. I was able to learn how to create a issue template that includes a bug report and a feature request. I then headed to the Github Action documentation page to learn how to create a javascript action. I have never used CI/CD workflows, all this is totally new to me but I will learn how to use it.
Results: ✍ Getting another PR merged and getting to know what Github action is.
Today's Progress
- Step by step I created the hello world github action which is created in javascript. I got to read the documentation and learn about different metadata syntax that should be used when creating an action.
Results: 👩💻 Greated the Github action Hello World.

Today's Progress
- Started to create my own action. I want to use json file to connect it to the readme file. I got some tests to pass but some failed. I will still continue to do my research on it and see how I can resolve the failed test. As a first timer doing this, It's not easy at all, but I love the change.
Results: 👩💻 Started to create my own Github action.

Today's Progress
- I created a blog post about open source contribution and how I got started. I worte the truth and some might think it was funny or simple but for a beginner it was a big step for me. With the Hackobter coming next month, I thought the post would be useful for beginners out there. I guess I am writing post I wish I had read before to guide me in the beginning of my journey.
Results: ✍ Dev.to blog post Open Source Contribution

Today's Progress
- I started learning React Js for a project I want to be involved with. The team is amazing and I would love to be part of that community which welcomes beginners and allow them to grow. I will be contracting om React Js for the next 2-3 months fully. Long days and long nights ahead of me but the results will be amazing. I have started to use FreeCodeCamp to get started with React Js basics. I can now see the difference btw Html and JSX and how to create class names with CamelCase format. I can't wait to learn more.
Results: ✍ Learnt how to create JSX syntax and to create react components.

Today's Progress
- From 1ST October 2020, Github will make the main branch the default branch which is amazing. The funny thing is, I just learned about it last week. I decided to make a blog post to let others know how to change it. It's always good to share information as you learn that's how I understand things better through research and writing.
Results: ✍ Posted another blog post on Dev.to Renaming master to main branch
Tweet The post was also retweet by Dev.to

Today's Progress
- I have always been using Photoshop or Adobe XD for design but when I started learning how to code during the lockdown, I shifted to Figma. Most because of the code snipped thay have. It makes it easier to code faster when you can see the height and width of your component in each frame. I used the bests by Dre offical website to get an inspiration to create another version of it but for only the skyline collection. I have always loved the quality of these headphones used them once when watching a movie and I immediately fell in love with them. Hope I will have enough money to buy one or two someday.
Results: ✍ Created the skyline collection website for beats by Dre and made different frames from desktop to mobile. It always good to make website responsive.

Today's Progress
- The past three days have been helpful. I was able to starting a real small website project that I designed in Figma. I wanted to go through the whole process of sketching, responsive design in figma to coding the website. I used Tailwind CSS a Css framework to learn and practice. The only way to I understand is by doing and seeing everything detail completed to the end. I used some custom css style like the colors, insets, rems, font family and font sizes to ensure the coded website looked like the design (Talkimg about making things pixel perfect. hahaha). I never used min-width in my coding, so it took a minute before I got used to it. But I can say I love Tailind Css and I will be using it more in my projects.
Results: ✍ Coded a responsive website with Tailwind Css called Beats studio3 by Beats by Dre.
Today's Progress
- After building the beats by dre website I decided to write an articles about tool or resources I found useful in my journey. As they say, sharing.
Results: ✍ Tailwind Css resources you wish you had.

Today's Progress
- Did some exercises on JSX, how to build a stateful component and a stateless component. Used codepen to render some react elements to the DOM.
Results: ✍ Got started with React Javascript.
Today's Progress
- I was able to attend the figma confrence that was held virtually on their website. I got to learn a lot about web accessibility in terms of design, dived into design stystems and how to build one, attend the talk about how Ikea design were builded by their team and lastly I got to attend a talk about promoting yourself and your work. I later started looking at my react notes on the JSX syntax, how to use class component to manipulate the DOM. It was good to go back to your notes when you are learning something new.
Results: ✍ Attended the Figma Euro Conference and revised on JSX syntax and react components.

Today's Progress
- Got to learn more about useState by Max in Udemy. This lesson explains how you can both write with class component and also useState to get the same result when write state and changing it with setState method. I also got to learn about handling event handlers in React lick onClick and onChange. I got to love using react hooks at least using useState instead of class component. The use of arrow functions makes it easier.
Results: 👩💻 Attended the Figma Euro Conference and revised on JSX syntax and react components.

Today's Progress
- After going theough react for a few days I thought to writing a post about the ting you will need to know before going into react. Before going to react I really didn't know what I should understand more about in vanilla JavaScript before diving in. But I decided to write a post that other beginners might find useful in their journey.
Results: ✍ Basic Javascript syntax to know before starting react Js .

Today's Progress
- The assignment touched on everyting I have learned about React basics so far. This was a great way to ensure I got to understand the concepts taught and the some exerices I did to practice.
Results: ✍ Got to successfully finish my first react assignment and I passed it. yeeahhh!!!
| |
|  |
|
Today's Progress
- I got to follow a React tutorial by the Tech girl on how to build a Todo app with React. I learnt how to use the state in the class coponents and use inline style to make it prettier. Some of the things I didn't understand but I know as I continue to use React, I will be less confused about how to use the components.
Results: ✍ Got to successfully finish my first react app - The Todo project.
Live Preview Todo app

Today's Progress
- Learnt how to manipulate the input value and make the changes be visible on the paragraph texts. I also was able to delete the cards on click.
Results: ✍ Got to successfully finish my first react app - The Todo project.
Today's Progress
- When I have been learning React for the few days I collected some resources that I found useful to me.
Results: ✍ Free React resources you should have in your pocket..

Today's Progress
- The assignment was about ensuring the input value is split into individual letters that should be printed out in it's own card. When the card is clicked it's deleted and removed and the state is updated.
Results: ✍ Split letters project..

Today's Progress
- Installing it through: npm install --save radium.
- Importing it to the file: import Radium from 'Radium';
- Use it as a higher order component. You can call Radium as a function and wrap your app component.
- Export it by: export default Radium(App);
- Adding styles to your site using👩💻
':hover':{
   backgroundColor: 'brown',
   color: 'black'
}
Results: ✍ Learned how to use Radium.

Today's Progress
- Installing it through: npm install --save styled-components.
- Importing it to the file: import styled from 'styled-component';
- Adding styles in your JavaScript file👩💻
const ButtonStyled = styled.button`
  background-color: brown;
  color: black;

  &:hover {
    background-color: black;
  }
`;

<ButtonStyled> This button</ButtonStyled>;
Results: ✍ Learned how to use styled component.
Today's Progress
- This year was my first time participating in hacktoberfest and I wanted to share some resources to use for code newbies.
- It always great to know where to start and what projects to be involved in during the contribution month.
- Gave the updated news from Hacktoberfest official site about the new guidelines for this year.
Results: ✍ How to participate in the Hacktoberfest as a Code Newbie 💻.

Today's Progress
- Practiced on how to use both Radium and styled component and to be honest I do prefer styled component. I can use it to easily create css styles in the js files without a hustle. It makes the code more understandable.
const ButtonStyled = styled.button`
  background-color: brown;
  color: black;

  &:hover {
    background-color: black;
  }
`;

<ButtonStyled> This button</ButtonStyled>;- Also attend the Summit React camp and learned a lot about React and how GraphQL works well with it. I have never used GraphQL but I will definitely learn it in future.
Results: ✍ Learned how to use styled component deeply.
Featured blog post on Dev.to My post about hacktoberfest for beginners was featured by the DEV Team. Exetremly excited!!!!

Today's Progress
- In order to keep up with the new terms I am learning about React i created a blog post it.
- The questions are helpful to know, not only because you get to understand the basics but they also asked in job interviews.
Results: ✍ 20 React questions to use as you learn 💻.

Today's Progress
- Got to go through the ultra project and create it from scratch.
- This is a Marketing agency website made with styled components and react router. You can go to different pages easily and access the content. This was easier by the help of react router. I was able to code with the help of @Briandesign on Youtube.
- I got to learn how to use styled componets and react router for the first time. The learning isn't staright forward but with more practice and the documentation for refence, I will make more websites with React.
Results: ✍ Build Ultra project with react and react router dom.

Today's Progress
-
After watching a React tutorial from Brian Design on youtube, I made this website to practice what I learned about React. It was fun designing the website from scratch in Figma and coding it out step by step with styled-components.
-
I also added some pages to continue learning about React router and how it is used. Overall I learned a lot and googled alot too, haha.
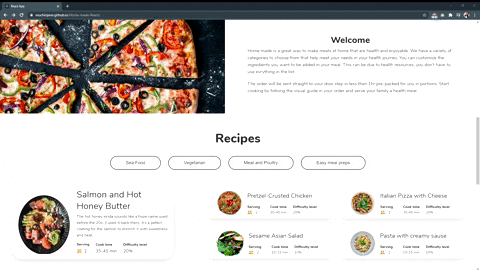
Results: ✍ Build Home Made project with react, react router dom and styled-componets.
Today's Progress
- After building the Home Made website I decided to turn it to a blog post to show others how I build it.
Results: ✍ A React website with Styled-components for beginners ✨.
Today's Progress
- This is a simple website build with Gatsby and styled-components to make it not only fast but also static compared to just using react only.
- Building the site helped to get to know to use images in Gatsby and how to use Graphql to render the data to the front end side. I truly learned a lot from the Official Gatsby documentation with clear stated examples.
Results: ✍ Build Home Made project with react, Gatsby JS and styled-componets.

Today's Progress
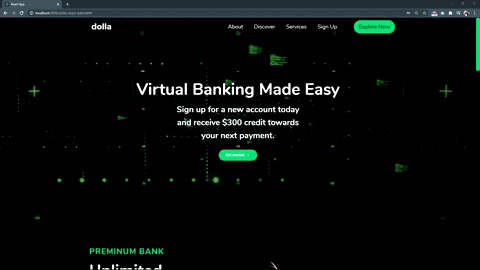
- The dolla website was code with react and styled components. I was able to make it responsive and add react scroll for smooth scrolling down the different sections. It was a great way for me to learn how to add scroll functions and other elements.
Results: ✍ Build dolla project with react, React scroll, react router and styled-componets.
Today's Progress
- A simple Pizza website built with React and Framer Motion. The animations are a bit extra, but it was for learning. I can't wait to build my next site with framer motion. The most important thing I have learnt so far is variants are very helpful to keep your code dry.
Results: ✍ Build Pizza website project with react, react router and Framer Motion.
Today's Progress
- After finishing up the Pizza website, I decided to blog about framer motion basics to help others get started with it.
Results: ✍ 20 React questions to use as you learn 💻

- I built my portfolio with react and Gatsby plus added a blog section which made it easier to add my posts to my audience.
- For styling I used styled components which made writing clean styled components easier to my files and useful for conditional statements.
- I got to use graphql for my backend to get my post and also my portfolio projects. Using Graphql playground made it easier to undersand the documentation and how to navigate my data flow. Results My Portfolio
Today's Progress: I started to learn how to connect react with firebase.
Task Accomplished: Made a few state hooks to handle the email, password and the errors during login or signup.
Today's Progress: Added more login and sign up features.
Task Accomplished: Added more features for login and signup like GitHub, Facebook or Google account. It was my first time adding this accounts, I had to google how to sign up for their developer app to handle the auth and get the Client API or secret keys. With the help of the firebase documentation.

- Note: I am having surgery in August, so I will be inactive for that month, I hope in September I will have healed and I can get back to coding. So don't mind seeing the lack of commits for 4-5 weeks. I will back soon(pray for me <3).
Today's Progress: I tried to make a web app that 1
Task Accomplished: The project was created with React Js, Material UI and Firebase. The user can create a task set the title and detail of it and choose the category of the task. It can be a reminder, personal, money or work related task. The user can delete the task after finishing it and this will also be deleted in the firebase cloud store.
-
The great thing I found about firebase is the documenation is easy to follow even if it's your first time using it.
-
This was also my first time using material UI for creating the components and I enjoyed. The docs have information that is straight forward and have clear examples.

Today's Progress
- This a blog post I wrote today to help code newbies to participate in the hacktoberfest even with basic skills.
Results: ✍ How to participate in Hacktoberfest as a code newbie 💻.

ps: Quick update: I am healing well, though my screen time is limited, I will try my best to use the time I have well.
Today's Progress
- Manual Testing: This is coding and previewing the code in the browser and test it to see if it works.
- Automated Testing: writing code that will test the code you have written. You can test a section or your entire code.
- Helps to catch errors/bugs early
- Write and ship better code
Test the individual blocks of the components. This is the most common and important test to conduct in your apps.
- Test multiple building blocks. Even though Intergration tests are important, there are used less but unit test are used more.
- This about testing the entire workflow of your app. It's just like manual testing but automated.
- They are fewer e2e tests.
Results
import { render, screen } from "@testing-library/react"
import Greeting from "./Greeting"

describe('greeting component', () => {
  test('renders hello world as a text', () => {
    //Arrange
    render(<Greeting />);
    //Act
    //.... nothing to do here

    //Assert
    const helloElement = screen.getByText('Hello world', { exact: false });
    expect(helloElement).toBeInTheDocument();
  })
  test('renders hey as a text', () => {
    //Arrange
    render(<Greeting />);
    //Act
    //.... nothing to do here

    //Assert
    const welcomeElement = screen.getByText('Hey');
    expect(welcomeElement).toBeInTheDocument();
  })
})Today's Progress
- I started a project for hackoberfest that my community can contribute to especially beginners.
- The project was built with:
 - CSS
 - React JS
 - Next JS
 - Material UI | MUI
Results: Source: Next product Site 💻
Preview: Product Website

Today's Progress
-
I started by Looking for a well designed website that's complete and have all the pages from the figma community. Since I want to practice more on how to use Material UI and customize the theme, i decided to go with it instead of Tailwind css.
-
The project was built with:
 - CSS
 - React JS
 - Next JS
 - Material UI | MUI
Results: Source: Next Finsweet Site 💻
About the project
-
I started by Looking for a well designed website that's complete and have all the pages from the figma community. Since I want to practice more on how to use Material UI and customize the theme, i decided to go with it instead of Tailwind css.
-
The project was built with:
 - CSS
 - React JS
 - Next JS
 - Material UI | MUI
Today's Progress
- I created 12 issues for the project that will help people be part of the Hacktoberfest contribution.
- The section of the site were divided into issue with description of the feature, how to achieve it and how the result should look like at the end.
- I got two pull request that I'm reviewing, gave them a few corrections to make the code better.
- Vercel is amazing, helps reviewing the update site before merging. That's a plus for my side as a maintainer. Vercel rules. hahah 🙌🎃
Results: Source: Next product Site 💻
Preview: Product Website
About the project
-
I started by Looking for a well designed website that's complete and have all the pages from the figma community. Since I want to practice more on how to use Material UI and customize the theme, i decided to go with it instead of Tailwind css.
-
The project was built with:
 - CSS
 - React JS
 - Next JS
 - Material UI | MUI
Today's Progress
- Continued with the project to code out the hero section, about section and the feature section.
- I got stuck in creating the theme especially the typography but when I googled and used MUI documentation I got better at coding the section.
- MUI made it easier to code up the section, but when the design component is complex, creating the theme to fit your project is better.
Results: Source: Next Finsweet Site 💻
Preview: Product Website

Today's Progress
-
I went to learn how to build forms in react in different ways.
- Using State: This was good because of repetitive code when you want to validate the inputs.
- Using Custom Hooks: This is a better methos since the code is well structured and not repetitive when validating the form.
-
The form at first has the button disabled, the user can't send any info without filling in the inputs.
-
If any of the input is empty the form can't be sent and the button will remain disabled. On top of this, each input will show you the errors through a p text.
-
Only when all input are correct and are not empty the button is active and can submit the data.
-
The project was built with:
 - CSS
 - Javascript
 - React JS
Results: Source: Next Finsweet Site 💻
