How to Setup your Contribution Environment
To contribute to PatternFly you will need the following:
- A GitHub account. You can register for a GitHub account on GitHub. If you are new to GitHub, take some time to read the GitHub Guides to learn about tasks you’ll commonly do as a contributor like creating issues and submitting pull requests.
- SourceTree This app is free and can be downloaded here. This will be used for synchronizing your working files on your desktop computer to the online PatternFly-Design repository in GitHub. Note that SourceTree is the tool that we recommend for this purpose, but there are alternatives. Some contributors have had success using the Git command line interface or an alternative tool called GitKraken for managing their local repo.
- A text editor application. We recommend using Atom. This app is free and can be downloaded here. This is an editor that you can use to format your design content as a markdown file. All PatternFly documentation is written in Markdown (.md file). This is a simple text formatting language that is widely used for authoring text based web content.
- A graphical editor capable of creating high-fidelity UI mockups. We recommend using Sketch with the PatternFly Design Kit. This is a custom Sketch Library and template that should be used for creating high-fidelity design mockups. The PatternFly Design Kit can be downloaded or cloned here.
Setting up the GitHub environment for PatternFly is something you should only need to do once.
-
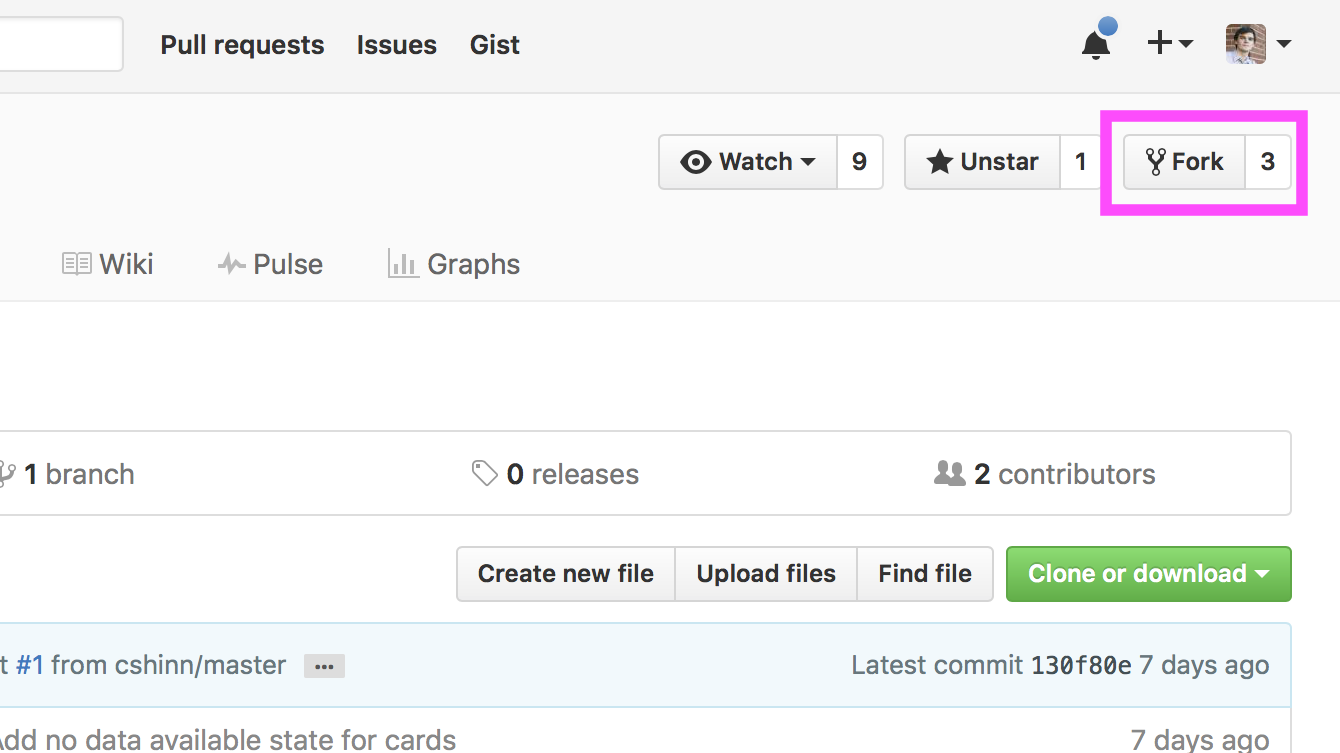
Log into GitHub and Go to the PatternFly-Design Repo on GitHub
-
Click on
Forkin the top right
- If it asks
Where should we fork this repository?, you will want to fork it to your personal GitHub account, for example;<yourgithubusername>/patternfly-design.
Next, set up SourceTree to manage a local copy of your repo.
- Download SourceTree
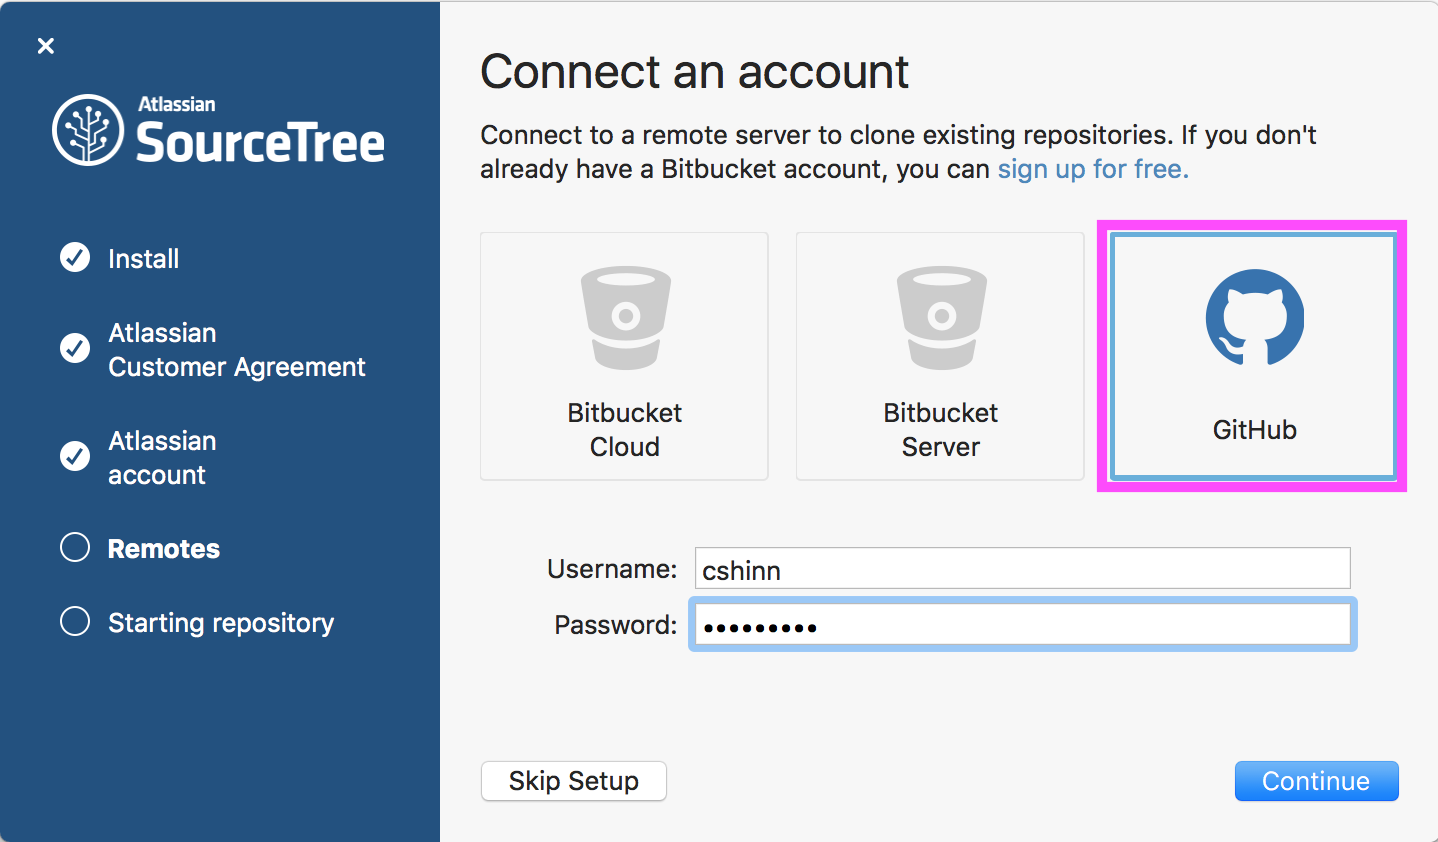
- Open the SourceTree App (create an account if necessary, or sign in with, a SourceTree or Google account. Your JIRA account will not work.)
- On the Connect an account page, select the account that you will use to connect to the PatternFly-Design repo, by choosing GitHub and sign in with your GitHub credentials, then click the
Continuebutton.
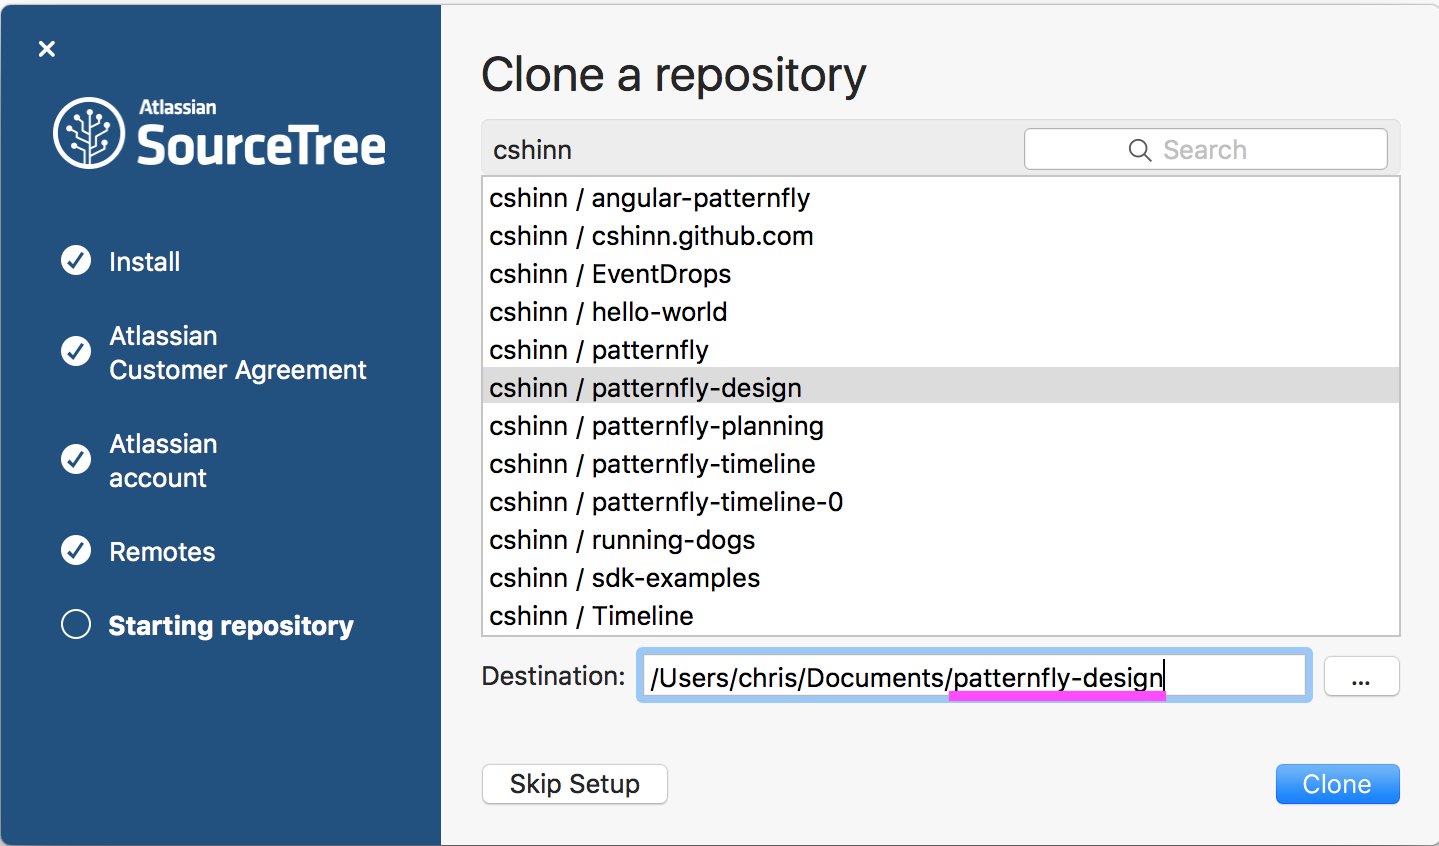
- On the Clone a repository page, scroll until you see the line named
<yourgithubusername>/patternfly-designand select it. - In the Destination field, type or browse for the desktop folder, in which you would like to store your local copy of patternfly-design. (This will create a local copy of the patternfly-design assets, on your desktop.) Now, click the
Clonebutton.
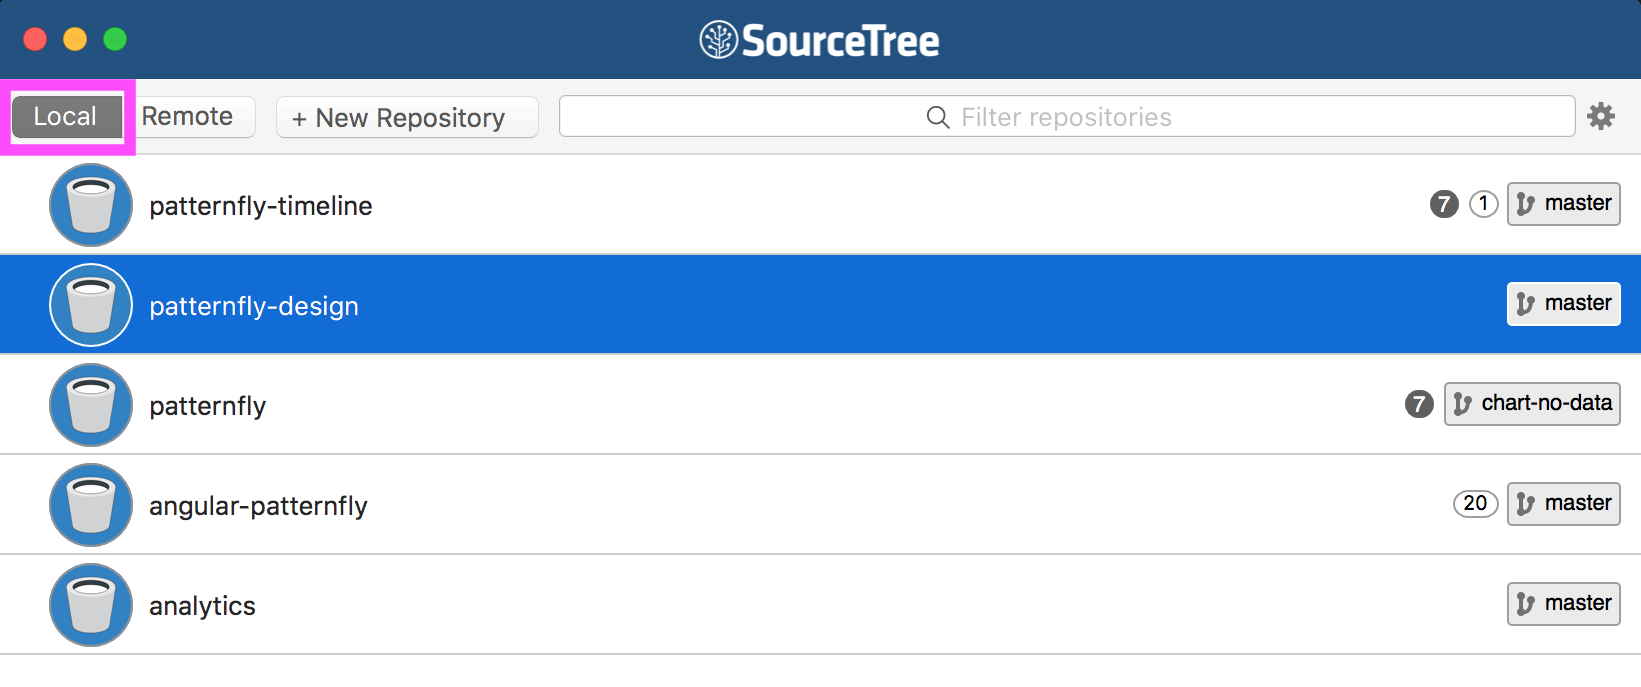
- SourceTree will present you with a list of your repositories. Make sure you are on the
Localtab, in the upper left corner, and double click on your patternfly-design repository, located in the list.
- In the SourceTree application menu, go to
Repository > Add Remote
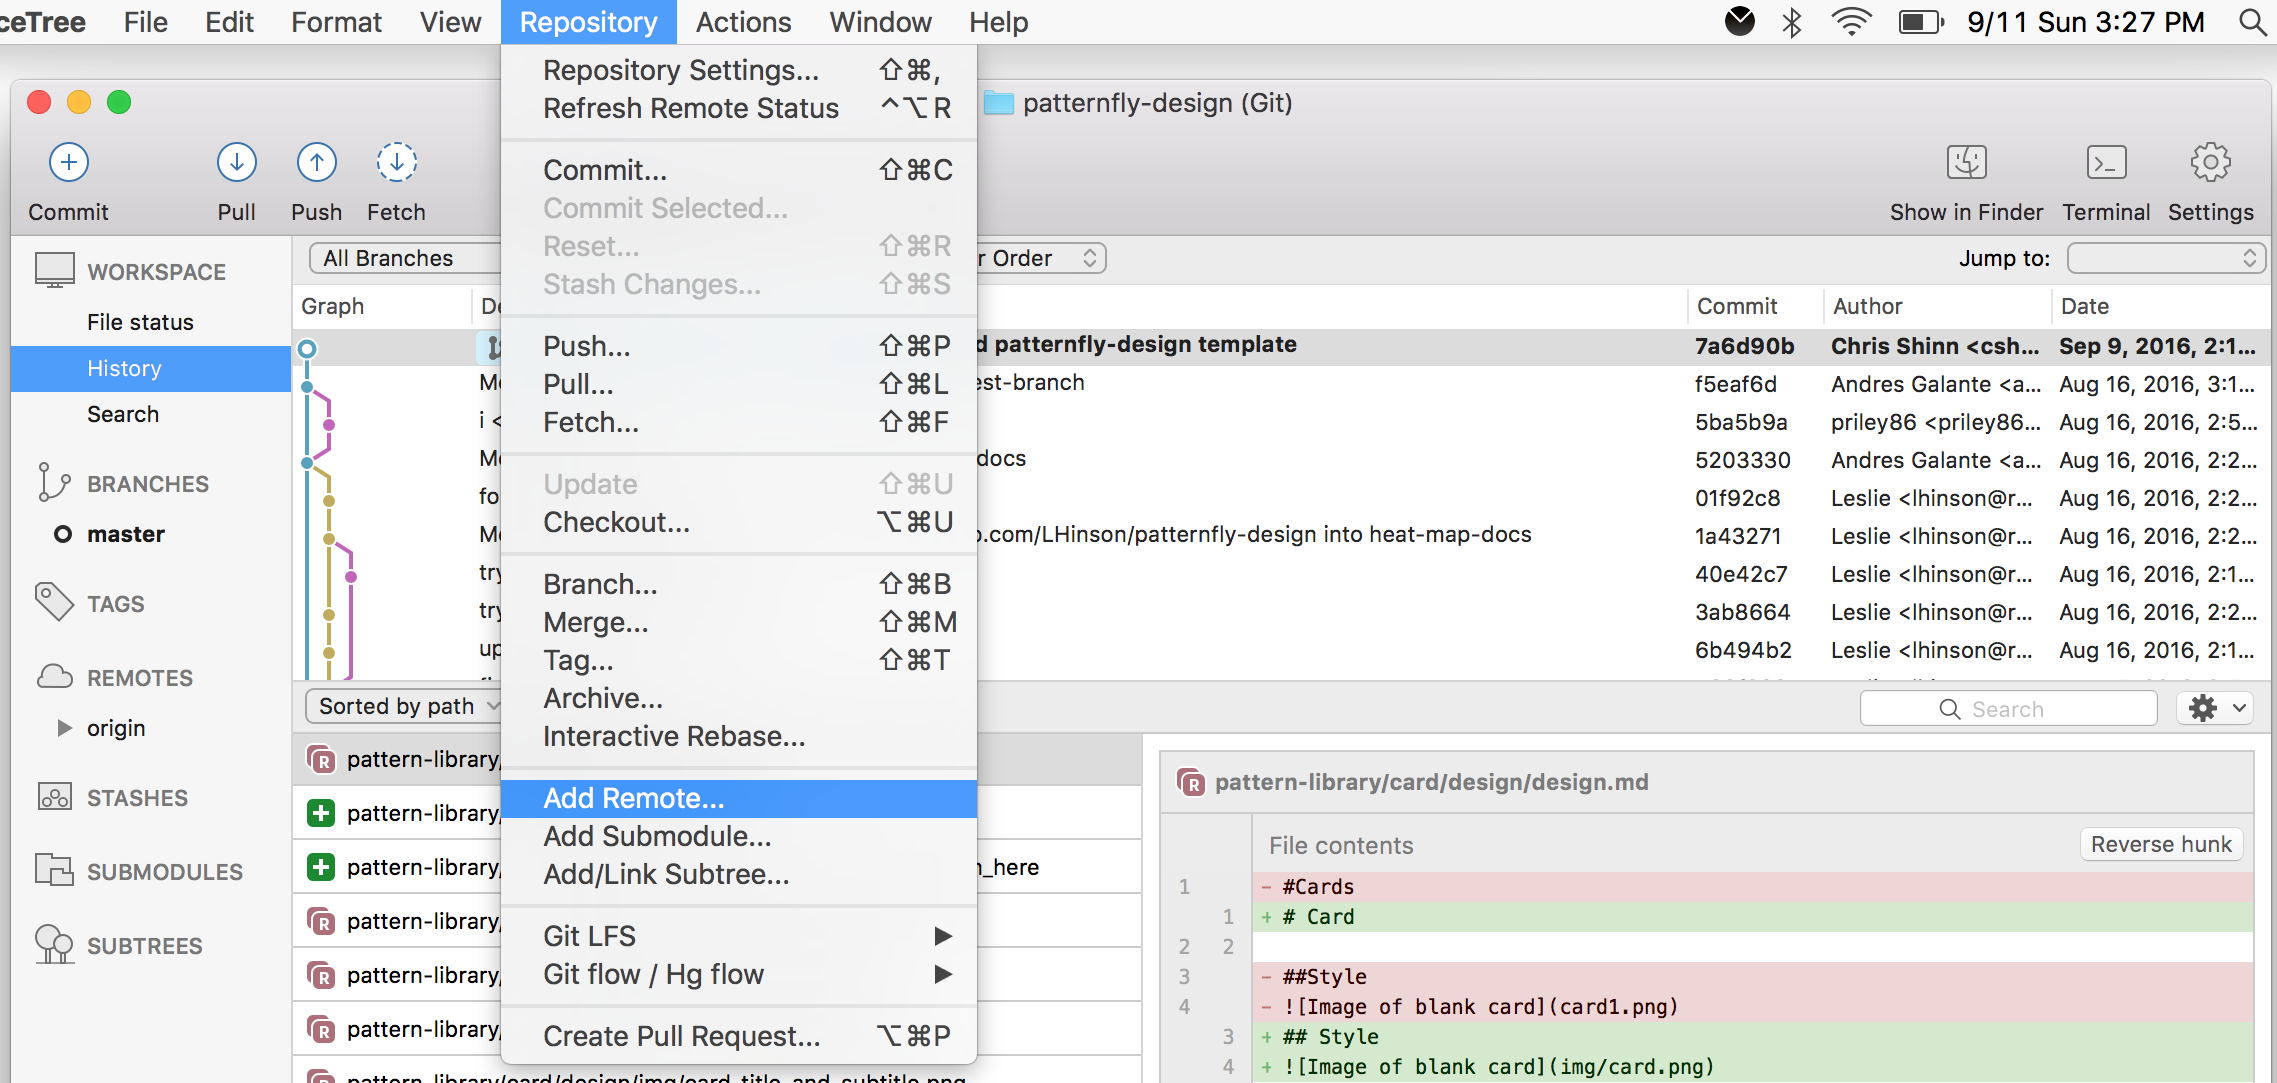
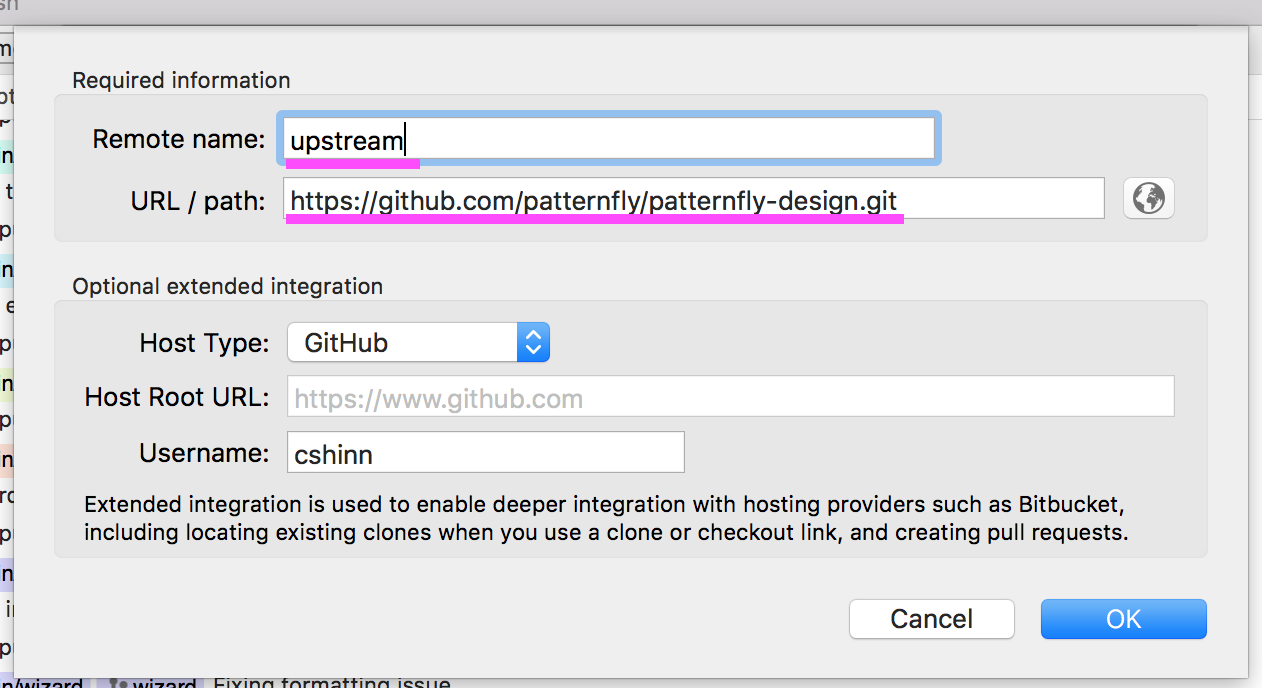
- Name it
upstream(make sure to use lowercase) and paste in the URLhttps://github.com/patternfly/patternfly-design.git - Note:
upstreamis the main repository andoriginis your personal fork, or copy of the repository.
- In the toolbar, click on the
Fetchicon, then click theOKbutton. Fetch will import any changes, that have been committed to the remote repository, into your local repo.
