Android Network (Eclipse) HowTo
The version of android used in this guide is 2.3.3 - Level 10 (Gingerbread to simplify Network calls). The Server that the Android Client application will connect to will be written in plain Java.
Prerequisites for this guide are HowTo:
In this guide, you will be covering the following topics:
- Set Up Android Project
- Run the template project on an emulator
- Set up the Front End (UI Configuration)
- Run the Front End project on an emulator
- Complete Front End (Control View States)
- Complete Back End (Network Configuration)
- Run Client application with Wifi Server
The source code for this project can be found here.
The guide concludes with an Android Client that connects to a Java Server's TCP connection (ServerSocket).
Select File → New → Other → Android → Android Project and create the Android project, by entering the name "AndroidEclipseClient" in the box labeled Project Name and select SDK Version 2.3.3.
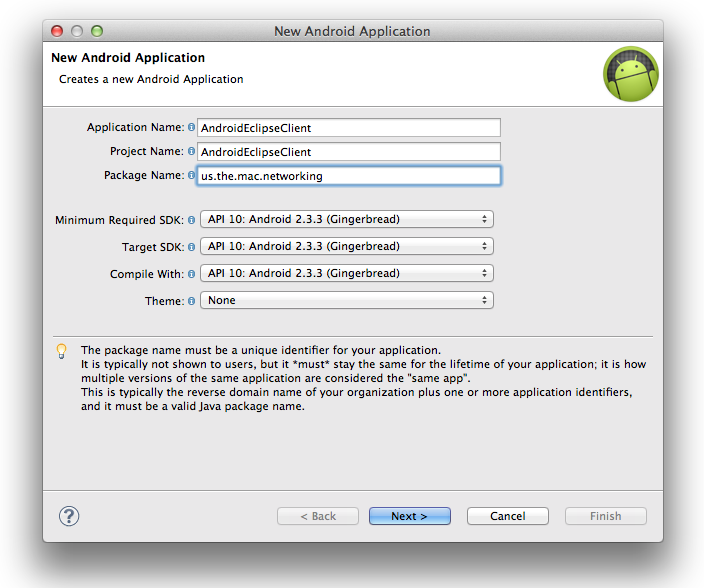
Click Next to move on to the Application Info dialog, and make needed changes.

The Android Eclipse Client launcher icon can be selected from the Clipart section:

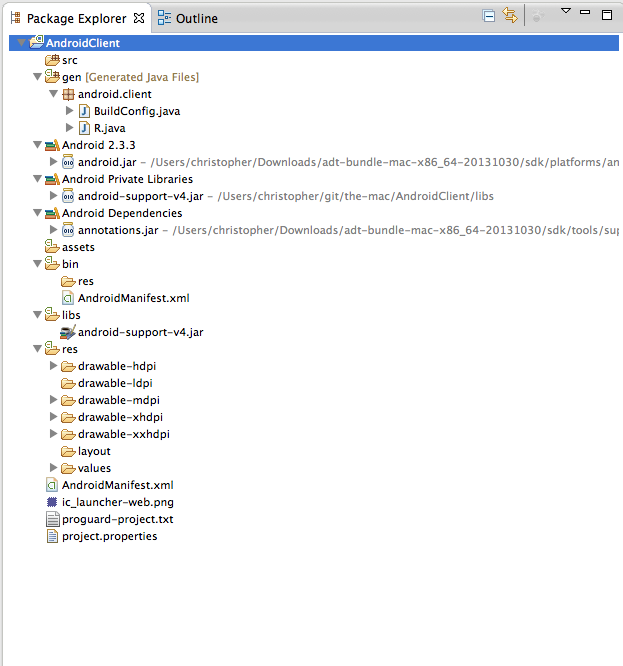
Press "Finish", and this then creates the following directory structure.
Create class by the name "NetworkClient" by pasting the contents below onto the empty src folder:
package us.the.mac.networking;

import android.app.Activity;
import android.os.Bundle;

public class NetworkClient extends Activity{

    /** Called when the activity is first created. */
    @Override
    public void onCreate(Bundle savedInstanceState) {
        super.onCreate(savedInstanceState);
        setContentView(R.layout.main);
    }
}
Note: There will be an error with the line containing "setContentView(R.layout.main);", but this error will be fixed after the next step by letting the Android Plugin automatically generate the R.layout.main reference.
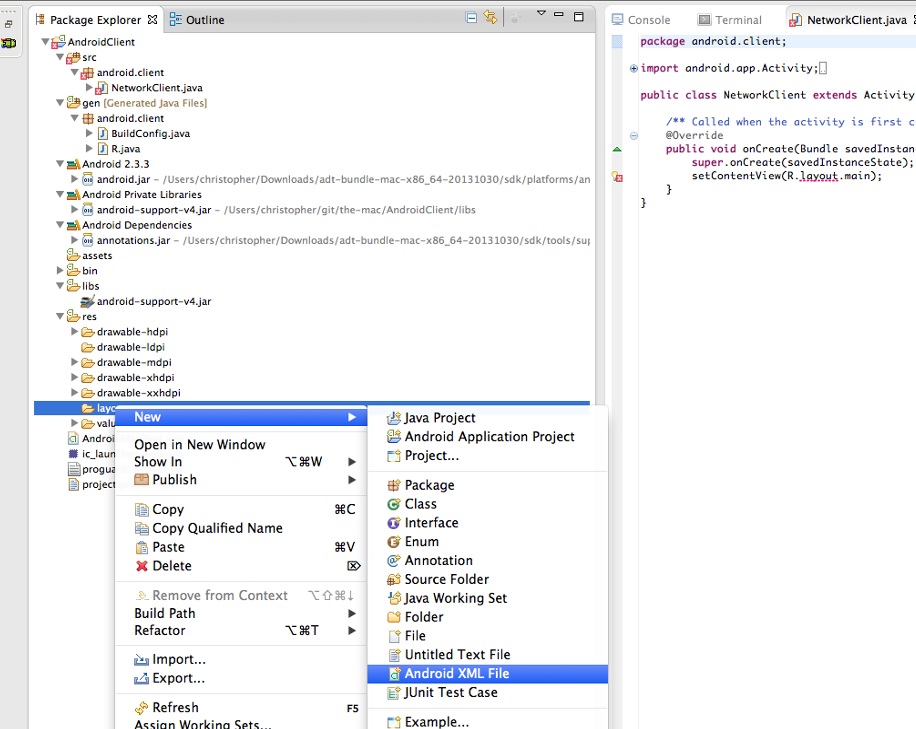
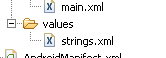
Select LinearLayout as the type of layout file to create, and name the file main.
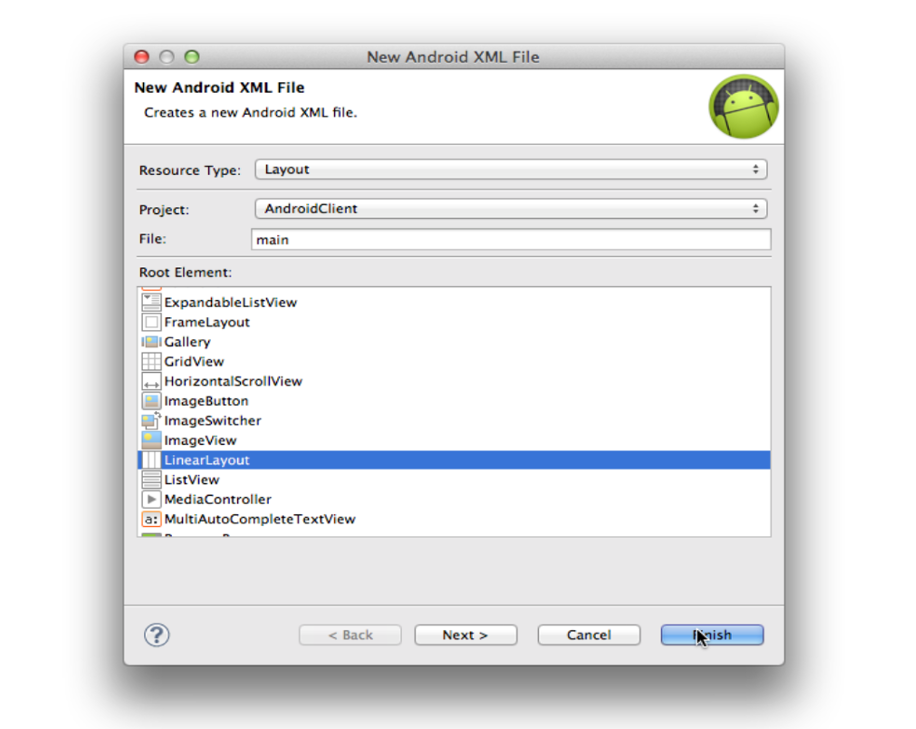
This file is created in the "res/layout/" folder of the Android project.
Note: While "res" contains structured values which are known to the Android platform (can be referenced using the generated R.layout.*) the directory "assets" can be used to store any kind of data. In Java you can access the assets folder data via the AssetsManager using the method getAssets().
2.1 Follow HowTo Build an Android Application (in Eclipse)
Note: With this guide you can learn the basics of how to work with Android Eclipse projects and some of Eclipse's nifty features.
The most relevant section is #3 Run sample implementation on Emulator, and the remaining sections help to familiarize with Android projects in Eclipse.
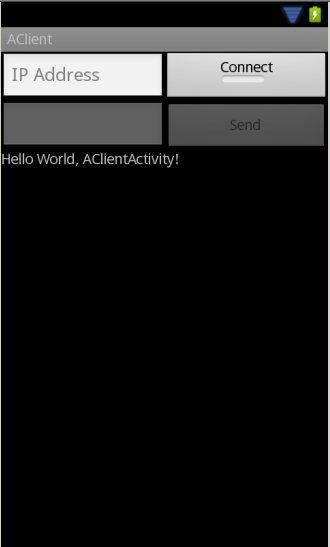
Once you have a working emulator, you can start the Android Application. First select your project, or right click on it, then select Run-As-> Android Application and be patient, because the emulator starts up very slowly. You should get a blank screen, but the application will run.
Android allows you to create attributes for all types of resources such as strings, colors and more. These attributes can be used throughout your UI definitions via XML or in Java source code.
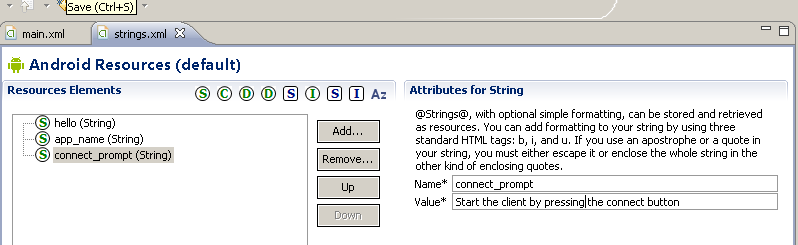
Select the file "res/values/strings.xml" and once you have opened strings.xml you can press "Add" (which is on the Design tab that opens by default).
Select "String" from the Resource options.
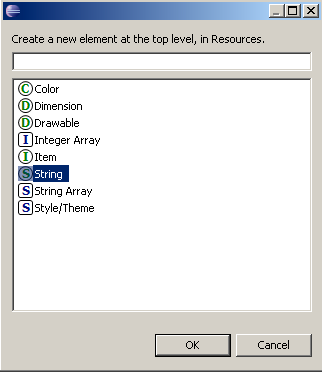
Then enter "connect_prompt" as the name and "Start the client by pressing the connect button" as the value (for your new string).
Now you can add the following "String" attributes to your string resources.
| Name | Value |
|---|---|
| send_prompt | Enter your message then press the send button |
| ip_address | IP Address |
| message_prompt | Say something... |
| device_ip | Device's IP Address: |
| server_ip | Server's IP Address: |
| connnect | Connect |
| disconnnect | Disconnect |
| send | Send |
Note: String attributes can be translated and placed in the application, and by simply changing the region of the phone the language changes to to your prepared translations.
Switch to the XML representation and validate the values.
<?xml version="1.0" encoding="utf-8"?>
<resources>

    <string name="hello">Hello World, NetworkClient!</string>
    <string name="app_name">NetworkClient</string>
    <string name="connect_prompt">Start the client by pressing the connect button</string>
    <string name="send_prompt">Enter your message and press the send button</string>
    <string name="ip_address">IP Address</string>
    <string name="message_prompt">Say something...</string>
    <string name="device_ip">Device\'s IP Address: </string>
    <string name="server_ip">Server\'s IP Address: </string>
    <string name="connect">Connect</string>
    <string name="disconnect">Disconnect</string>
    <string name="send">Send</string>

</resources>
The Android SDK allows you to define certain artifacts, e.g. strings and UI components, in two ways. One is via a rich editor and the other is directly via XML. The following description uses the rich UI but for validation purposes also lists the XML. You can switch between them by clicking on the tabs on the lower part of the editor. Open "res/layout/main.xml" in the Package Explorer.
Add the first view (a TextView) to your LinearLayout from the “Palette” view. First, select Text Fields and locate “Plain Text” in the “Palette” view. Drag this object onto the main Linear Layout (orange section) to create our first text field.
In the Graphical Layout for main.xml, right-click on the TextView object then select Edit on the context menu to change the text to the connect_prompt string resource.
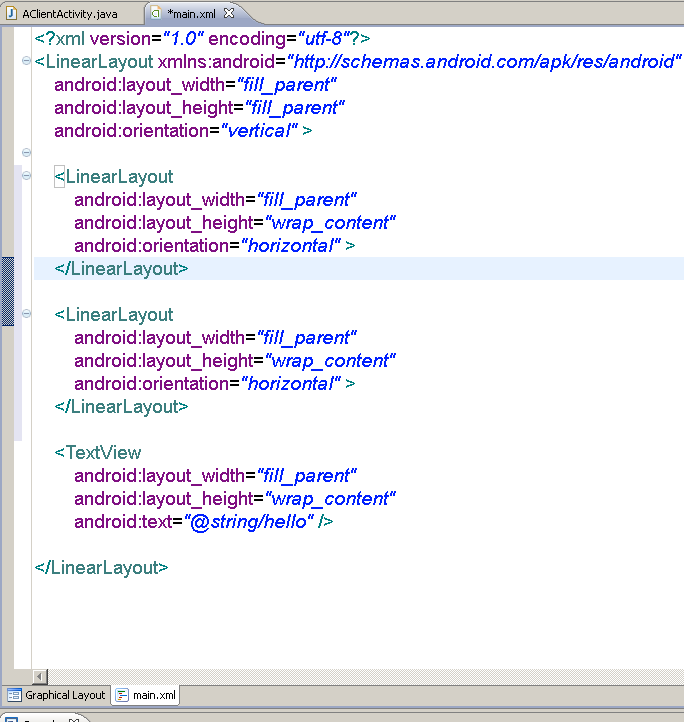
Now select the Palette “Layouts” section and drag 2 “Linear Layout (Horizontal)” objects onto the existing Linear Layout (above the TextView). Verify there are two LinearLayout views are there by selecting the main.xml tab at the bottom. The file will look as follows:
Select "res/layout/main.xml" and open the Android editor via a double-click. This editor allows you to create the UI via drag and drop or via the XML source code. You can switch between both representations via the tabs at the bottom of the editor. For changing the position and grouping elements you can use the outline view as well.
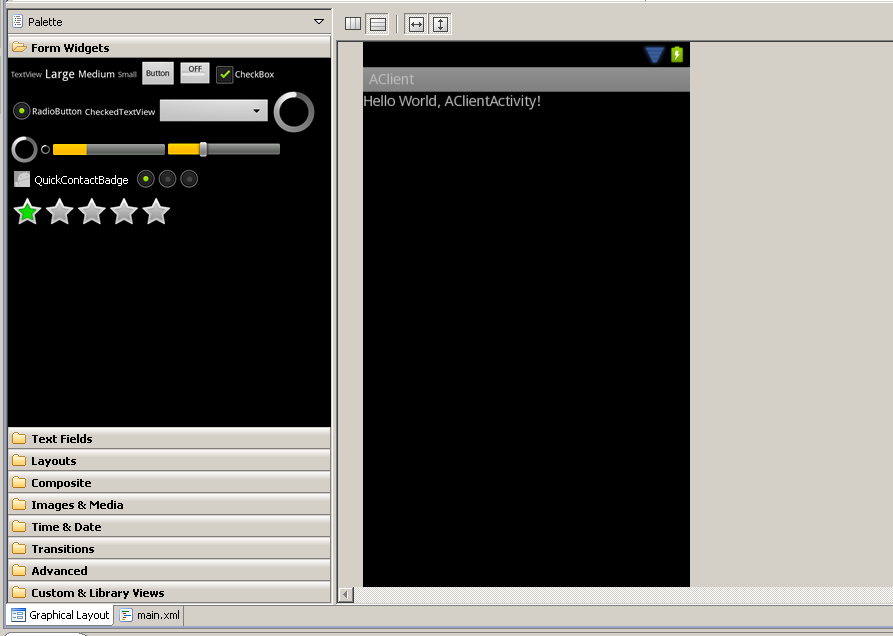
The following shows a screenshot of the Palette view from which you can drag and drop new UI elements into your layout. Please note that the "Palette" view changes frequently so your view of it might be a bit different.
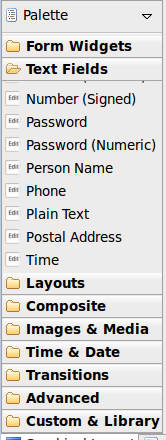
From the “Palette” view, select Text Fields and locate “Plain Text”. Drag this onto the first Linear Layout (orange section) to create a text input field. Next, from the “Palette” view, select Form Widgets and locate “Toggle Button”. Drag this onto the same Linear Layout (first orange section) to create a toggle button. Then, Right click on the Toggle button and select LayoutHeight and choose the Match Parent option.
Now click on the “Palette” view, select Text Fields and locate “Plain Text”. Drag this onto the second Linear Layout (orange section) to create a text input field. Next, from the “Palette” view, select Form Widgets and locate “Button”. Drag this onto the same Linear Layout (second orange section) to create a button.
The result should look like the following:
Switch to the "main.xml" view and verify that your XML looks like the following.
<?xml version="1.0" encoding="utf-8"?>
<LinearLayout xmlns:android="http://schemas.android.com/apk/res/android"
    android:layout_width="match_parent"
    android:layout_height="match_parent"
    android:orientation="vertical" >

    <LinearLayout
        android:id="@+id/linearLayout1"
        android:layout_width="match_parent"
        android:layout_height="wrap_content"
        android:orientation="horizontal" >

        <EditText
            android:layout_width="fill_parent"
            android:layout_height="wrap_content"
            android:layout_weight="1" >

            <requestFocus />
        </EditText>

        <ToggleButton
            android:layout_width="fill_parent"
            android:layout_height="match_parent"
            android:layout_weight="1" />
    </LinearLayout>

    <LinearLayout
        android:id="@+id/linearLayout2"
        android:layout_width="match_parent"
        android:layout_height="wrap_content" >

        <EditText
            android:layout_width="fill_parent"
            android:layout_height="wrap_content"
            android:layout_weight="1" />

        <Button
            android:layout_width="fill_parent"
            android:layout_height="wrap_content"
            android:layout_weight="1" />
    </LinearLayout>

    <TextView
        android:layout_width="fill_parent"
        android:layout_height="wrap_content"
        android:text="@string/hello" />

</LinearLayout>
If you select a UI element you can change its properties via the properties view. Most of the properties can be changed via the right mouse menu. You can also edit properties of fields directly in XML. Typically you change properties directly in the XML file as this is much faster. But the right mouse functionality is nice if you are searching for a specific property.
We will change the initial text for the ToggleButton to the connected string.xml connect resource. Right click on the ToggleButton view and select the Edit Text option, then set textOff as the connect string resource. Then set textOn as the disconnect string resource. We have now set the ToggleButton states to connect and disconnect when clicking the toggle button.
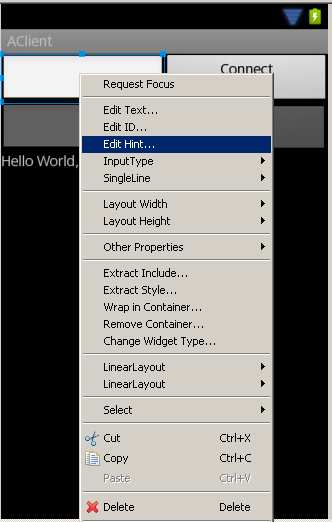
Now use the right mouse click on the first EditText object to assign the "ip_address" string attribute to its "Edit Hint" property. After clicking the view you will be presented with the string resource options, select the ip_address resources through the context menu.
Now set the "send" string attribute to the second Button.
From now on I assume you are able to use the properties menu on the UI elements, but you can also edit the XML file or modify the properties via right mouse click as well.
<?xml version="1.0" encoding="utf-8"?>
<LinearLayout xmlns:android="http://schemas.android.com/apk/res/android"
    android:layout_width="match_parent"
    android:layout_height="match_parent"
    android:orientation="vertical" >

    <LinearLayout
        android:id="@+id/linearLayout1"
        android:layout_width="match_parent"
        android:layout_height="wrap_content"
        android:orientation="horizontal" >

        <EditText
            android:id="@+id/ipBox"
            android:layout_width="fill_parent"
            android:layout_height="wrap_content"
            android:layout_weight="1"
            android:hint="@string/ip_address" >

            <requestFocus />
        </EditText>

        <ToggleButton
            android:id="@+id/connect"
            android:layout_width="fill_parent"
            android:layout_height="match_parent"
            android:layout_weight="1"
            android:textOn="@string/disconnected"
            android:textOff="@string/connected" />
    </LinearLayout>

    <LinearLayout
        android:id="@+id/linearLayout2"
        android:layout_width="match_parent"
        android:layout_height="wrap_content" >

        <EditText
            android:id="@+id/msgBox"
            android:layout_width="fill_parent"
            android:layout_height="wrap_content"
            android:enabled="false"
            android:layout_weight="1" />

        <Button
            android:id="@+id/send"
            android:layout_width="fill_parent"
            android:layout_height="wrap_content"
            android:enabled="false"
            android:layout_weight="1"
            android:text="@string/send" />
    </LinearLayout>

    <TextView
        android:id="@+id/text"
        android:layout_width="fill_parent"
        android:layout_height="wrap_content"
        android:text="@string/connect_prompt" />

</LinearLayout>
The most relevant pre-requisite you will need here is #3 Run sample implementation on Emulator, and the remaining sections help to familiarize with android projects in eclipse.
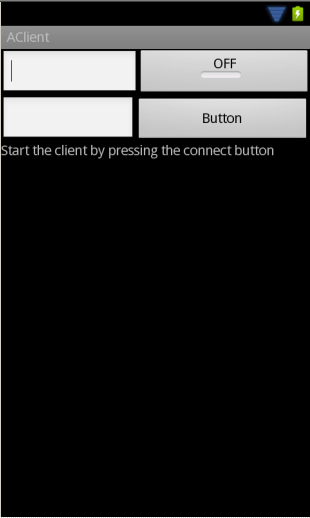
Select your project, right click on it, Run-As-> Android Application and be patient, because the emulator starts up very slowly. You should get the following result:
Using the setUpAllViews method allows for the assignment of all the UI object references in one place. The UI objects can be mapped to the views that were drug onto the main.xml file (e.g., TextView, EditText, ToggleButton and more).
package us.the.mac.networking;

import android.app.Activity;
import android.os.Bundle;
import android.view.View;
import android.widget.Button;
import android.widget.EditText;
import android.widget.TextView;
import android.widget.Toast;
import android.widget.ToggleButton;

public class NetworkClient extends Activity{

    // Used to reference UI elements of main.xml
    private TextView text;
    private EditText msgBox;
    private EditText ipBox;
    private ToggleButton connect;
    private Button send;

    /** Creates all UI Elements and reference them locally.*/
    private void setUpAllViews(int layout)
    {
        // layout serves as the reference id for main.xml
        setContentView(layout);

        text = (TextView) findViewById(R.id.text);
        msgBox = (EditText) findViewById(R.id.msgBox);
        ipBox =  (EditText) findViewById(R.id.ipBox);

        connect = (ToggleButton) findViewById(R.id.connect);
        send = (Button) findViewById(R.id.send);
    }

    /** Called when the activity is first created. */
    @Override
    public void onCreate(Bundle savedInstanceState) {
        super.onCreate(savedInstanceState);
        setUpAllViews(R.layout.main);
    }
}
The "implements OnClickListener", "connect.setOnClickListener" and "public void onClick" portions below allow for button interaction.
package us.the.mac.networking;

import android.app.Activity;
import android.os.Bundle;
import android.view.View;
import android.view.View.OnClickListener;
import android.widget.Button;
import android.widget.EditText;
import android.widget.TextView;
import android.widget.Toast;
import android.widget.ToggleButton;

public class NetworkClient extends Activity implements OnClickListener {

    // Used to reference UI elements of main.xml
    private TextView text;
    private EditText msgBox;
    private EditText ipBox;
    private ToggleButton connect;
    private Button send;

    /** Creates all UI Elements and reference them locally.*/
    private void setUpAllViews(int layout)
    {
        // layout serves as the reference id for main.xml
        setContentView(layout);

        text = (TextView) findViewById(R.id.text);
        msgBox = (EditText) findViewById(R.id.msgBox);
        ipBox =  (EditText) findViewById(R.id.ipBox);

        connect = (ToggleButton) findViewById(R.id.connect);
        send = (Button) findViewById(R.id.send);

        connect.setOnClickListener(this);
    }

    /** Called when the activity is first created. */
    @Override
    public void onCreate(Bundle savedInstanceState) {
        super.onCreate(savedInstanceState);
        setUpAllViews(R.layout.main);
    }

    /** Manages all button clicks from the screen */
    @Override
    public void onClick(View v) {
        Toast.makeText(this, ipBox.getText(), Toast.LENGTH_LONG).show();
    }
}
The most relevant pre-requisite is #3 Run sample implementation on Emulator, and the remaining sections help to familiarize with android projects in eclipse.
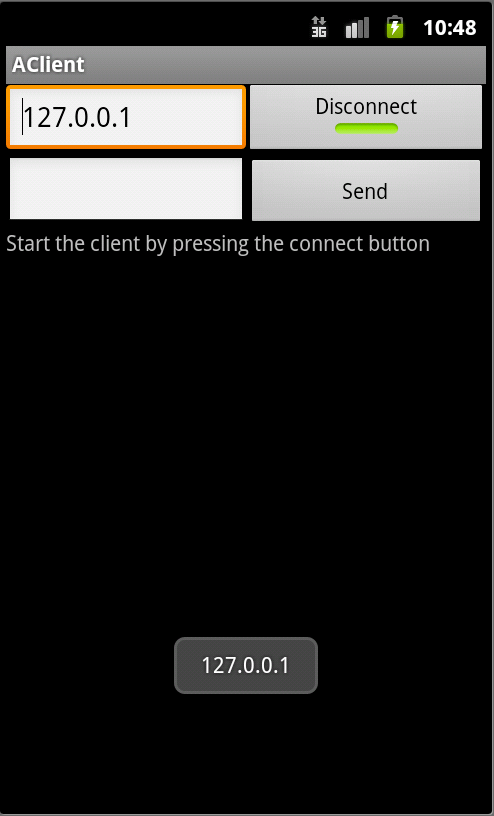
Select your project, right click on it, Run-As-> Android Application and be patient, because the emulator starts up very slowly. With the new changes you can now input anythting you like into the ipBox EditText. The Android Application will now allow you to click on the Connect Button and show the contents of the ipBox as a Toast (Pop-Up). You should get the result in following image:
Here is where you can do the same as Section 5.2, but with one added line of code in the main.xml file and no reference to an OnClickListener in Java code.
package us.the.mac.networking;

import android.app.Activity;
import android.os.Bundle;
import android.view.View;
import android.widget.Button;
import android.widget.EditText;
import android.widget.TextView;
import android.widget.Toast;
import android.widget.ToggleButton;

public class NetworkClient extends Activity{

    // Used to reference UI elements of main.xml
    private TextView text;
    private EditText msgBox;
    private EditText ipBox;
    private ToggleButton connect;
    private Button send;

    /** Creates all UI Elements and reference them locally.*/
    private void setUpAllViews(int layout)
    {
        // layout serves as the reference id for main.xml
        setContentView(layout);

        text = (TextView) findViewById(R.id.text);
        msgBox = (EditText) findViewById(R.id.msgBox);
        ipBox =  (EditText) findViewById(R.id.ipBox);

        connect = (ToggleButton) findViewById(R.id.connect);
        send = (Button) findViewById(R.id.send);

    }

    /** Called when the activity is first created. */
    @Override
    public void onCreate(Bundle savedInstanceState) {
        super.onCreate(savedInstanceState);
        setUpAllViews(R.layout.main);
    }

    /** Manages all button clicks from the screen */
    @Override
    public void onClick(View v) {
        Toast.makeText(this, ipBox.getText(), Toast.LENGTH_LONG).show();
    }
}
In the case of the onClick method in NetworkClient.java, if you use the main.xml file instead to reference the click you minimize the code from three added lines in NetworkClient to one added line in main.xml.
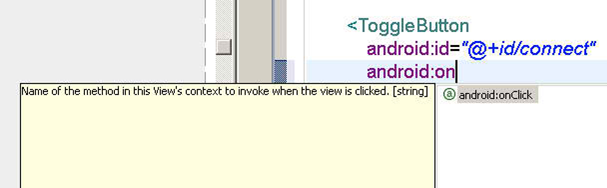
Here is main.xml file with the addition of the onClick property on the "connect" ToggleButton:
<?xml version="1.0" encoding="utf-8"?>
<LinearLayout xmlns:android="http://schemas.android.com/apk/res/android"
    android:layout_width="match_parent"
    android:layout_height="match_parent"
    android:orientation="vertical" >

    <LinearLayout
        android:id="@+id/linearLayout1"
        android:layout_width="match_parent"
        android:layout_height="wrap_content"
        android:orientation="horizontal" >

        <EditText
            android:id="@+id/ipBox"
            android:layout_width="fill_parent"
            android:layout_height="wrap_content"
            android:layout_weight="1"
            android:hint="@string/ip_address" >

            <requestFocus />
        </EditText>

        <ToggleButton
            android:id="@+id/connect"
            android:onClick="onClick"
            android:layout_width="fill_parent"
            android:layout_height="match_parent"
            android:layout_weight="1"
            android:textOn="@string/disconnected"
            android:textOff="@string/connected" />
    </LinearLayout>

    <LinearLayout
        android:id="@+id/linearLayout2"
        android:layout_width="match_parent"
        android:layout_height="wrap_content" >

        <EditText
            android:id="@+id/msgBox"
            android:layout_width="fill_parent"
            android:layout_height="wrap_content"
            android:enabled="false"
            android:layout_weight="1" />

        <Button
            android:id="@+id/send"
            android:layout_width="fill_parent"
            android:layout_height="wrap_content"
            android:enabled="false"
            android:layout_weight="1"
            android:text="@string/send" />
    </LinearLayout>

    <TextView
        android:id="@+id/text"
        android:layout_width="fill_parent"
        android:layout_height="wrap_content"
        android:text="@string/connect_prompt" />

</LinearLayout>
The most relevant pre-requisite is #3 Run sample implementation on Emulator, and the remaining sections help to familiarize with android projects in eclipse.
Select your project, right click on it, Run-As-> Android Application and be patient, because the emulator starts up very slowly. You should get the result in the following image:
Again, the Android Application will allow you to click on the Connect Button and show the IP Address entered with a Toast (Pop-Up).
Adding the following two methods enhances your application, resulting in more control of app UI states (and cleaner code for beginner Android Developers to use).
 /** References all views that have text changes (e.g, text.setText("some text")).
 * @param view the id for the view to be changed
 * @param content the data to be sent to the view
 **/
 private void setText(int view, String content)
 {
     switch(view)
    {
        case R.id.ipBox: ipBox.setText(content); break;
        case R.id.msgBox: msgBox.setText(content); break;
        case R.id.text: text.setText(content+"\n\n"); break;
        case appendText: text.append(content+"\n\n"); break;
        case msgBoxHint: msgBox.setHint(content); break;
    }
 }

 /**
 * References all views that have boolean changes (e.g, ipBox.setEnabled(true)).
 * @param view the id for the view to be changed
 * @param value the boolean value to be sent to the view
 **/
 private void setValues(int view, boolean value)
 {
    switch(view)
    {
        case R.id.ipBox: ipBox.setEnabled(value); break;
        case R.id.msgBox: msgBox.setEnabled(value); break;
        case R.id.send: send.setEnabled(value); break;
        case R.id.connect: connect.setChecked(value); break;
    }
 }
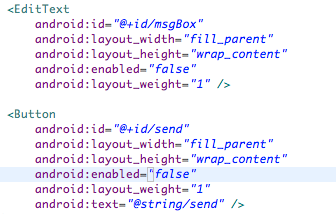
To complete the UI design, you will need to set the msgBox EditText and send Button enabled properties to false. This allows the sending of a message when connected, but excludes errors of when not connected.
The following methods are to be added to the NetworkClient.java file to allow for Wifi Network connectivity.
The WifiManager object retrieves the IP Address for the current Wifi connection.
private String getLocalIpAddress() {

    WifiManager wifi = (WifiManager) getSystemService(Context.WIFI_SERVICE);

    // Get WiFi status
    WifiInfo info = wifi.getConnectionInfo();

    return Formatter.formatIpAddress(info.getIpAddress());
}
The Input and Output set up method needed to send data to the Server.
private void setUpIOStreams() throws IOException
{
    InetAddress addr = InetAddress.getByName(
        ipBox.getText().toString());

    client = new Socket(addr, 8888);

    outToServer = new DataOutputStream(
        client.getOutputStream());

    inFromServer = new BufferedReader(
        new InputStreamReader(
            client.getInputStream()));
}
This serves as an on switch to the server connection. The methods setText and setValues are used here to set up the application's connected state.
private void enableConnection()
{
    try {
        setUpIOStreams();
        String ip = client.getInetAddress().toString();

        setText(R.id.text,"Device's IP Address: " + ipAddress);
        setText(appendText,"Server's IP Address: " + ip.substring(1));
        setText(msgBoxHint, "Say something...");
        setText(appendText, "Enter your message then press the send button");

        setValues(R.id.connect,true);
        setValues(R.id.send,true);
        setValues(R.id.ipBox,false);
        setValues(R.id.msgBox,true);
    } catch (IOException e) {

        setValues(R.id.connect,false);
        Toast.makeText(this, e.toString(), Toast.LENGTH_LONG).show();
    }

}
This serves as an off switch to the server connection. The methods setText and setValues are used here to set up the application's disconnected state.
private void disableConnection()
{
    if(client != null)
    {
        try {
            client.close();
        } catch (IOException e) {
            Toast.makeText(this, e.toString(), Toast.LENGTH_LONG).show();
        }

        setText(R.id.text,"Press the connect button to start the client");
        setText(R.id.msgBox,"");
        setText(msgBoxHint,"");

        setValues(R.id.connect,false);
        setValues(R.id.ipBox,true);
        setValues(R.id.msgBox,false);
        setValues(R.id.send,false);
    }
    else
    {
        setValues(R.id.connect,false);
    }
}
The DataOutputStream object (outToServer) sends messages. The BufferedReader object (inFromServer) reads in a line from the server connection. The methods setText and setValues are used here to set up the application's sending state, which resets to the disconnected state if the app is not able to send.
private void sendDataOverConnection()
{
    String sentence = msgBox.getText().toString() + "\n";
    setText(R.id.msgBox, "");
    try {
        if(client.isClosed()) setUpIOStreams();

        outToServer.writeBytes(sentence);
        String modifiedSentence = inFromServer.readLine();

        sentence = ("OUT TO SERVER: " + sentence);
        sentence += "\n" +("IN FROM SERVER: " + modifiedSentence);
        client.close();

    } catch (IOException e) {
        Toast.makeText(this, e.toString(), Toast.LENGTH_LONG).show();

        setValues(R.id.ipBox,true);
        setValues(R.id.connect,false);
        setValues(R.id.send,false);
        setValues(R.id.msgBox,false);
    }
    setText(appendText, sentence);
}
The following method allows the user to manage the UI/Connection states for the NetworkClient.
When the user clicks the connect button it toggles between the enableConnection and disableConnection methods, and when the user is able to send a message it calls to the sendDataOverConnection method.
public void onClick(View v)
{
    switch(v.getId())
    {
        case R.id.connect:
            if(connect.isChecked())
                enableConnection();
            else
                disableConnection();
            break;
        case R.id.send:
            sendDataOverConnection();
            break;
    }
}
The following two lines need to be added to the Android Manifest (as children to the manifest tag) in order to acquire Wifi config states and any network (Wifi or otherwise).
<uses-permission android:name="android.permission.INTERNET" />
<uses-permission android:name="android.permission.ACCESS_WIFI_STATE" />
7.2 Follow HowTo Build a Java Server Application (in Eclipse)
Note: With this guide you can learn the basics of how to run Java TCP Server projects and some other nifty features. The Server is also written in Java source, but runs on a regular Java Virtual Machine (JVM) instead of Android's Dalvik Virtual Machine. This TCP Server implementation has the following features:
- Initializes the ServerSocket on port 8888, and retrieves the Server's IP Address.
- Calls the accept() method and waits for the client to connect to the socket.
- Retrieves the socket's input/output streams and opens a reader/writer on them.
- Communicates using the I/O Streams via client by reading/writing from/to socket.
7.3 Follow HowTo Run sample implementation on Actual Device
Note: With this guide you can learn the basics of how to run Android Eclipse projects and some other nifty features.
The most relevant section is #4.2 Run API Demos sample on Device, and the remaining sections help to familiarize with android and eclipse.
The Client App is ready for a device, so we can go to the "Run" Menu (or right click in Package Explorer) to run the application.
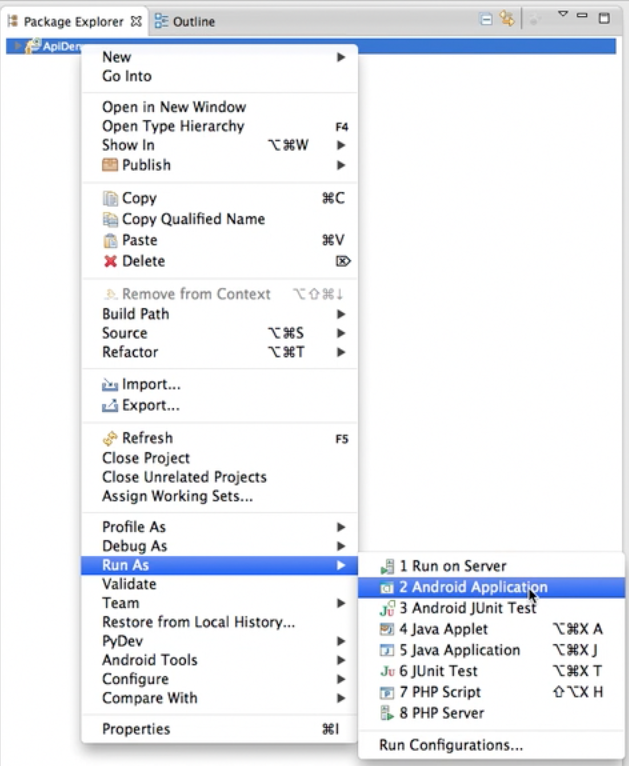
Now Right Click project for "Context Menu" -> "Run As" -> "Android Application"
The Client Application running on the device will look as follows:
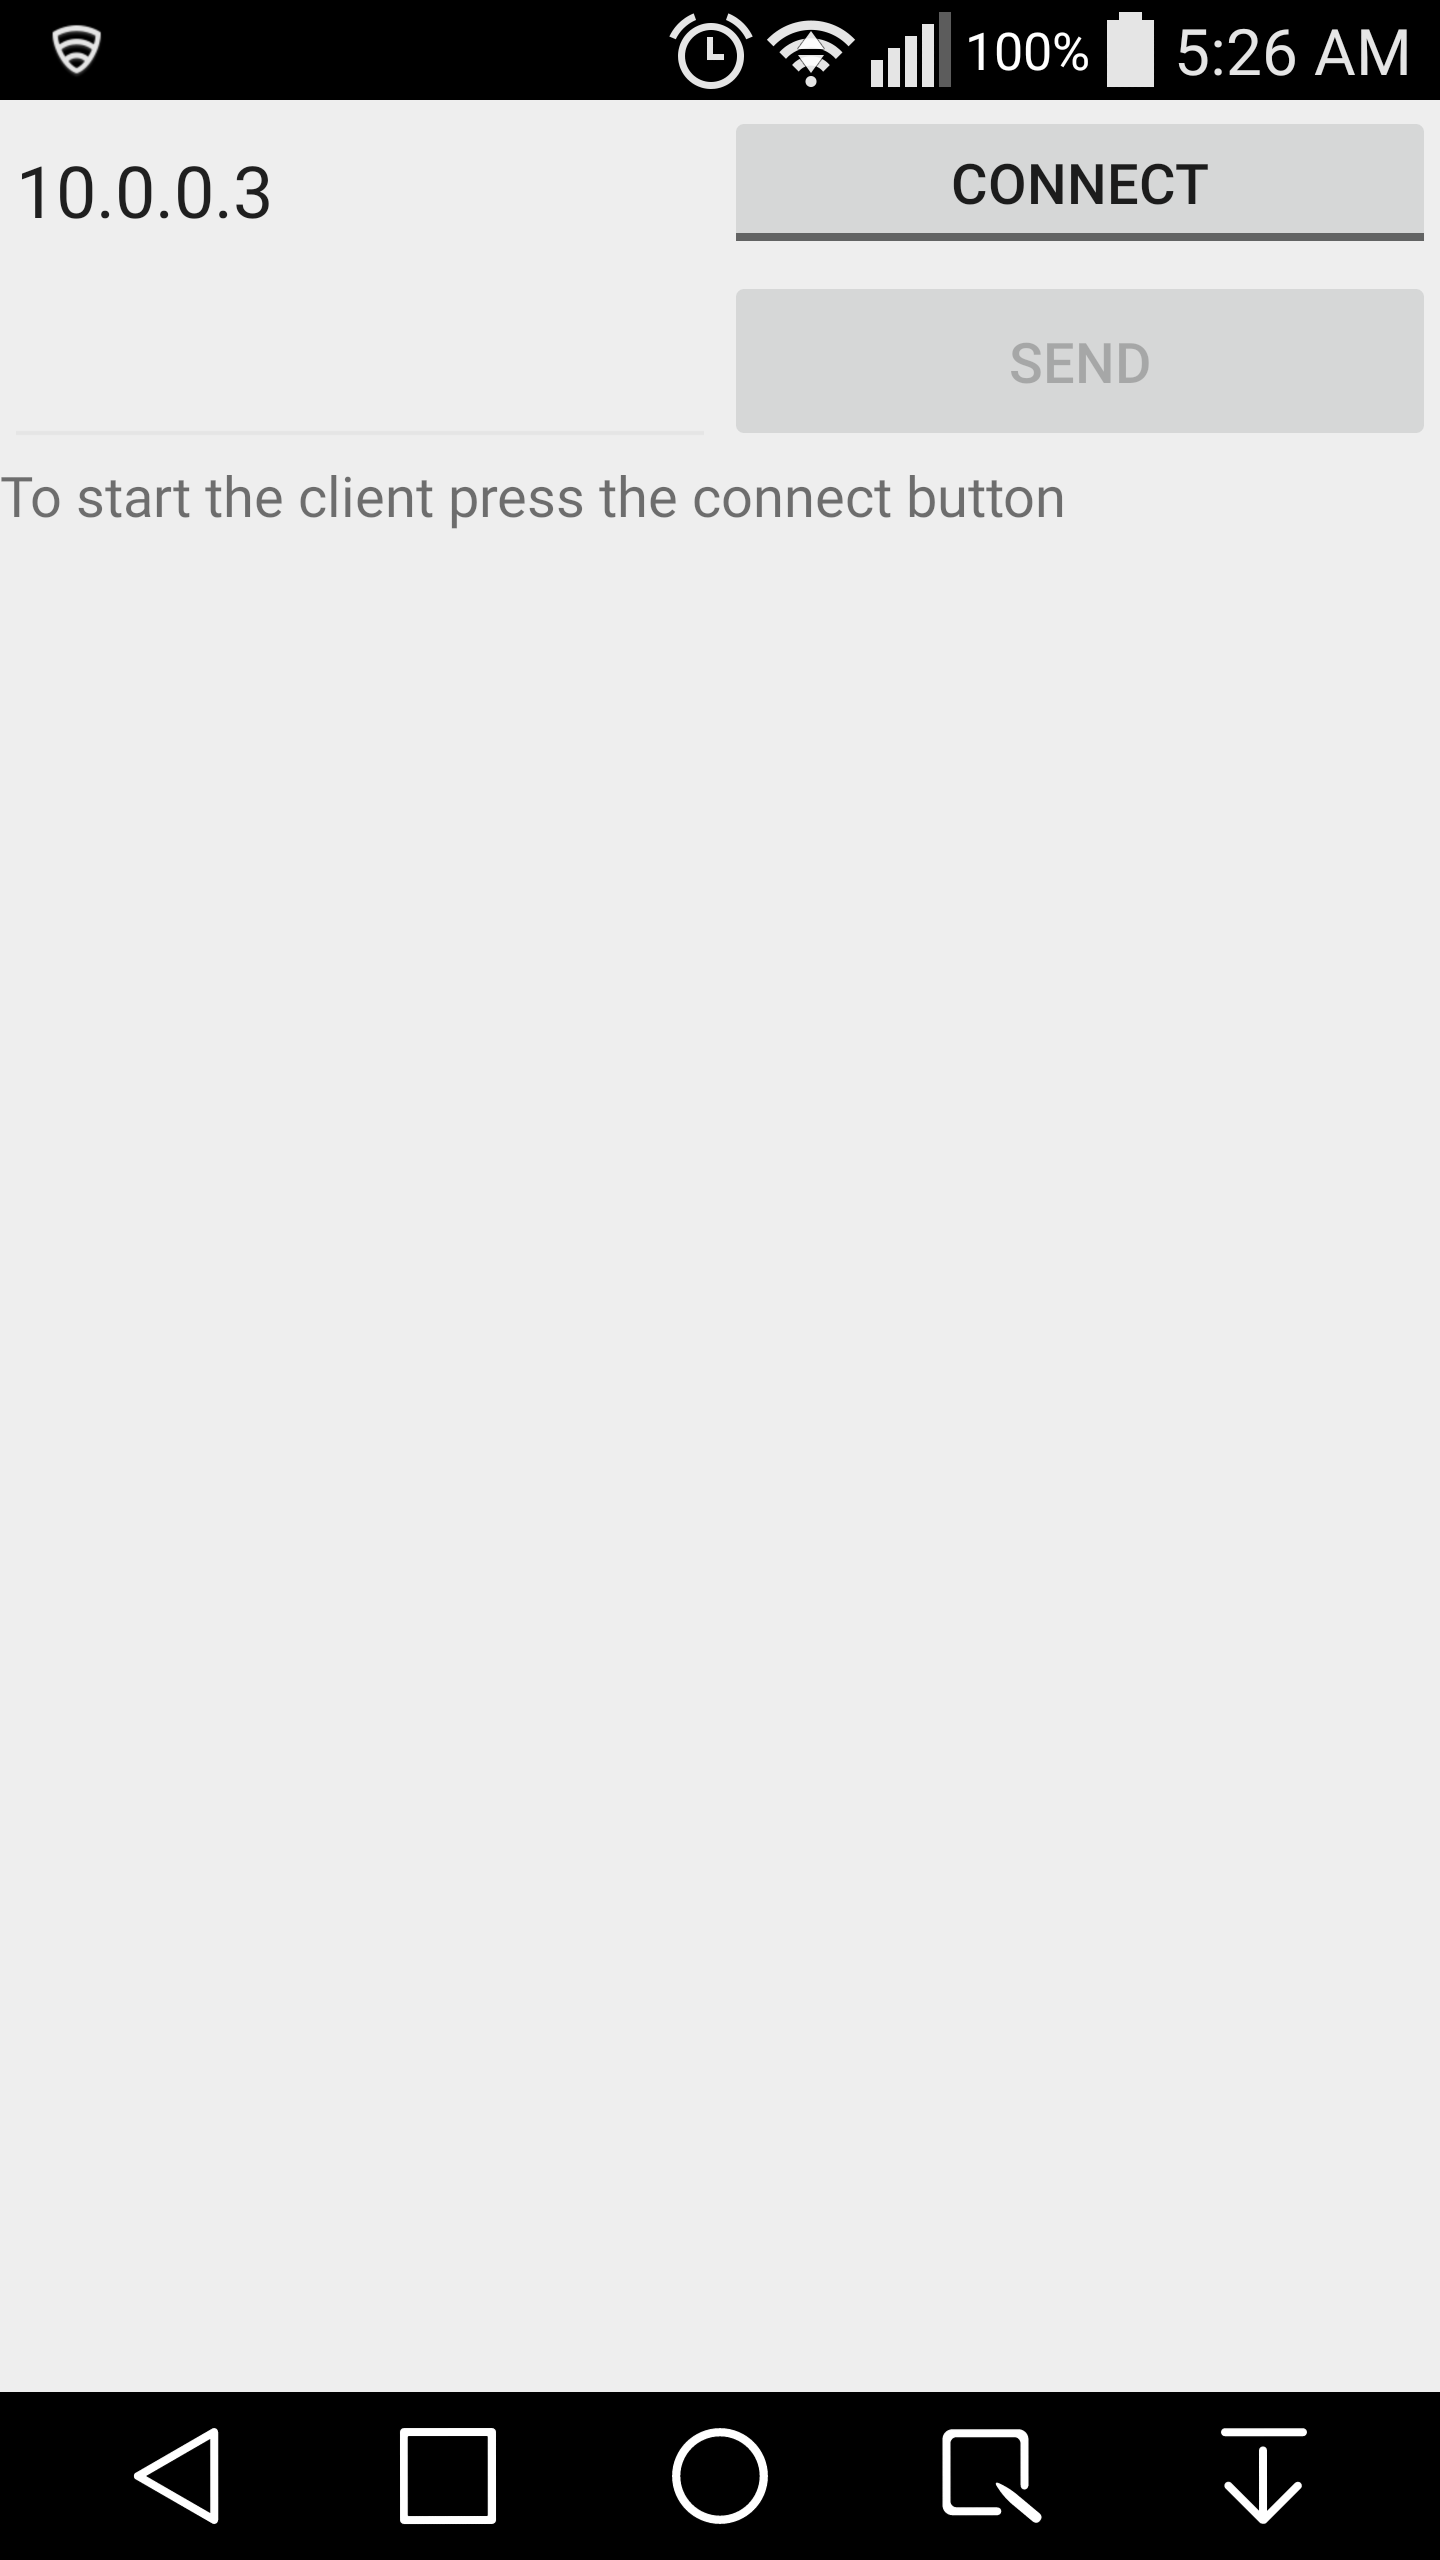
Note: The IP Address that shows in the ipBox after starting the client is the client's IP Address. With both the Client and Server on the same Wifi Network the IP Address prefix (i.e, 192.168.5.* OR 10.0.0.*) will be the same.
To complete the Client/Server guide follow HowTo Build a Java Server Application (in Eclipse)
Once again, the source code for this project can be found here.