iOS Swift Network (Xcode) HowTo
The version of iOS used in this guide is 7 (Runs on iPhone 4s, 5 and 6). The Server that the iOS Swift Client application will connect to will be written in plain Java.
Prerequisites for this guide are HowTo:
- Build a Swift Application (in Xcode)
- Build an iOS Application (in Xcode)
- Design in Interface Builder (in Xcode)
In this guide, you will be covering the following topics:
- Set Up iOS Project
- Set up the Front End (UI Configuration)
- Complete Front End (Control View States)
- Complete Back End (Network Configuration)
- Run Client application with Wifi Server
The source code for this project can be found here.
The guide concludes with an iOS Swift Client that connects to a Java Server's TCP connection (ServerSocket).
Disclaimer: There are Screenshots in this guide left for legacy purposes, that include Objective-C references. This should not be a problem because the needed source code (for copying) is available in Swift syntax.
1.1 Follow HowTo Build an Swift Application (in Xcode)
Note: With this guide you can learn the basics of how to work with Xcode projects and some of its nifty features.
The most relevant section is #1 Download, Install and Open an Xcode 6.1.1+ Version, and the remaining sections help to familiarize with Xcode.
Once you can execute the Xcode 6.1.1+ file, it will prompt you to create/select a project.
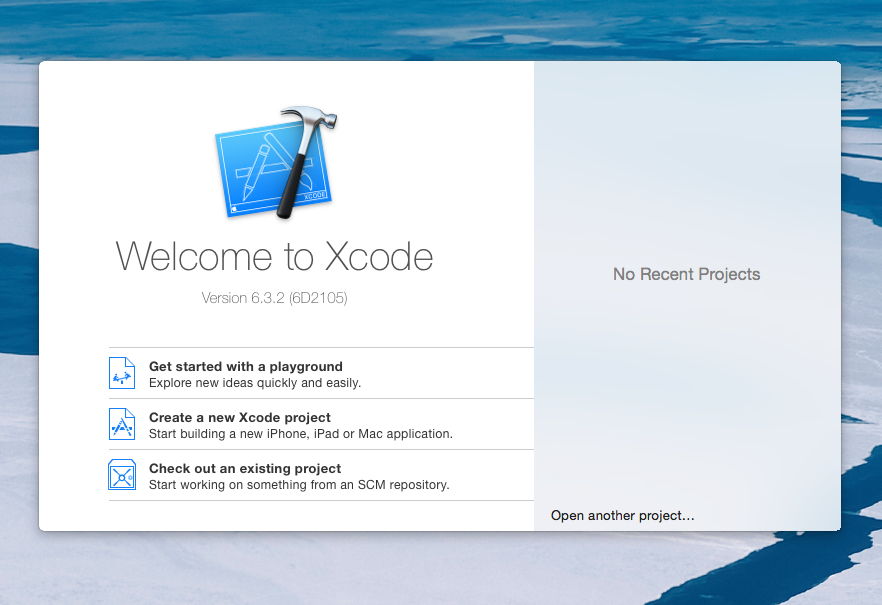
Select the "Create a new Xcode Project" option. Then select under the iOS section "Application", next select "Single View Application".
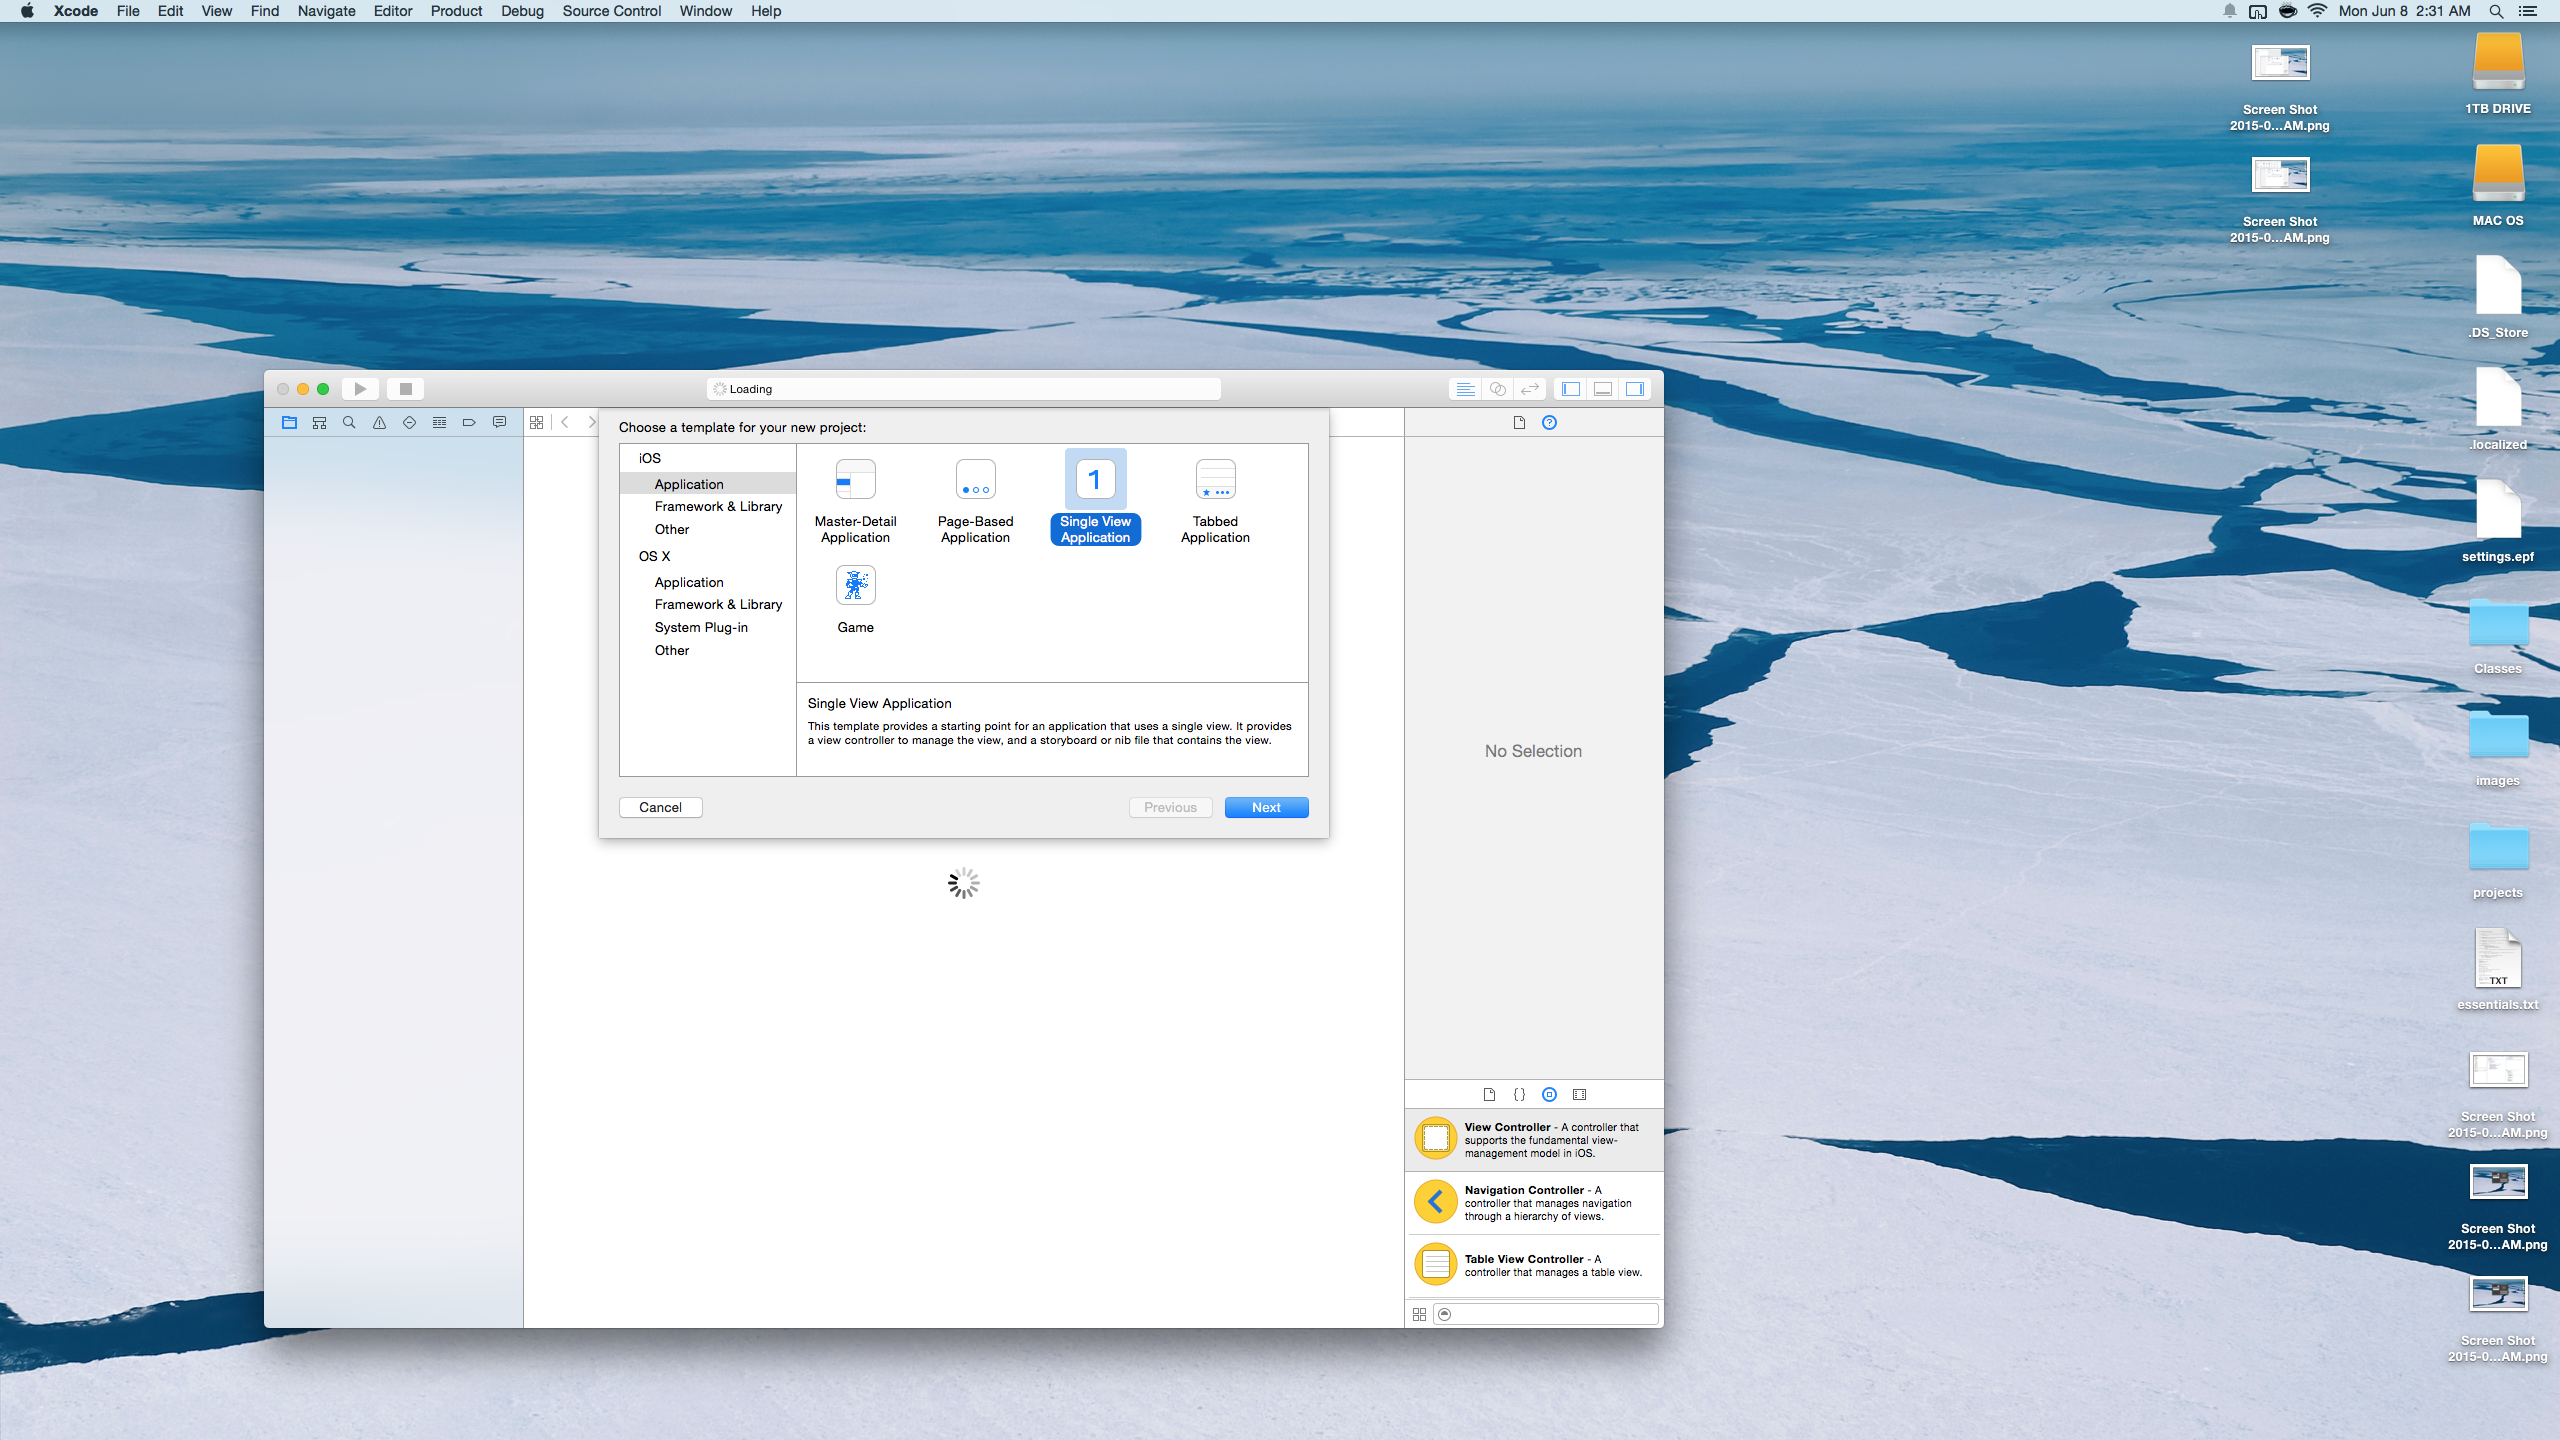
Finally provide an App Name of "iOS Swift Client" in the box labeled Product Name and ensure the Language selected is "Swift" and the Devices set to Universal.
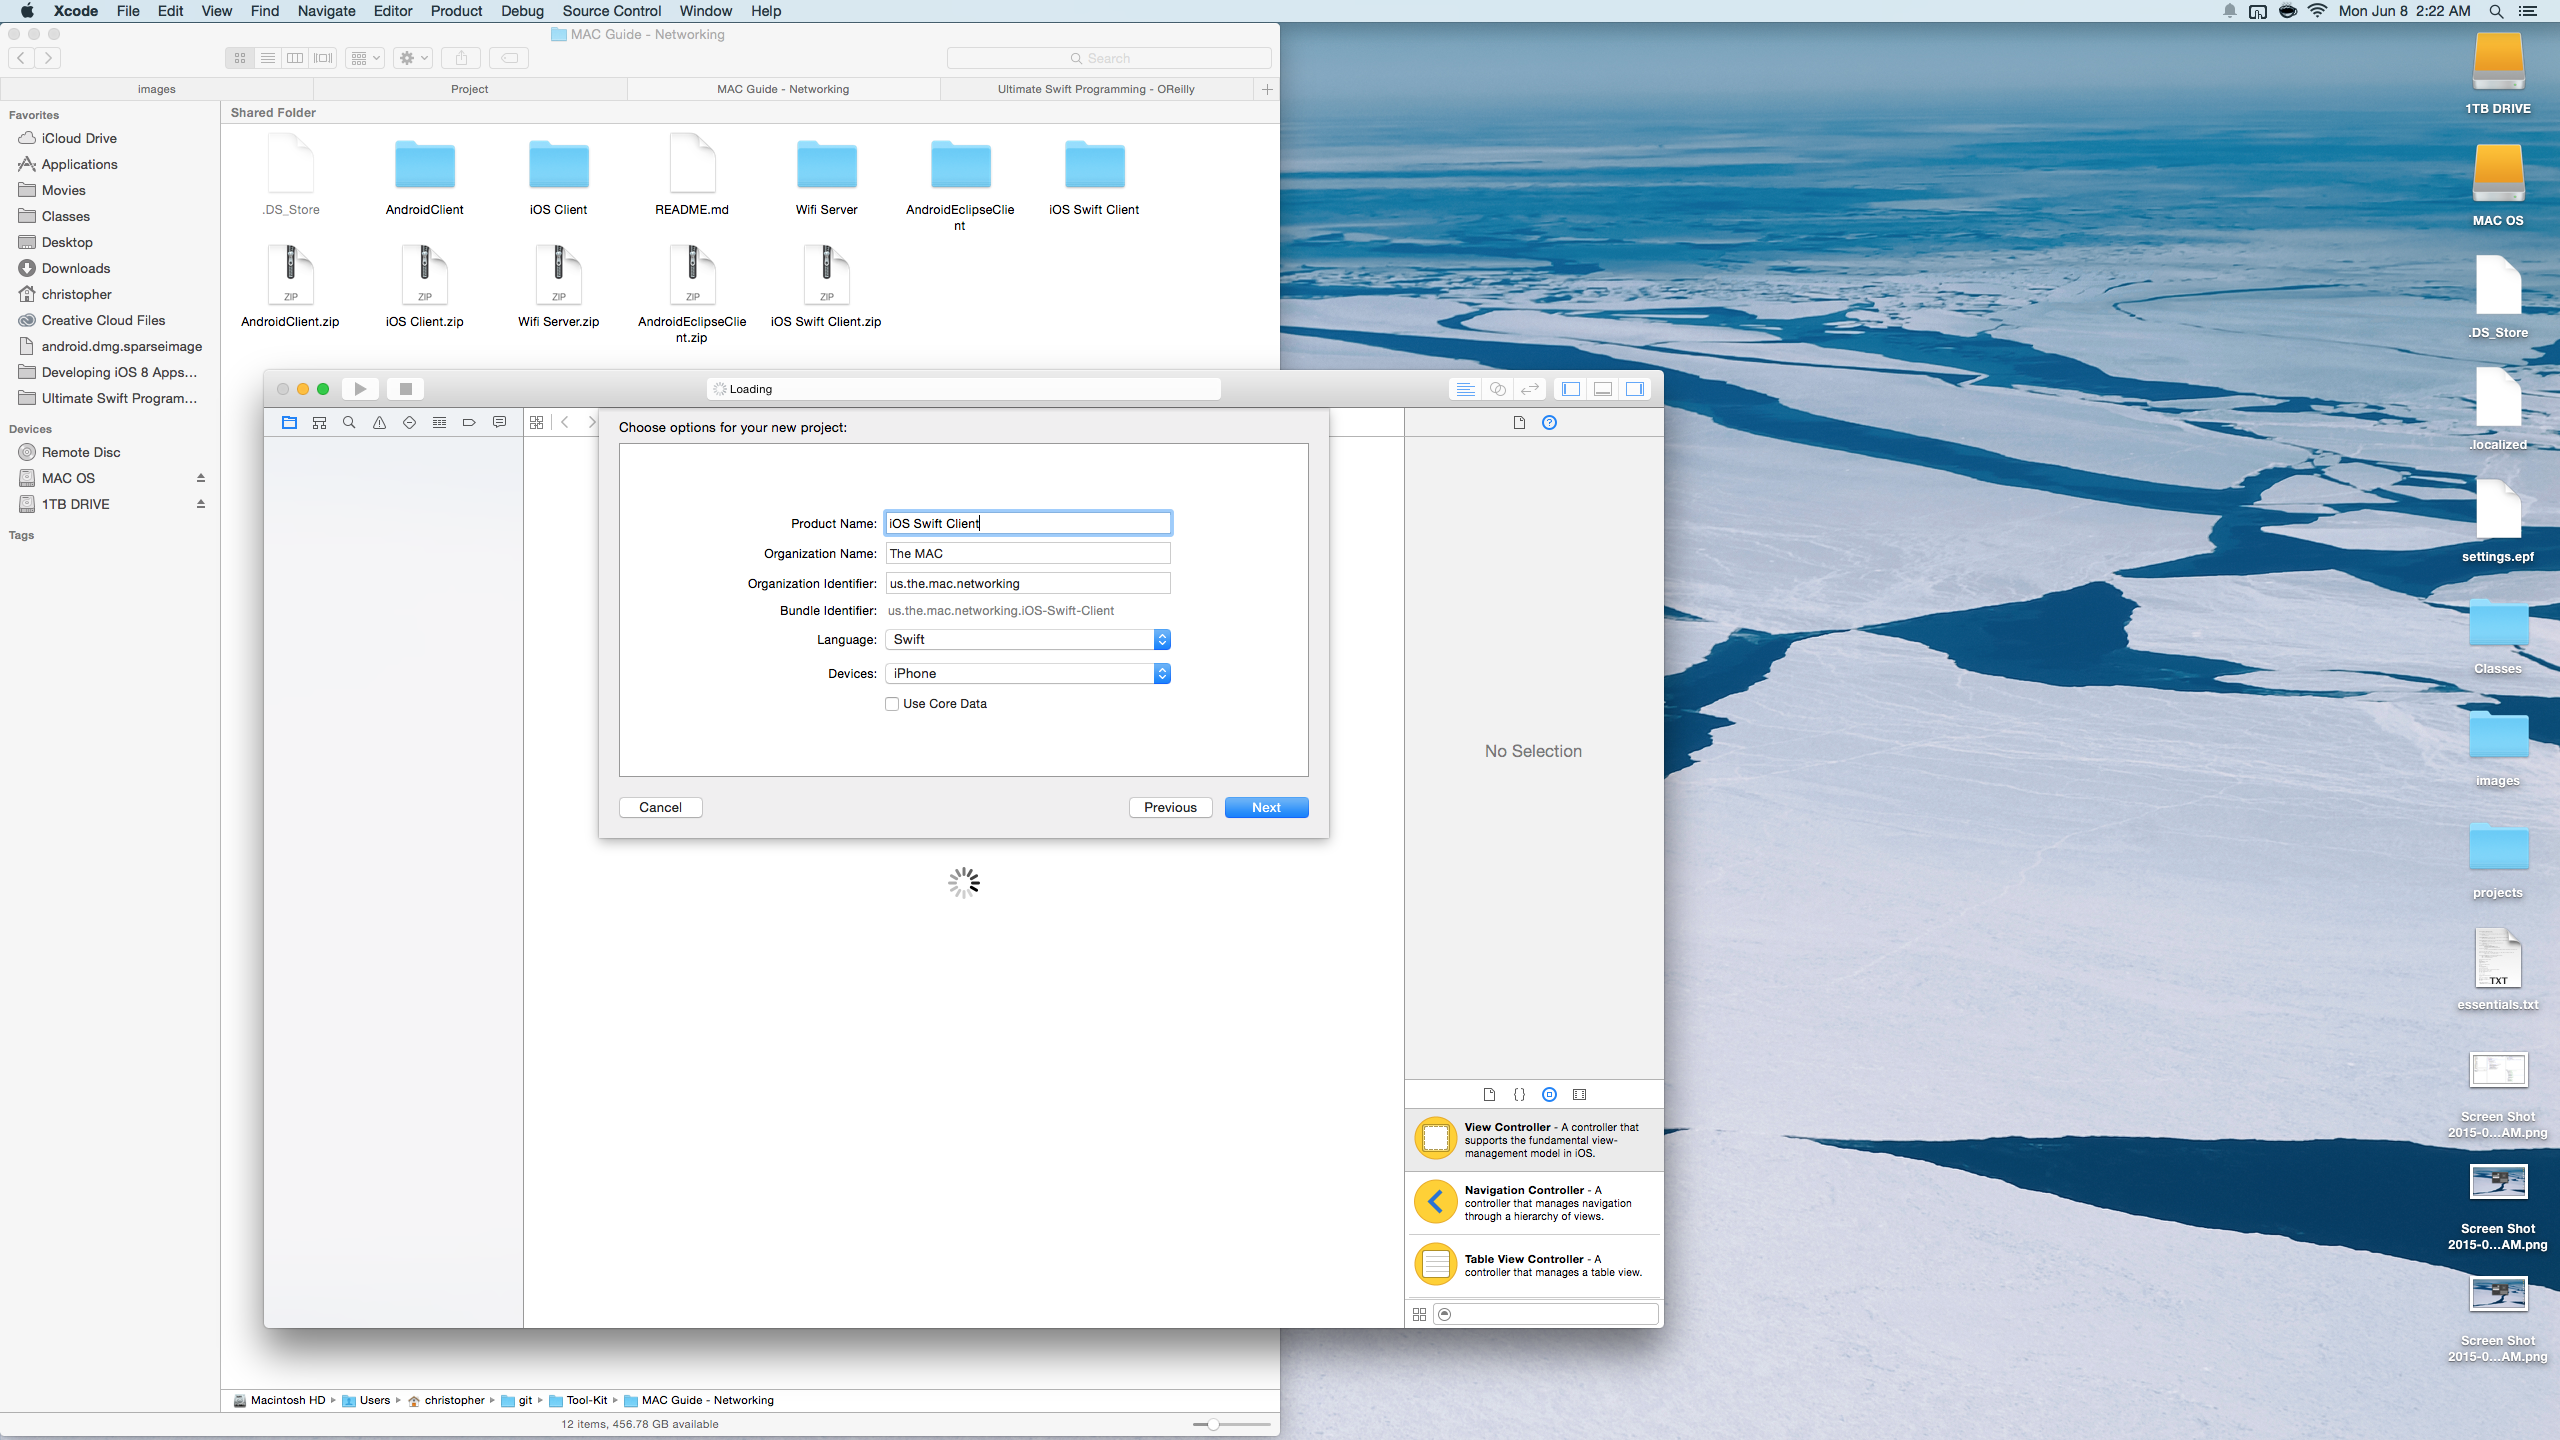
Click Next to move on to selecting a location for the Application source code.
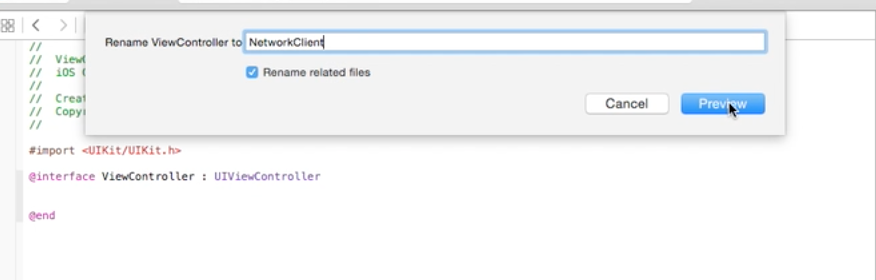
Rename the "ViewController" file to "NetworkClient", by right clicking on the class name "ViewController" inside of "ViewController.swift" and select the Refactor -> Rename option.
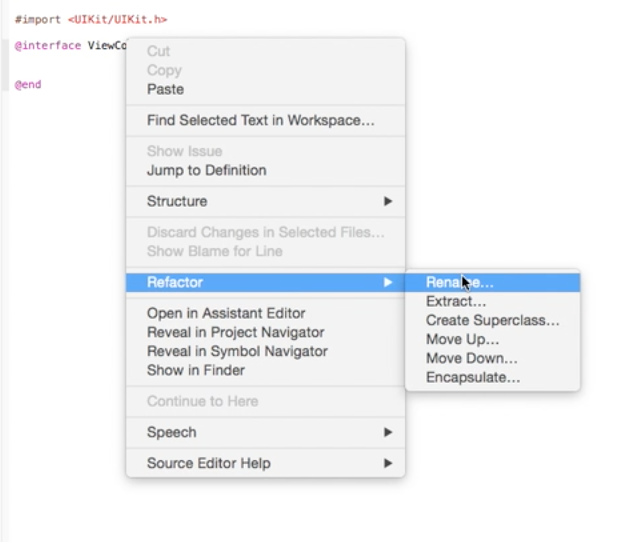
It will prompt you that you will be changing the related files names as well.
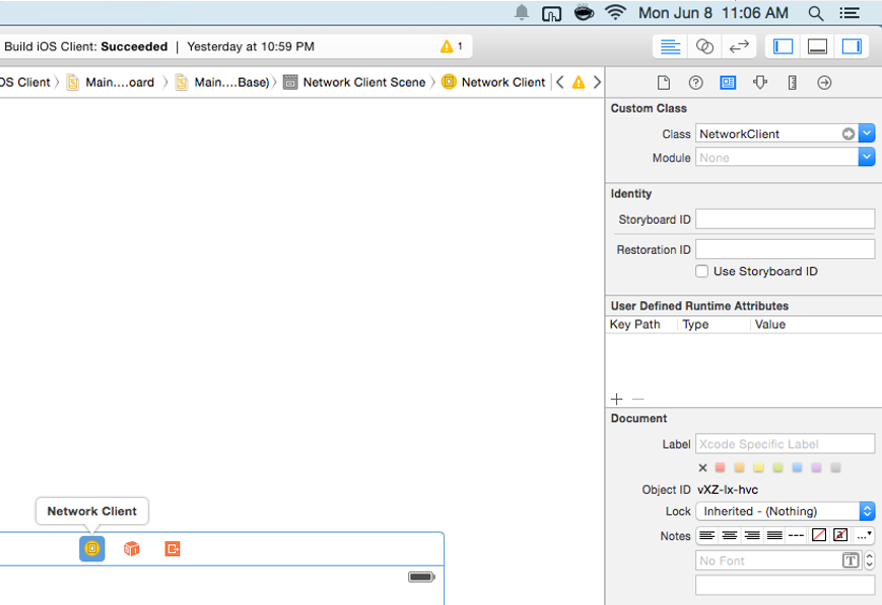
Verify that the Story Board has a reference to the UIViewController class named "NetworkClient" in the File Inspector on the right.
Next create a new file by right clicking on the "iOS Swift Client" Folder/Group.
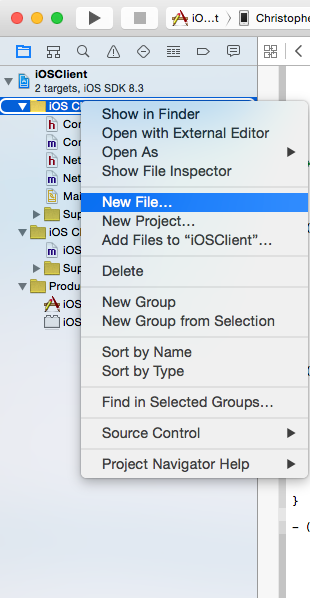
Select "Header File" as the type.
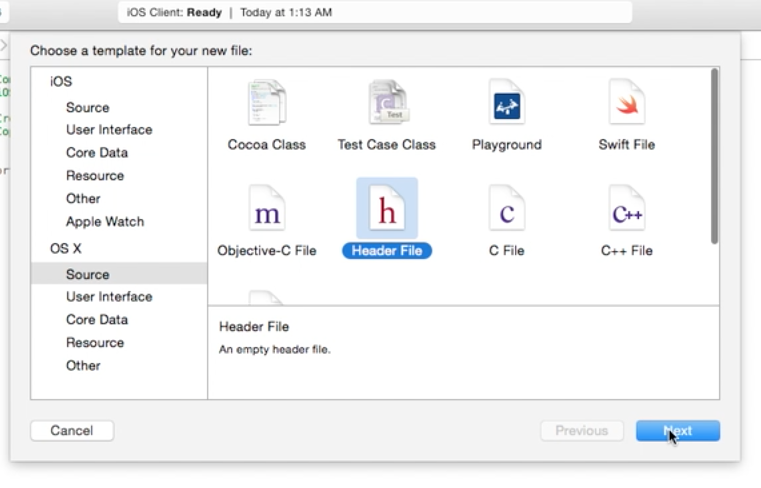
Name that file "Communicator.h" and inside of the file paste the contents below:
#ifndef iOS_Swift_Client_Communicator_h
#define iOS_Swift_Client_Communicator_h

#import <Foundation/Foundation.h>
#include <ifaddrs.h>
#include <arpa/inet.h>

@class NetworkClient;
@interface Communicator : NSObject <NSStreamDelegate>

@property (nonatomic, retain) NSString* host;
@property (nonatomic) int port;
@property (nonatomic) BOOL connected;

+ (NSString *)getLocalIpAddress;
- (void)setup:(NetworkClient*) client;
- (void)open;
- (void)close;
- (void)stream:(NSStream *)stream handleEvent:(NSStreamEvent)event;
- (NSString *) readIn;
- (void)writeOut:(NSString *)s;

@end

#endif
Next create another file by right clicking on the "iOS Swift Client" Folder/Group.
Select "Objective-C File" as the type.
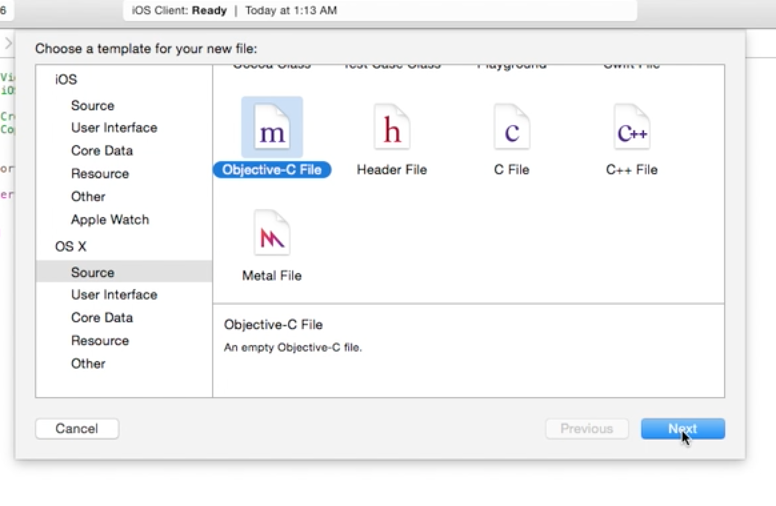
Name that file "Communicator.m", and the following prompt will be displayed to connect your Objective-C code to the Swift project:
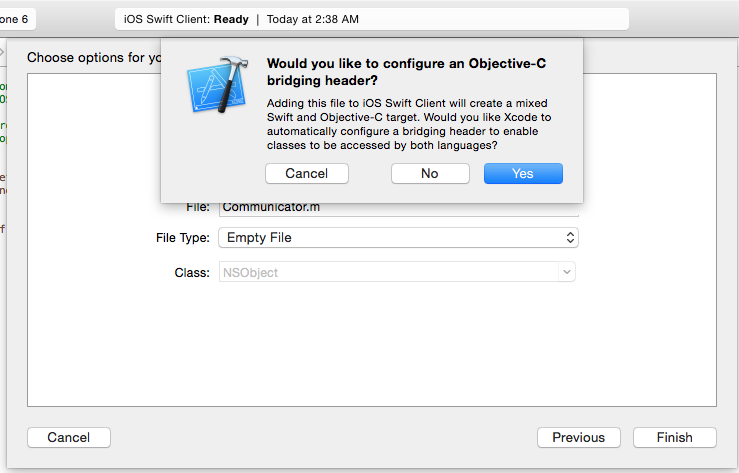
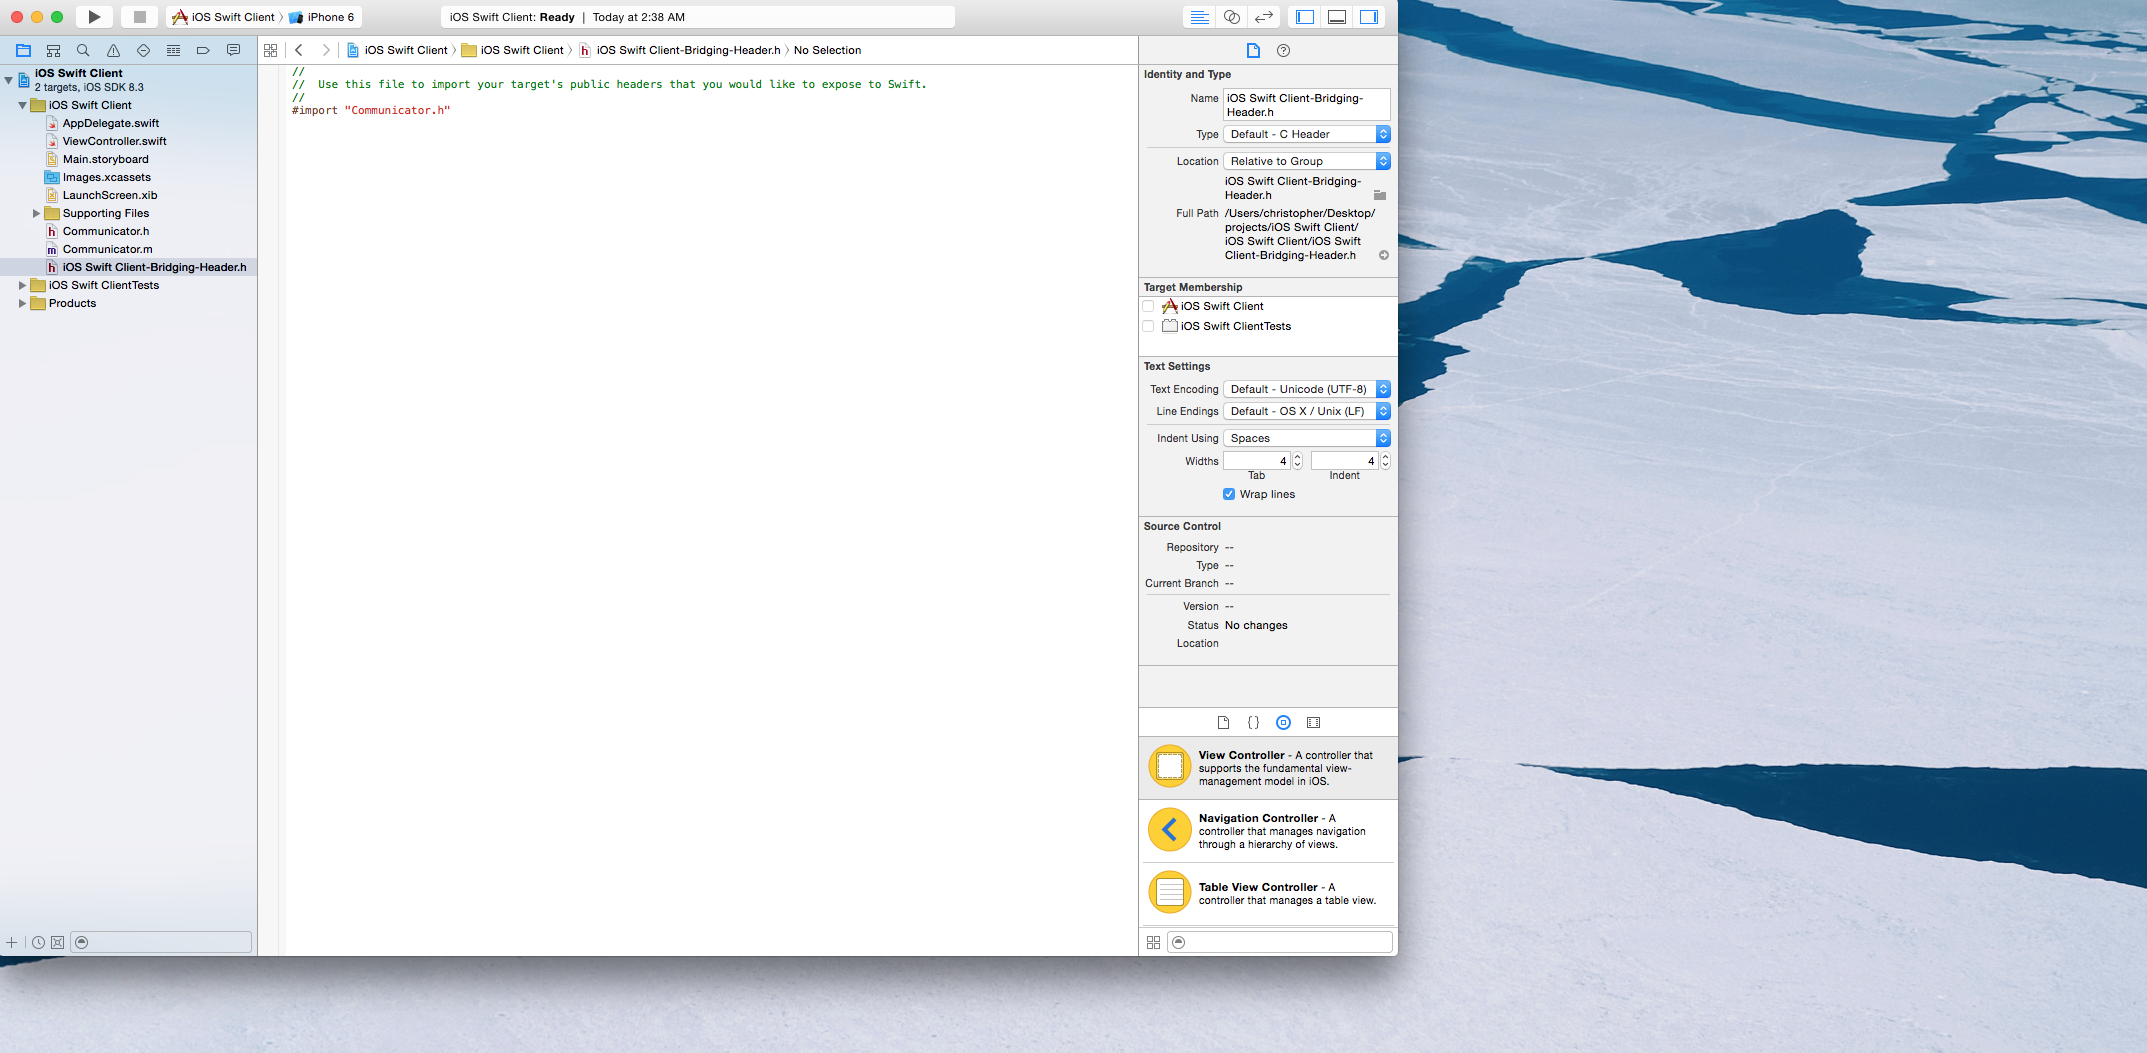
Note: Pressing Yes at this prompt generates a "iOS Swift Client-Bridging-Header.h" file, and we’ll need to edit this file to expose our Objective-C code to our Swift code.
Note: The imported Objective-C functionality will be available in any Swift file within that target automatically, without any import statements. Use your custom Objective-C code with the same Swift syntax you use with system classes.
Once the bridge has been completed, we can go inside of the Communicator.m file and paste the contents below:
#import <Foundation/Foundation.h>
#import "Communicator.h"
#import "iOS_Swift_Client-Swift.h"

CFReadStreamRef readStream;
CFWriteStreamRef writeStream;

NSInputStream *inputStream;
NSOutputStream *outputStream;
NetworkClient *networkClient;

@implementation Communicator


+ (NSString *)getLocalIpAddress {

    NSString *address = @"error";
    struct ifaddrs *interfaces = NULL;
    struct ifaddrs *temp_addr = NULL;
    int success = 0;
    // retrieve the current interfaces - returns 0 on success
    success = getifaddrs(&interfaces);
    if (success == 0) {
        // Loop through linked list of interfaces
        temp_addr = interfaces;
        while(temp_addr != NULL) {
            if(temp_addr->ifa_addr->sa_family == AF_INET) {
                // Check if interface is en0 which is the wifi connection on the iPhone
                if([[NSString stringWithUTF8String:temp_addr->ifa_name] isEqualToString:@"en0"]) {
                    // Get NSString from C String
                    address = [NSString stringWithUTF8String:inet_ntoa(((struct sockaddr_in *)temp_addr->ifa_addr)->sin_addr)];

                }

            }

            temp_addr = temp_addr->ifa_next;
        }
    }
    // Free memory
    freeifaddrs(interfaces);
    return address;

}

- (void)setup :(NetworkClient*) client {
    self.connected = NO;
    networkClient = client;
    NSURL *url = [NSURL URLWithString:self.host];

    CFStreamCreatePairWithSocketToHost(kCFAllocatorDefault, (__bridge CFStringRef)[url host], self.port, &readStream, &writeStream);

    if(!CFWriteStreamOpen(writeStream)) {

        return;
    }

    if(!CFReadStreamOpen(readStream)) {

        return;
    }

    [self open];
}

- (void)open {

    inputStream = (__bridge NSInputStream *)readStream;
    outputStream = (__bridge NSOutputStream *)writeStream;

    [outputStream setDelegate:self];

    [outputStream scheduleInRunLoop:[NSRunLoop currentRunLoop] forMode:NSDefaultRunLoopMode];

    [inputStream open];
    [outputStream open];
    self.connected = YES;
}

- (void)close {
    self.connected = NO;

    [inputStream close];
    [outputStream close];

    [outputStream removeFromRunLoop:[NSRunLoop currentRunLoop] forMode:NSDefaultRunLoopMode];

    [inputStream setDelegate:nil];
    [outputStream setDelegate:nil];

    inputStream = nil;
    outputStream = nil;
}

- (void)stream:(NSStream *)stream handleEvent:(NSStreamEvent)event {

    switch(event) {
        case NSStreamEventHasSpaceAvailable: {
            if(stream == outputStream) {
                NSLog(@"outputStream is ready.\n\n");
            }

            break;
        }
        default: {
            NSLog(@"Stream is sending an Event: %i", event);
            if(event == NSStreamEventErrorOccurred) {
                self.connected = NO;
                [networkClient disableConnection];
            }
            break;
        }
    }
}

- (void)writeOut:(NSString *)s {
    NSString * output = [NSString stringWithFormat:@"%@\r\n",s];
    uint8_t *buf = (uint8_t *)[output UTF8String];

    [outputStream write:buf maxLength:strlen((char *)buf)];
}

- (NSString *) readIn {

    int len;
    uint8_t buffer[1024];
    NSMutableString *total = [[NSMutableString alloc] init];
    while (![inputStream hasBytesAvailable]) {}
    [NSThread sleepForTimeInterval:0.1f];
    while ([inputStream hasBytesAvailable]) {
        len = [inputStream read:buffer maxLength:sizeof(buffer)];
        if (len > 0) {
            [total appendString: [[NSString alloc] initWithBytes:buffer length:len encoding:NSASCIIStringEncoding]];
        }
    }

    [self close];

    return total;
}

@end
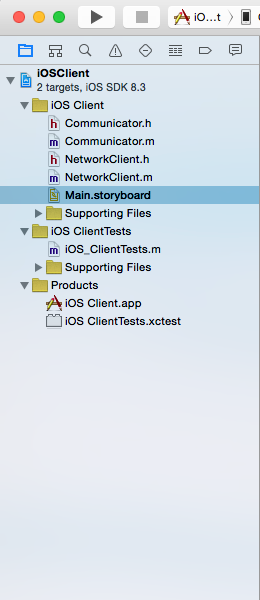
These changes will provide the following directory structure:
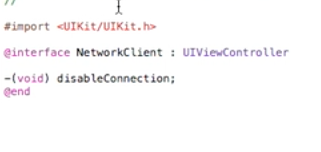
Note: After adding the file above, you will need to add a reference to "disableConnection" inside NetworkClient.swift (as a method declaration).
1.5 Follow HowTo Build an iOS Application (in Xcode)
Note: With this guide you can learn the basics of how to work with iOS Xcode projects and some of Xcode's nifty features.
The most relevant section is #3 Run sample implementation on Simulator, and the remaining sections help to familiarize with iOS projects in Xcode.
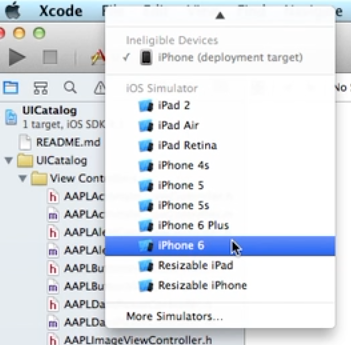
The Simulators are ready to be started for the iOS Interfaces App, but you need to select which one you would like to use:
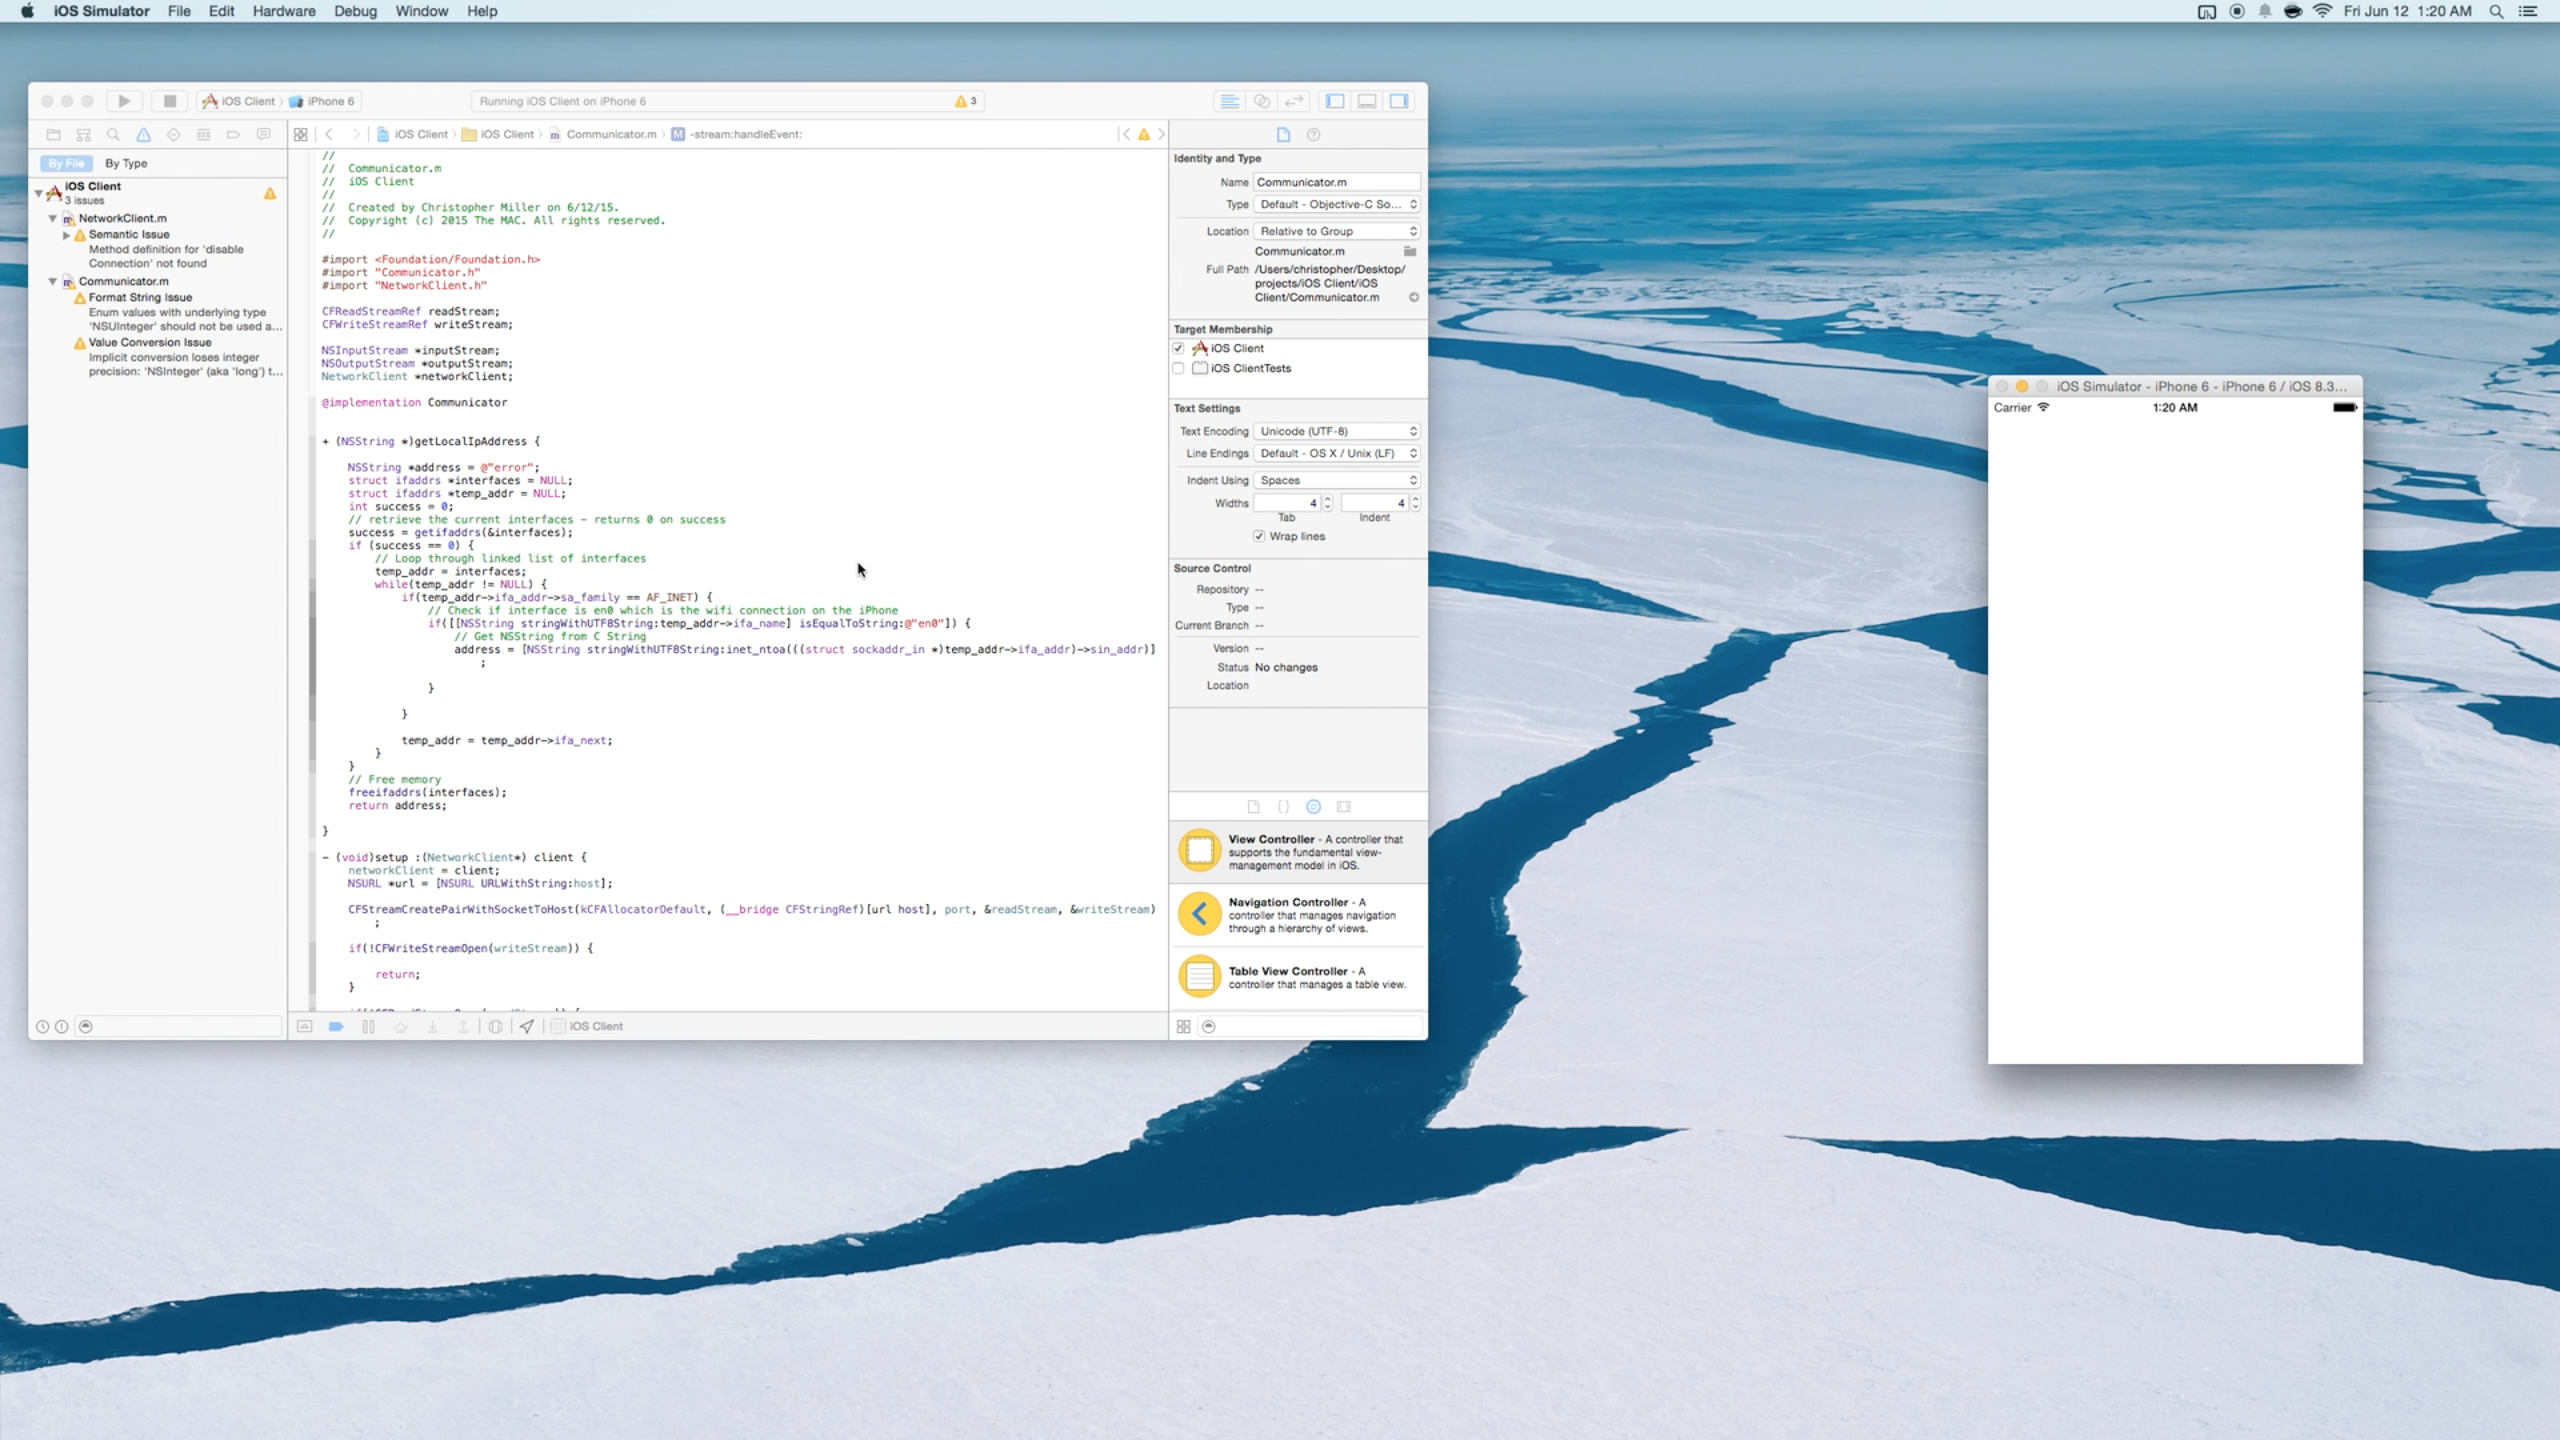
Go to the "Product" Menu, and select Run (or press the Run "▶" Button at the top of Xcode) to run the application

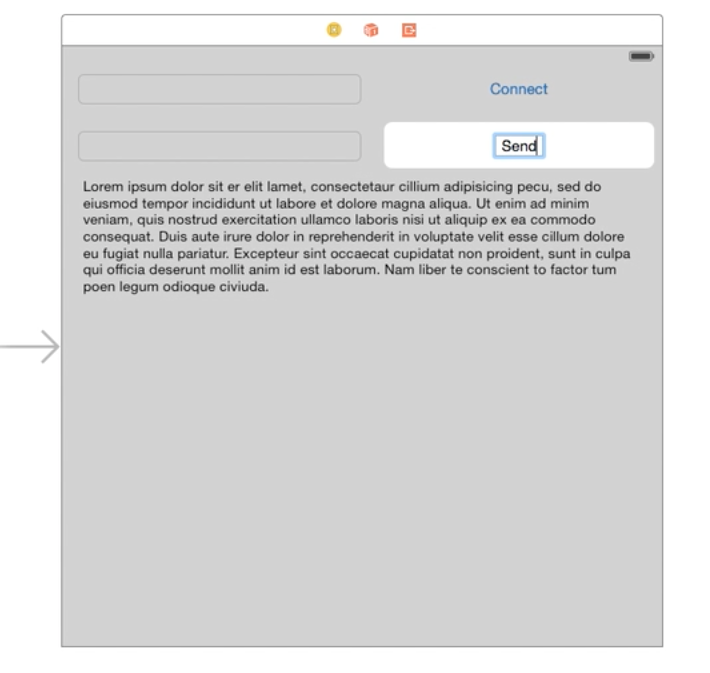
The iOS Swift Client Application running on the Simulator will currently look as follows:
When we created the project, XCode added a Main.storyboard file to our project. The StoryBoard contains the views for the ViewController class to display. Next, we will drag 5 UI elements onto the StoryBoard. These UI elements will consist of a "UITextView", 2 "UITextField"s and 2 "UIButton"s.
2.1 Follow HowTo Design in Interface Builder (in Xcode)
Note: With this guide you can learn the basics of how to work with Xcode Interface Builder and some of its nifty features.
The most relevant section is #2 Creating User Interface (UI), and the remaining sections help to familiarize with Interface Builder in Xcode.
We can find the first component in the library faster by typing "Text" in the search box.

We can then begin dragging the first element onto the IB, which will look as follows:
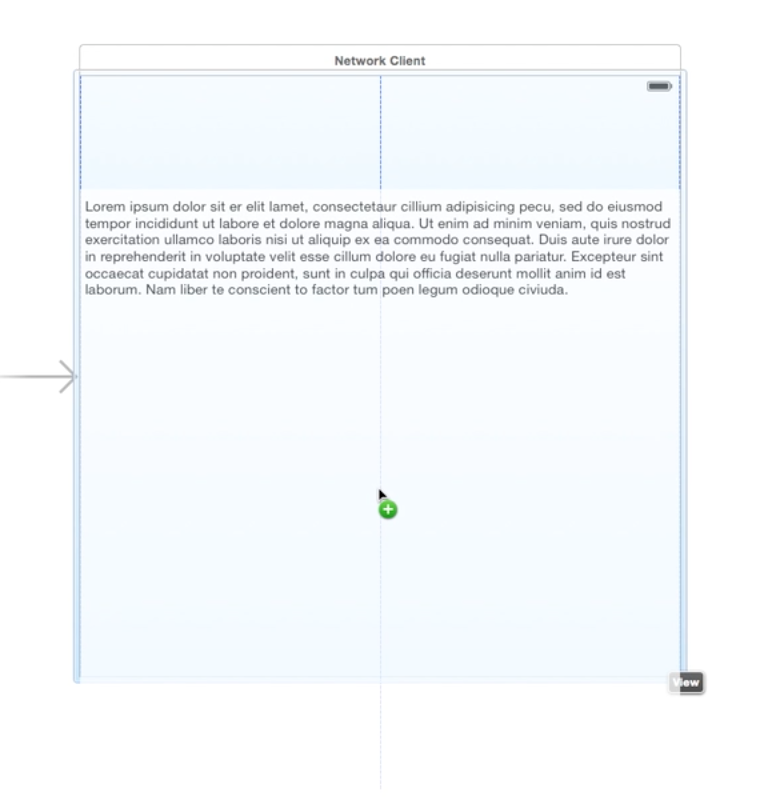
Note: The Text View is lined up horizontally within the ViewController during the drag, and this will be very important in a later step.
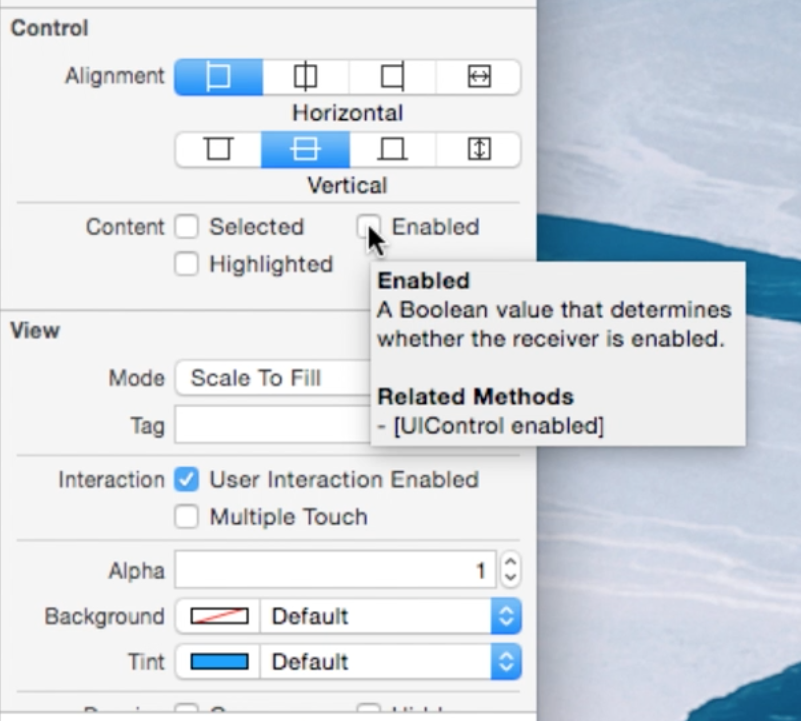
Lastly, we can edit the first element's enabled property, which will looks as follows:
Note: The next few views will go above this view, so we'll place it lower on the screen and make sure to drag the bottom on to the container.
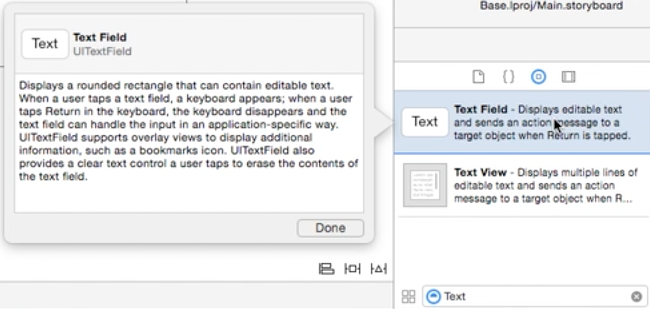
We can find the second component in the library faster by typing "Text" in the search box. What you may also notice is that when clicking on the element in the library there is a note/documentation attached to components.
We can now begin dragging the second element type onto the IB. After placing it on the top left we can drag it about half the width of the container, which will look as follows:

We will need two Text Fields, so we can now begin dragging the third element onto the IB and make sure its width is aligned to the first Text Field, which will initially look as follows:

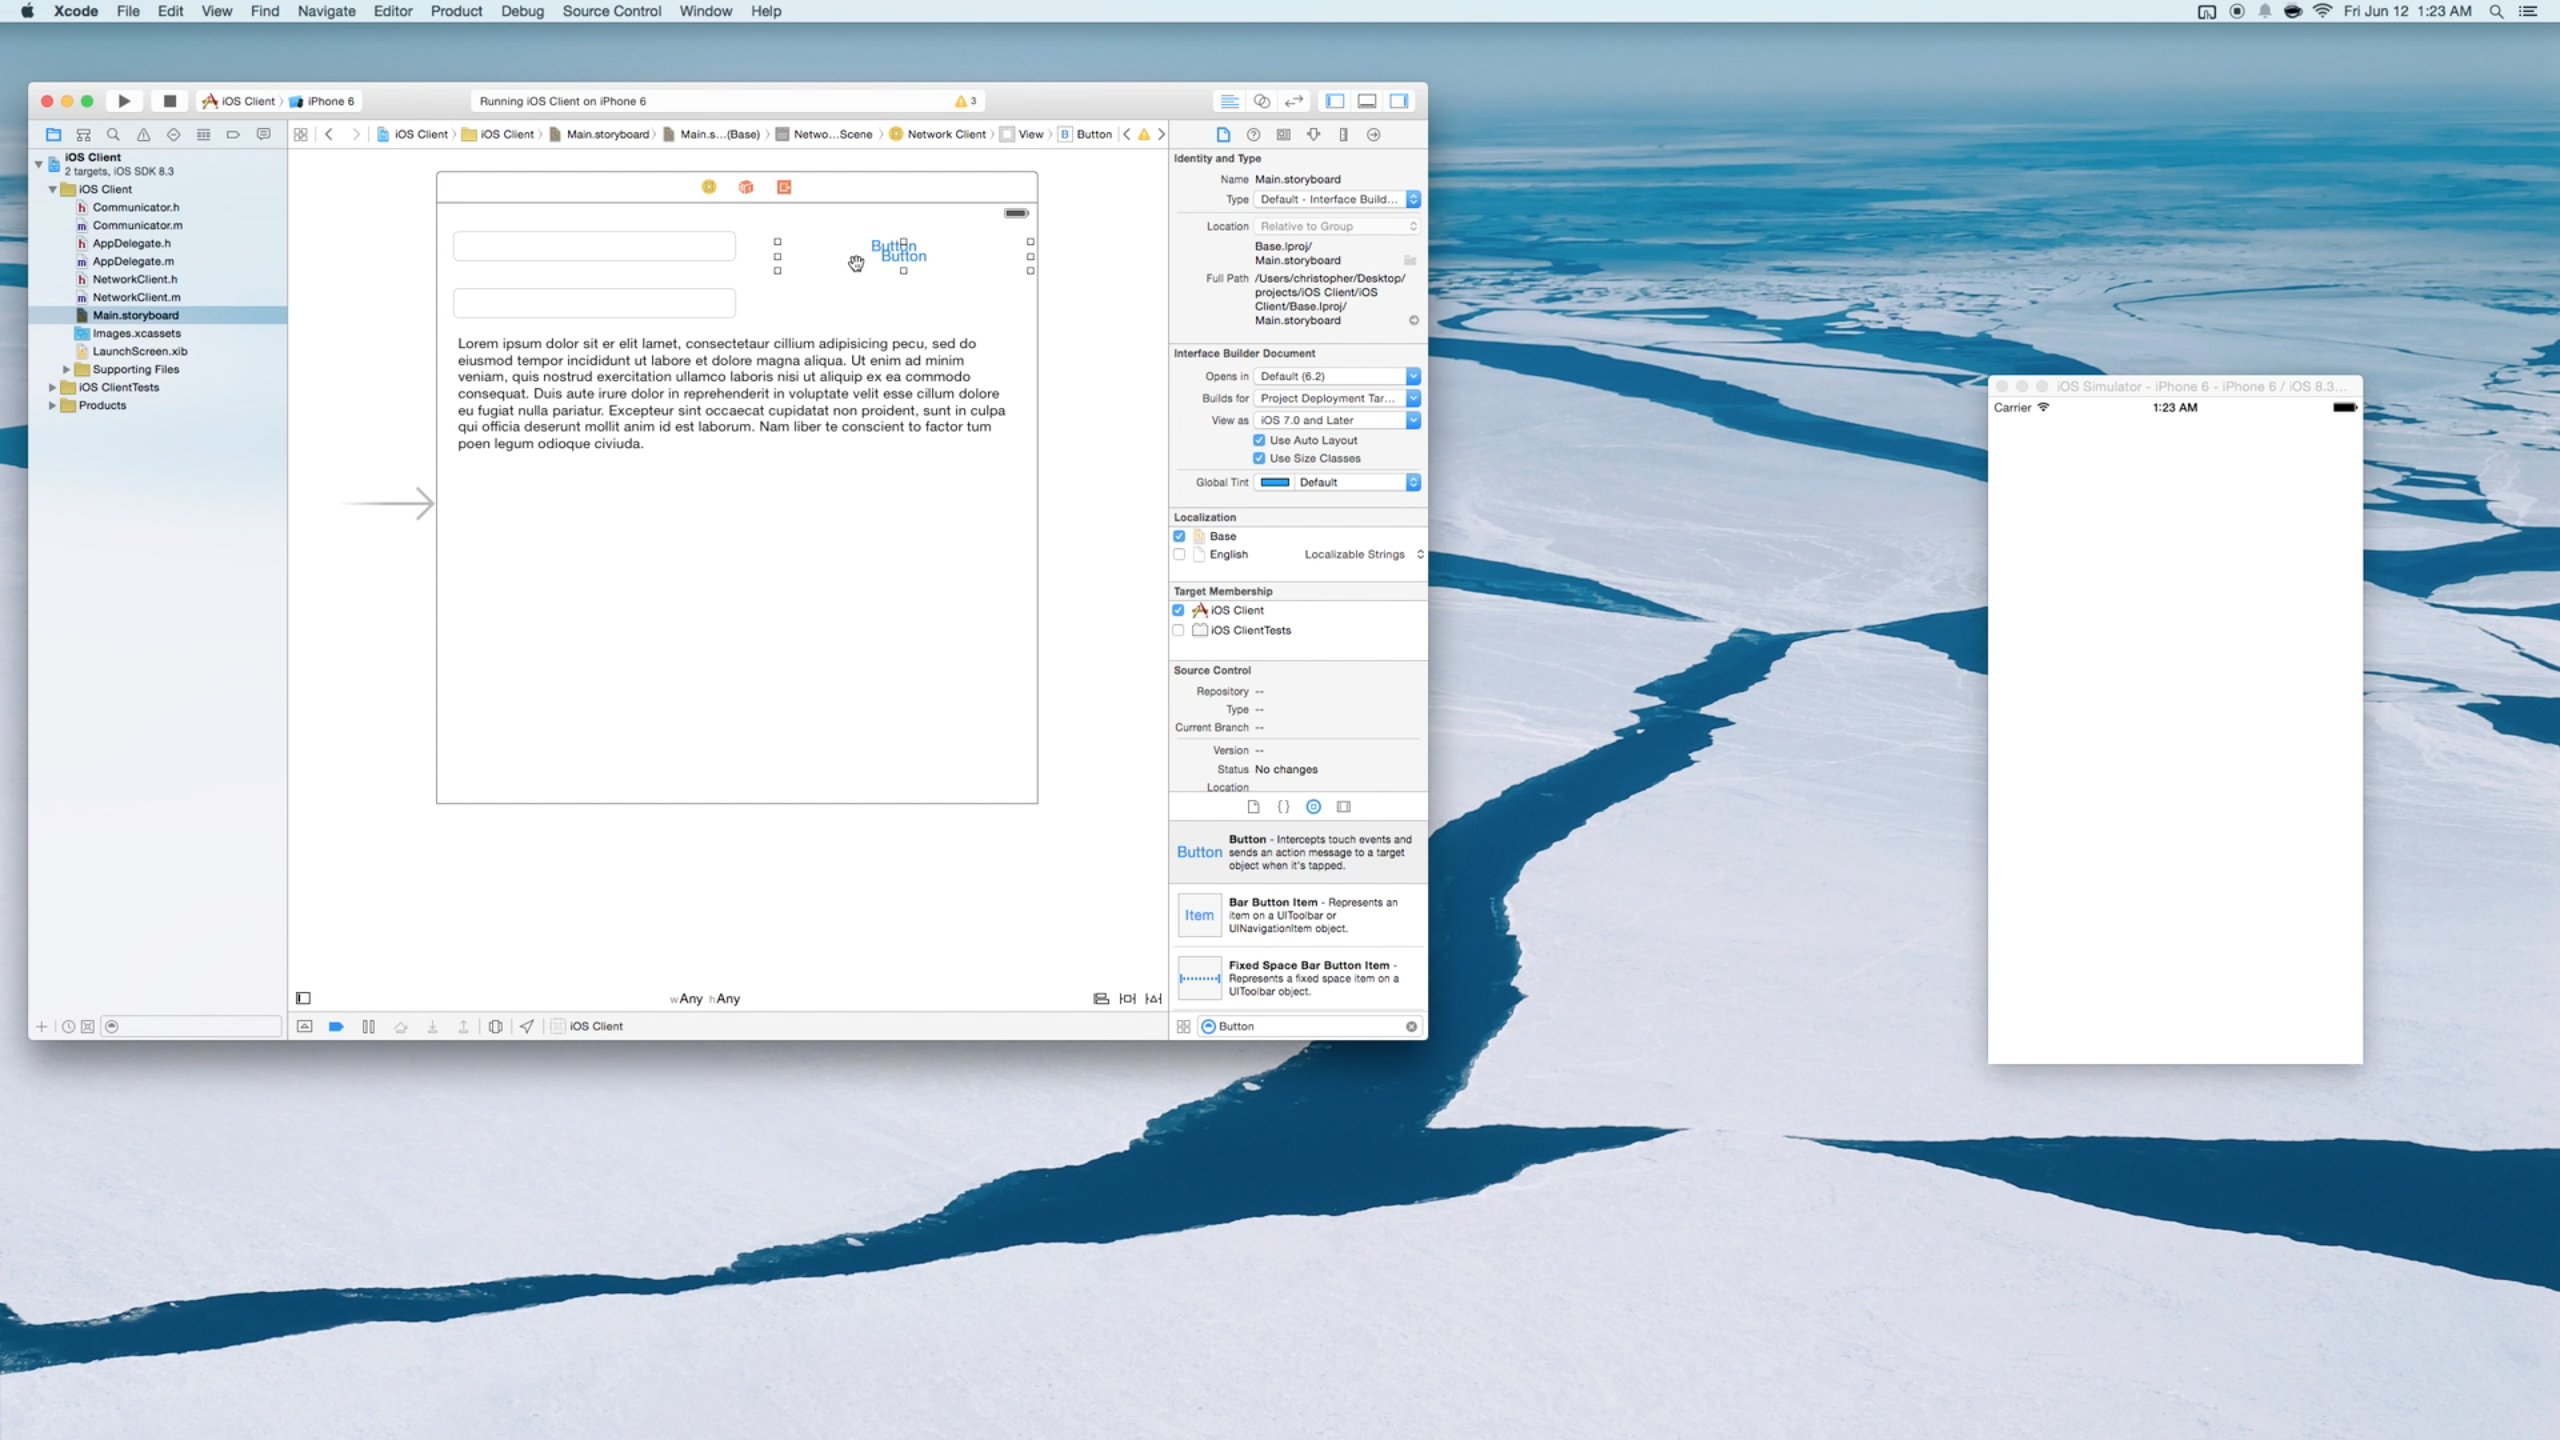
The last components can also be searched for in the library by typing "Button" in the search box. Once found, we can begin dragging the last elements onto the IB, which will look as follows:

We can now begin dragging the fourth element type onto the IB. After placing it on the top right we can drag it about half the width of the container, which will look as follows:

We will need two Buttons, so we can simply copy the last element (Using CMD + C) from the previous button creating the fifth element in the IB and this copy makes sure its width is the same as the first Button, which will initially look as follows:
We can double click and edit the second to last element's text to say "Connect" for the top right button, which will look as follows:

Edit the last element's text to say "Send" for the second button, which will look as follows:
Lastly, edit the first Text Field element's Placeholder text in the Identity Inspector to say "IP Address", which will look as follows after completing the edit:

2.5 Follow HowTo Design in Interface Builder (in Xcode)
Note: With this guide you can learn the basics of how to work with Xcode's Interface Builder and some of Xcode's nifty features.
The most relevant section is #3 Converting UI To Universal, and the remaining sections help to familiarize with iOS projects in Xcode.
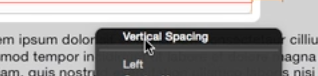
In the case of the Buttons, Text Fields and the Text Views (below), we will Control-drag to the background (or container), to make the spacing between the view and the "Container Margin" a constraint:
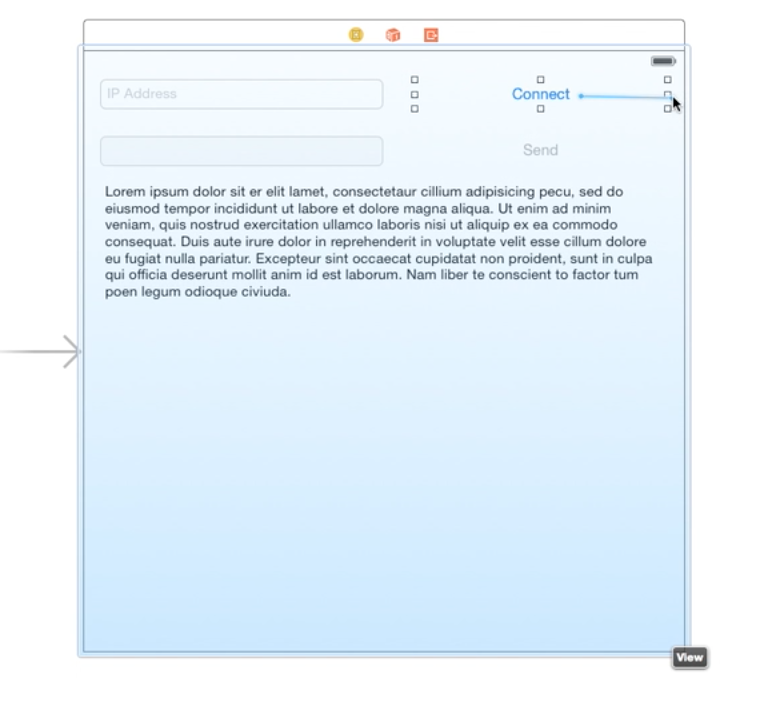
Note: Here, we are dragging between the element and the container, to pin the element’s "Trailing Space" to the Container Margin.
Note: This Control-drag method is a quick, precise tool for creating a single constraint when you know exactly what type of constraint you want and where you want it.
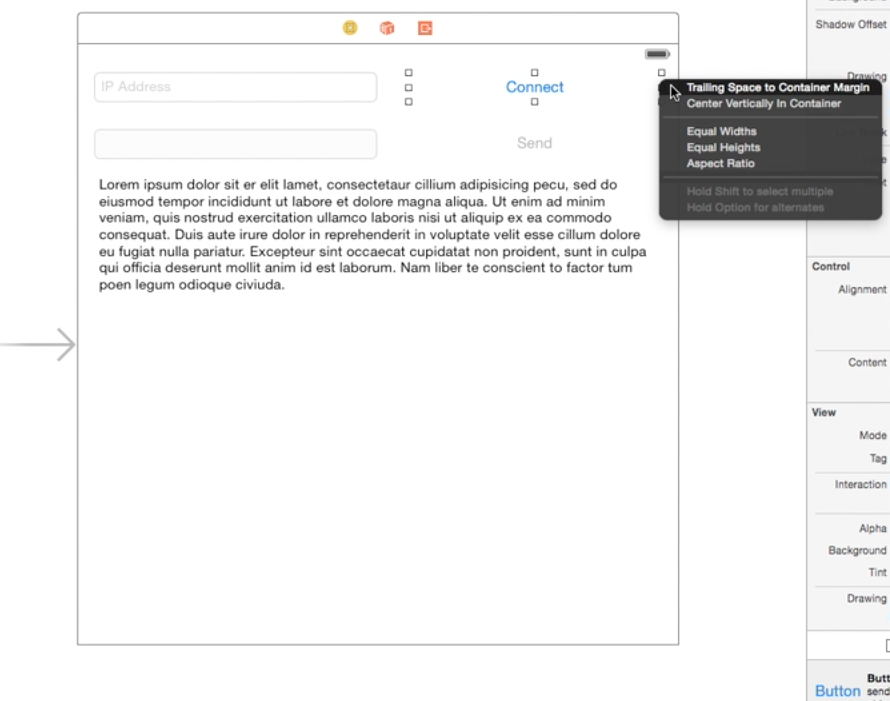
In the case of the other Button and the Text View (below), we will again Control-drag to the background (or container), to make the spacing between the view and the "Container Margin" a constraint:
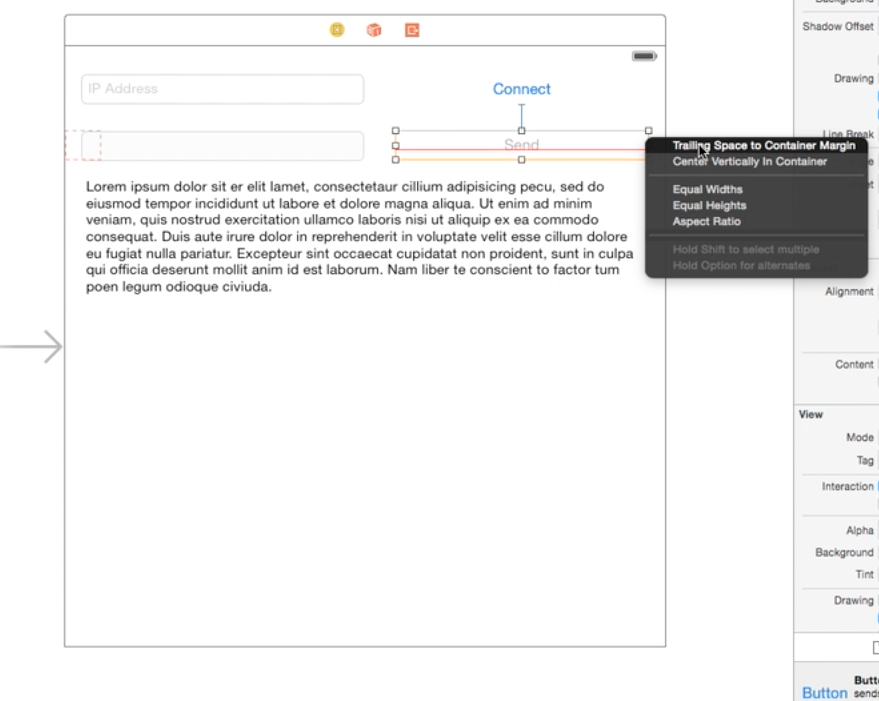
Once these operations are complete, all three views will be evenly spaced with "Trailing Space" to the Container Margin:

In the case of the Buttons, Text Fields and the Text Views (below), we will Control-drag to the background (or container), to make the spacing between the view and the "Container Margin" a constraint:

Note: Here, we are dragging between the element and the container, to pin the element’s "Leading Space" to the Container Margin.
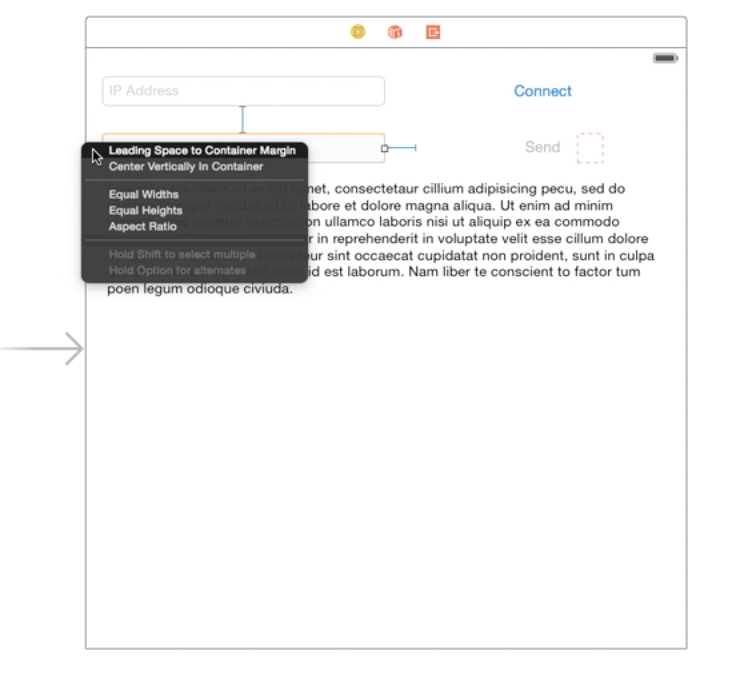
Note: This Control-drag method is a quick, precise tool for creating a single constraint when you know exactly what type of constraint you want and where you want it.
In the case of the Text Fields (below), we will again Control-drag between the element and the container to make the leading space a constraint:
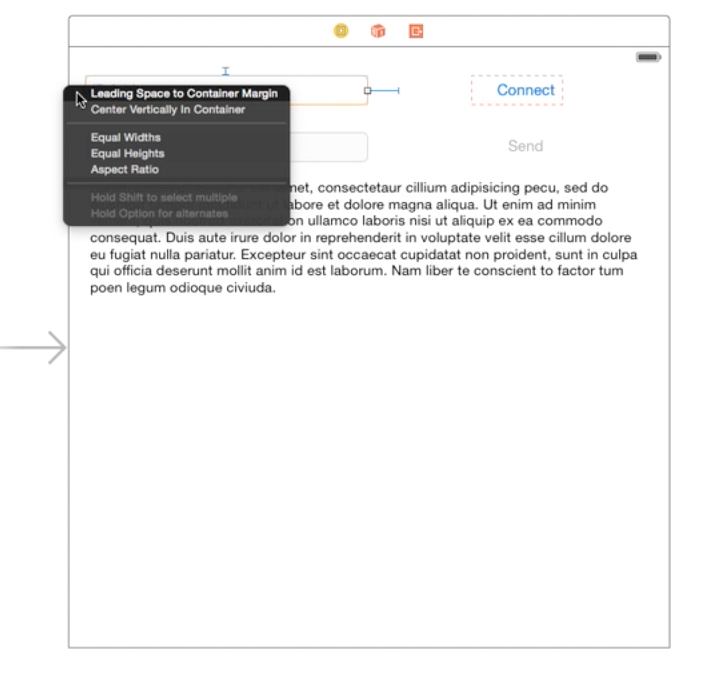
Once these operations are complete, all three views will be evenly spaced with "Leading Space" to the Container Margin:
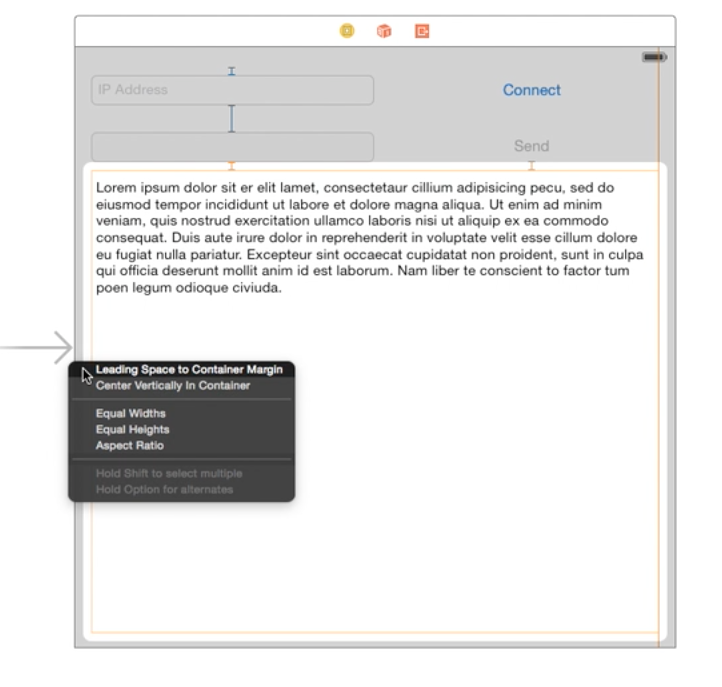
The fastest way to add a constraint is by holding down the Control key and dragging from a view on the canvas. You can Control-drag from an element to itself, to its container, or to another element.
Note: Here, we are draging between the element and the container to make the top space a constraint:

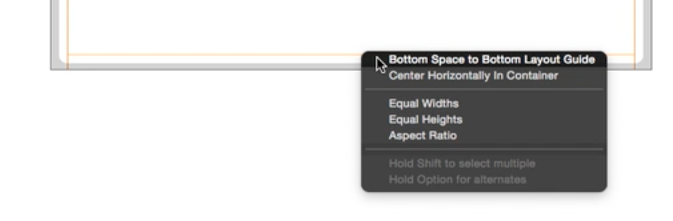
Note: Here, we are draging between the element and the container to make the bottom space a constraint:
Next we need to drag between each of the elements in Main.storyboard, to pin the element’s to each other vertically and horizontally in the container (similar to in the Interface Builder Guide).
In the case of the Buttons and the Text Fields (below), we will Select the Pin Menu (on the bottom right), to make equal widths a constraint:

Note: This set of constraints completes the Network Client's Universal iOS design in IB.
2.7 Follow HowTo Build an iOS Application (in Xcode)
Note: With this guide you can learn the basics of how to work with iOS Xcode projects and some of Xcode's nifty features.
The most relevant section is #3 Run sample implementation on Simulator, and the remaining sections help to familiarize with iOS projects in Xcode.
The Simulators are ready to be started for the iOS Interfaces App, but you need to select which one you would like to use:
Go to the "Product" Menu, and select Run (or press the Run "▶" Button at the top of Xcode) to run the application
The "iOS Swift Client" Application running on the iPad Air, iPhone 6 and iPhone 4S Simulators will look as follows:

3.0 Follow HowTo Design in Interface Builder (in Xcode)
Note: With this guide you can learn the basics of how to work with Xcode's Interface Builder and some of Xcode's nifty features.
The most relevant section is #4 Connecting UI To Source Code, and the remaining sections help to familiarize with iOS projects in Xcode.
Our first step to connecting the UI (View) to the Source (Controller), is to create Outlets to the existing IB components. We do that by Control-Dragging from a component in IB to the source file:

After making the connections, the source should have the following references:
@IBOutlet weak var text: UITextView!
@IBOutlet weak var msgBox: UITextField!
@IBOutlet weak var ipBox: UITextField!
@IBOutlet weak var connect: UIButton!
@IBOutlet weak var send: UIButton!
At this point we will need the following Constants from here on out:
let connectID = 1232
let sendID = 1233
let ipBoxID = 1234
let ipHintID = 1134
let msgBoxID = 1235
let textID = 1236
let appendTextID = 1237
let msgBoxHintID = 1238
Note: We can place these Constants above or below the properties created above (for organization) in the NetworkClient.swift file.
Adding the following two methods enhances your application, resulting in more control of app UI states (and cleaner code for beginner iOS Developers to use).
/** References all views that have text changes (e.g, text.text = "some text").
* @param view the id for the view to be changed
* @param content the data to be sent to the view
**/
func setText(view: Int , content: String?)
{
    let uwContent = content!
    switch(view) {
    case ipBoxID: ipBox.text = uwContent
    case ipHintID: ipBox.placeholder = uwContent
    case msgBoxID: msgBox.text = uwContent
    case textID: text.text = "\(uwContent)\n\n"
    case appendTextID: text.text = "\(text.text)\(uwContent)\n\n"
    default: msgBox.placeholder = uwContent
    }
}

/**
* References all views that have boolean changes (e.g, ipBox.enabled = true).
* @param view the id for the view to be changed
* @param value the boolean value to be sent to the view
* */
func setValues(view: Int, value: Bool) {
    switch(view) {
    case ipBoxID: ipBox.enabled = value
    case msgBoxID: msgBox.enabled = value
    case sendID: send.enabled = value
    default: connect.selected = value
    }
}
To complete the UI design, you will need to set the msgBox (UITextField) and send (UIButton) enabled properties to false. This allows the sending of a message when connected, but excludes errors of when not connected.
Using the setUpAllViews method allows for the assignment of all the UI object data in one place. The UI objects have outlets to the views that were drug onto the Interface Builder file (e.g., UITextView, UITextField and UIButton).
import UIKit
import Foundation

class NetworkClient: UIViewController {

    override func viewDidAppear(animated: Bool) {
        super.viewDidAppear(animated)
        setUpAllViews()
    }

    func setUpAllViews() {

        connect.setTitle("Connect", forState: UIControlState.Normal)
        connect.setTitle("Disconnect", forState: UIControlState.Selected)

        if(ipAddress == "error") {
            setText(ipHintID,content:"Check Wifi")
            setValues(ipBoxID,value:false)
        }
        else {
             setText(ipBoxID,content:ipAddress)
             setValues(ipBoxID,value:true)
        }

         setText(textID,content:"To start the client press the connect button")
         setValues(msgBoxID,value:false)
         setValues(sendID,value:false)
    }

}
Our second step to connecting the UI (View) to the Source (Controller), is to create an Action. In .swift source files for Swift applications an Action can be created simply by Control-Dragging from a component in IB to the source file:

The second step to creating this action is to declare its properties:

Note: In this case we name the Action "onClick", and notice that we choose to make the Connection type "Action" and set the Arguments to "None".
The source addition will look as follows:
@IBAction func onClick() {
	...
}
Note: You may also notice that the Action that is generated is accompanied by a marker on the left. This marker (or dot) tells us that the marked item is connected to IB.

Lastly, we need to test whether the button state can be controlled. Next we will change the state of the Button and view the state changes on the Simulator.
The source changes will look as follows:
@IBAction func onClick() {

	//  TOGGLE THE STATE/TEXT FOR BUTTON
    connect.selected = !connect.selected;
}
3.5 Follow HowTo Build an iOS Application (in Xcode)
Note: With this guide you can learn the basics of how to work with iOS Xcode projects and some of Xcode's nifty features.
The most relevant section is #3 Run sample implementation on Simulator, and the remaining sections help to familiarize with iOS projects in Xcode.
The Simulators are ready to be started for the iOS Interfaces App, but you need to select which one you would like to use:
Go to the "Product" Menu, and select Run (or press the Run "▶" Button at the top of Xcode) to run the application
Note: This change will help with determining whether we are connected to the WiFi Network or not, and will look as follows:

The following methods are to be added to the NetworkClient.swift file to allow for Wifi Network connectivity. There also needs to be a property reference to the mCommunicator object inside of the NetworkClient.swift file similar to the following:
var mCommunicator: Communicator?
Also, we need to revisit the setUpAllViews Method and add a Communicator reference for the ipAddress.
func setUpAllViews() {
    ipAddress = Communicator.getLocalIpAddress()
    ...
}
The Input and Output set up method needed to send data to the Server.
func setUpIOStreams() {

    mCommunicator = Communicator();

    let text = ipBox.text!
    mCommunicator!.host = "http://\(text)"
    mCommunicator!.port = 8888;

    mCommunicator!.setup(self)
}
This serves as an on switch to the server connection. The methods setText and setValues are used here to set up the application's connected state.
func enableConnection() {
    let text = ipBox.text!
    let address = ipAddress!
    setText(textID,content:"Device's IP Address: \(address)")
    setText(appendTextID,content:"Server's IP Address: \(text)")
    setText(msgBoxHintID, content:"Say something...")
    setText(appendTextID, content:"Enter your message then press the send button")

    setValues(sendID,value:true)
    setValues(msgBoxID,value:true)
    setValues(ipBoxID,value:false)
    if(mCommunicator == nil) { setUpIOStreams() }

}
This serves as an off switch to the server connection. The methods setText and setValues are used here to set up the application's disconnected state.
func disableConnection() {

    setText(textID, content:"Press the connect button to start the client")
    setText(msgBoxID, content: "")
    setText(msgBoxHintID, content: "")

    setValues(ipBoxID,value:true)
    setValues(msgBoxID, value:false)
    setValues(sendID, value:false)
    setValues(connectID, value:false)

    if(mCommunicator != nil)
    {
        mCommunicator!.close()
        mCommunicator = nil;
    }
}
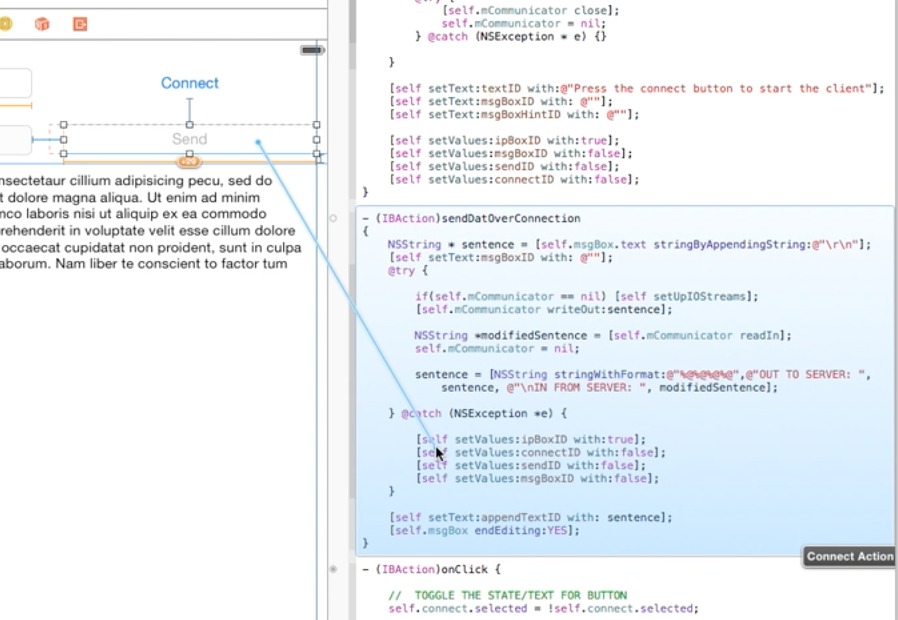
The mCommunicator reference internally uses NSOutputStream object (outputStream) to send messages. The mCommunicator reference internally uses NSInputStream object (inputStream) to read in a line from the server connection. The methods setText and setValues are used here to set up the application's sending state, which resets to the disconnected state if the app is not able to send.
@IBAction func sendDatOverConnection(button: UIButton) {

    let text = msgBox.text!
    var sentence = "\(text)\r\n";
    setText(msgBoxID, content: "");

    if mCommunicator == nil { setUpIOStreams(); }
    mCommunicator!.writeOut(sentence);

    if mCommunicator!.connected {

        var modifiedSentence = mCommunicator!.readIn();
        self.mCommunicator = nil;

        sentence = "OUT TO SERVER: \(sentence)\nIN FROM SERVER: \(modifiedSentence)"

    } else {

        setValues(ipBoxID, value:true)
        setValues(connectID, value:false)
        setValues(sendID, value:false)
        setValues(msgBoxID, value:false)
    }

    setText(appendTextID, content: sentence);
    msgBox.endEditing(true);
}
Note: This method is an IBAction method, and at this point we have not connected it to an IB component. We can make this connection by Control-dragging from the send Button to the sendDataOverConnection method like follows:
The following method allows the user to manage the UI/Connection states for the NetworkClient.
When the user clicks the connect button it toggles between the enableConnection and disableConnection methods.
@IBAction func onClick(button: UIButton) {

    //  TOGGLE THE STATE/TEXT FOR BUTTON
    connect.selected = !connect.selected;
    let selected = connect.selected
    println("isConnected: \(selected)");

    //  TOGGLE THE STATE FOR CONNECTION
    if selected { enableConnection() }
    else { disableConnection() }
}
5.1 Follow HowTo Build a Java Server Application (in Eclipse)
Note: With this guide you can learn the basics of how to run Java TCP Server projects and some other nifty features. The Server is also written in Java source, but runs on a regular Java Virtual Machine (JVM) instead of Android's Dalvik Virtual Machine. This TCP Server implementation has the following features:
- Initializes the ServerSocket on port 8888, and retrieves the Server's IP Address.
- Calls the accept() method and waits for the client to connect to the socket.
- Retrieves the socket's input/output streams and opens a reader/writer on them.
- Communicates using the I/O Streams via client by reading/writing from/to socket.
5.2 Follow HowTo Run sample implementation on Actual Device
Note: With this guide you can learn the basics of how to run iOS Xcode projects on an actual hardware device and some other nifty features.
All sections are relevant because of how Apple devices are set up for Developers, but if you already have a registered device then #3.5 Run UICatalog sample on Device is most relevant.
The device is now ready to be started for the iOS Swift Client App, but you need to select it from the device list:

The device is now ready for the iOS Swift Client App, so you can go to the "Product" Menu, and select Run (or press the Run "▶" Button at the top of Xcode) to run the application
The iOS Swift Client Application running on the device will look as follows:
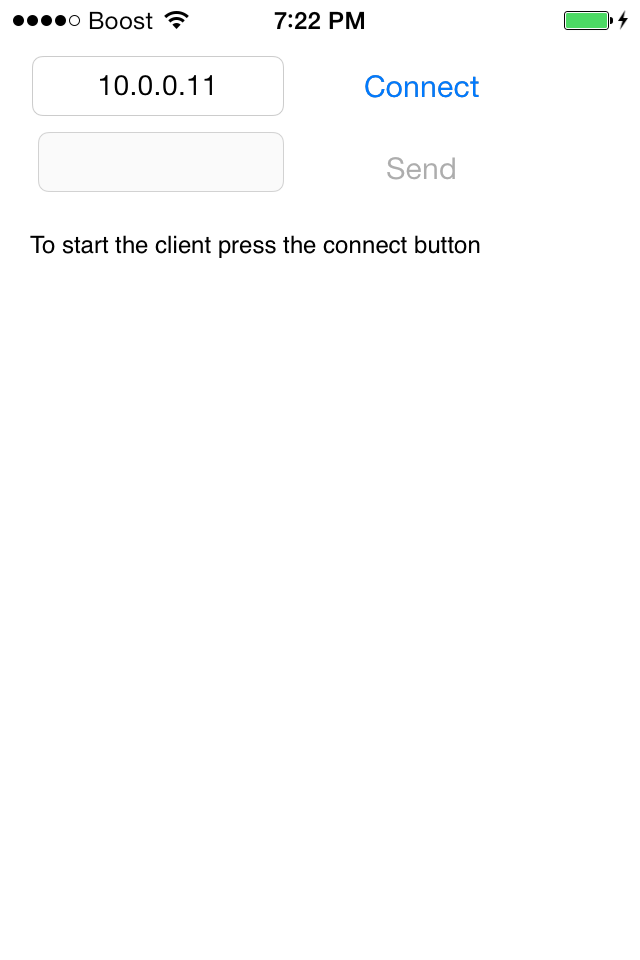
Note: The IP Address that shows in the ipBox after starting the client is the client's IP Address. With both the Client and Server on the same Wifi Network the IP Address prefix (i.e, 192.168.5.* OR 10.0.0.*) will be the same.
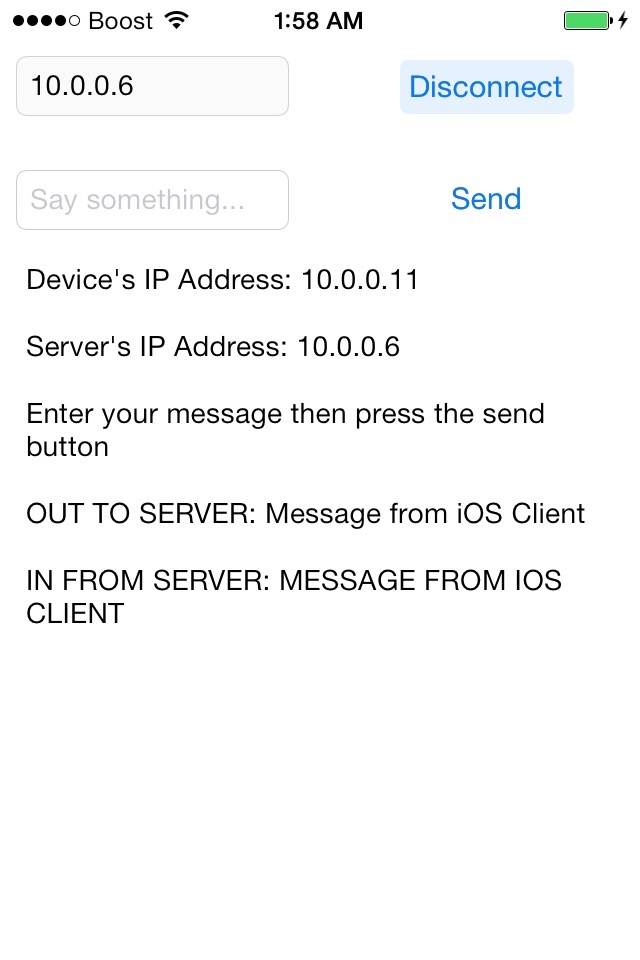
After connecting the to the Java Server and sending a message, the iOS Swift Client running on the device will look as follows:
To complete the Client/Server guide follow HowTo Build a Java Server Application (in Eclipse)
Once again, the source code for this project can be found here.